Shop Target Dorm Room Finds Here!
Transitioning from life at home to life in the dorm is a huge change. As a mom, I know you want to set your kid up for success the best you can. that’s why when I was at Target and spotted some dorm room essentials, I knew I wanted to show you. This is their first place alone, but you can still make it feel like home! Here are some of my top picks…
A desk lamp is a must – especially if you have a roommate. It’s the best for studying late at night and keeps the light focused in one area. I own this Task Table Lamp and it’s lasted for years! You won’t believe the price either. Grab it for ONLY $8!
This is a great elevated option! The dorm room is small, so compacting anything you can is a must. I found this Organizer Task Lamp that combines light with a space for your pencils, mail, and phone. Get it for just $16!
You will need a new bedspread too! I love plain bedspreads to accent with pillows and blankets. Grab this Garment Washed Microfiber Quilt for just $25 in so many colors! You can’t beat that price!!!
This is one of my favorite colors it comes in! So feminine but still light and airy to open up a small space! Buy the Garment Washed Microfiber Quilt for $25 too!
Even though most dorms don’t have a kitchen, having a couple cups and bowls on hands is a necessity. These are the PERFECT option because they are unbreakable, cheap, and come in youthful, fun colors. Grab a few 10.5″ Plastic Dinner Plates, 37oz Plastic Cereal Bowl Polypro, and 26oz Plastic Tall Tumblers for $0.50 each! You will not beat that.
Coffee is a MUST. They won’t know how much they appreciate it until they’re are up till 4am at a late night cramming session. This mini size is the best option for the dorm, PLUS it’s on sale! Grab the Keurig K-Mini Single-Serve K-Cup Pod Coffee Maker for $59.99 (was $90). Don’t miss this deal!
Increase storage with this Tall Sliding Bin Cube. Whether it’s in the bathroom, living space, or washroom, this will organize your items and slide out for easy access. Get it for $80 now!
Don’t miss out on all of these Target Dorm Room Finds! Start crossing items off the list today!
All orders $35 or more will ship for free from Target. Or when you pay with your Target RedCard. Or you can order online and choose free curbside or in-store pickup.
If you have Target REDcard, you will get another 5% Discount and Free Shipping! Sign up for REDcard here.
Target® is a registered trademark of Target Brands, Inc.
]]>Purdy – the paintbrush and painting tool company – has come out with their own modular tool storage system designed with painter’s in mind.
Purdy says that theirs is the first tool box system created for Pro painters, allowing users to “Organize, Stow, and Go.”
The system came out a few months ago, but only recently came to my attention thanks to Purdy’s targeted ads on social media.
The Purdy Painter’s Storage Box line features an XL rolling tool box, an XL brush and roller box, and a smaller sized supply box.
They advertise that the “two bottom boxes offer plenty of space for all the tools needed on the job – including power tools.”
The rolling box also features “ample space to store multiple gallon cans.”
The rear of the rolling tool box has two extension pole holders.
While some other brands’ modular tool box systems have fixtures or accessories for holding levels, this is the first I’ve seen of a built-in painting pole holder.
A dedicated brush storage bars helps painters “keep brushes orderly and bristles in top shape” by storing them vertically. Purdy says this can be used before, on the way, or during painting jobs.
The smaller tool box has a removable covered wet brush and roller bin, with room to hold up to 18″ rollers. Purdy says “it’s designed for moving used brushes and rollers from jobsites to where they’ll be cleaned,” and without getting paint on anything else in the tool box.
The tool box also has plenty of room for tools, fresh rollers, and supplies such as tubes of caulk.
The boxes have an IP65 water and dust resistance rating.
The 9-inch all-terrain wheels are described as being replaceable.
It’s also notable that, based on the product images, the wheels don’t eat up too much of the rolling tool box volume.
Price: $330
The Purdy Painter’s Storage Box looks to only be available via Sherwin Williams.
Thanks to Aaron for the heads-up!
This does look to be a well-thought-out storage system for painters.
Here’s what I’m thinking. Couldn’t Purdy have designed inserts for popular brands’ modular tool box systems instead, such as Dewalt ToughSystem or Milwaukee Packout?
It’s unclear as to whether Purdy will ever offer the different tool boxes individually, or if they plan on expanding the line with additional options.
What if a painter wanted one small tool box for patching tools, and another for clean paint rollers and wet brush storage?
Here’s a 30-second intro video:
]]>Here are some storage and organizational options for storing those necessary evils that come with having a family. We've got ideas that are super cheap and require a bit of work and options to buy your way to organization.
Related: Options for donating storing and selling old toys
Let's start with some DIY solutions. These are ideas that are pretty quick fixes and won't cost a lot of money. We've added shopping links for Amazon on a few, and they are affiliate links.
These glass jars once used for canning make great decor statements when used to store hair accessories or other small items. Add a chalk label and put those hair bows and other accessories on display. No need to break the bank for the fancy ones, your local dollar store may sell them. We like these clear plastic ones we found on Amazon.
Don't be so quick to toss those old cans. A good washing, and a few coats of spray paint make them great containers for storing art utensils, pencils and pens. Get inspired by this hanging bar with hooks for pots and kitchen utensils we found on Amazon.
Replace shoes with dolls, toys, flashcards and other small items in over the door shoe storage containers.
Add hanging flower baskets to the side of your deck or sandbox to store outside play toys neatly. These we found on Amazon are great.
With the grooves already built in and the cutlery tray attached a dish rack makes perfect storage for coloring or work books. Drop writing utensils in the cutlery dish for convenience.
If these ideas are a little too time consuming, we've got some ways to shop your way out of the problem with toy storage.
Use Pinterest to save your favorite recipes. Be sure to follow our Organization board for more tips.
]]>We may earn revenue from the products available on this page and participate in affiliate programs.
It’s pretty easy to end up at Sky Ting Yoga’s Chinatown location when you’re trying to get to architectural designer Nick Poe’s apartment. The elevator button is finicky, and there’s always someone on their way to the seventh-floor studio. On my third try, though, the door slid open on the right level. Bright, minimal, and flanked by towering plants that lap up the ample natural light, a series of restrained vignettes unfold—a wood armoire and stainless steel desk; a bathtub on a pedestal flanked by slippers and towels; a single yellow folding chair at the dining table.
I immediately began counting the windows—there are 16 in total, many of which look out over a lively stretch of Dimes Square, with the Nine Orchard hotel holding court kitty-corner and cars shuttling across the Manhattan Bridge off in the distance. There’s a certain low-level city hum in the air, even indoors. Poe’s shepherd rescue, Fido, ambles about the place with a bone; he’s never too far from the designer, who is responsible for the interiors of his neighbor Sky Ting, Jacqueline Sullivan Gallery, and Time Sushi Bar, among numerous other residential and commercial spaces.
We all post up on a pair of sofas Poe designed—minimalist Judd-inspired joints outfitted with cotton futons and yoga bolsters masquerading as cushions—to chat about his process. The son of photographer Sarah Charlesworth and filmmaker Amos Poe, Nick grew up in Manhattan; his architectural studio is named for his childhood address on Great Jones Street. He recalls being obsessed with Legos and woodworking, to the point that he requested a mini workshop within that of his engineer grandfather’s.
Over the course of his youth he was occupied with drawing, photography, physics, and subsequently architecture. His unorthodox path to design began in earnest after an illuminating (re: disappointing) internship at a large New York architecture firm. Disillusioned with the idea of a traditional route to the field, Poe turned to video making and animation, ultimately starting streetwear label Pegleg with longtime friend Harry McNally. While Pegleg’s time came and went, Poe’s entrepreneurial spirit remained. After some years at Pandiscio Green tracing technical CAD floor plans for high-end condos, he came to the realization that he was siloing his creative pursuits; it was a watershed moment. “I felt like I just kind of took my head out of the sand,” he says.
About a decade ago, Poe finished his first design and renovation project in Brooklyn’s Sunset Park, after which, he says, “I was hooked. I was like, I want any opportunity I can to be involved with construction creatively.” Sky Ting came next (he’s a part owner of the yoga practice), and the work unspooled from there, leading to Lee’s Private Dining Room, Lucien, and more private residences.
When the original Chinatown Sky Ting was forced to relocate, Poe was lucky to come across the seventh-floor studio space and his apartment simultaneously; they signed two long-term leases and he renovated them both at the same time.
The apartment is sparse in a way that belies its layout when Poe first got the keys. He posited that his home, previously split up into four or five dark bedrooms with one bathroom and a kitchenette, had been an Airbnb hustle. The to-be yoga studio? It had hosted the headquarters for a company that made Bob Marley–branded headphones. To help buffer Sky Ting’s collective jumping and music in his personal space, he installed four layers of flooring (including one of lightweight concrete and one of cork) overhead.
When asked what stuck out most about the renovation process, there was no hesitation on Poe’s part: “Well, there was figuring out the bathtub,” he says with a sly smile, stealing a glance at the blue, rust-spattered claw-foot right there in the main room. The fixture is something of a recurring motif in the designer’s life. In his first apartment with McNally (which, fun fact, had been his friend’s childhood home), the bathroom was the largest room, home to a freestanding tub that became the place to lounge or host photo shoots. The move of installing this one out in the open plays into something sentimental about that time. “I’m a big bathtub believer,” Poe muses. “And I think that they’re beautiful, the way that they look and the experience; it’s just kind of romantic.”
Across from the bathtub, cookbooks by David Tanis, Igancio Mattos, and Mina Stone are stored with reads like The Tibetan Book of Living and Dying, Creative Visualization, and a Piero Portaluppi monograph. A Poe-designed stainless steel vanity lingers nearby, inspired by Bowery restaurant-supply shops and born out of other projects that have influenced his work over time.
The aforementioned pine sofa frames, which the designer has also built for clients, fit twin mattresses—no custom upholstery. Plus they can double as crash pads for late-night guests. He carpeted the living space, then poured the almost-solid concrete coffee table on-site, which anchors the southern end of the apartment.
His mother’s presence, and Poe’s youth, is felt quietly throughout. “My childhood home is really important to me and part of what informs my practice and why I do what I do,” he explains. “This table I grew up eating on,” he notes, gesturing toward the dining surface (built by the family’s neighbor, sculptor Bryan Hunt, from old floorboard scraps). “My mom was an excellent cook and very thrifty. She served nearly every meal of my early life on that table. A decade after losing her, it still bonds me to her, my family, and that wonderful space.” His love of candlelight comes from her, too. “She was obsessed with candles,” he recalls. “There’s something mystical about them.”
Poe is equally adept in his own kitchen, outfitted in white 2-by-2-inch tile and open storage, and equipped sparingly with a stainless steel Viking range; a glass-paned lowboy refrigerator and freezer; and pops of red in a La Marzocco espresso maker and waste bin. The designer built the tall kitchen island with his team; simple carpentry is central to his ethos. “It’s perfectly sized for the kitchen and will have to stay with the loft. Perhaps it’s a passing of the torch like what Bryan left us,” he muses. Pottery from Oaxaca, a Wedgwood tea set, and Splatterware are relegated to the shelves, mingling with thrifted pots, Duralex cups, and a small talisman-like painting that hung in his childhood kitchen.
There is nothing more than what is needed in the small bedroom and bathroom—a narrow, neatly organized walk-through closet connects the two and keeps them both orderly. Poe had to build the bathroom from scratch (the plumbing also services the public tub), so he lined it with cedar and the same tile as the kitchen, installed a flush-mounted mirror to introduce more light, and added an inexpensive unit to create a steam shower.
Poe’s frugality—sourcing from architectural salvage, antiques stores, dumps, you name it—comes from a feeling that there’s great waste in his industry. “Something that I’ve been thinking about a lot, and talking about recently, is the idea of this prescribed notion of luxury that I don’t really buy into, or believe in, and actually don’t really think is a great value,” he explains. “Sometimes people fall back on something because they say, oh, that’s expensive and it’s good. I think it’s much more interesting to be resourceful and find solutions.”
The post When the Elevator Door Slides Open to This Chinatown Loft, You’re Welcomed by a Bathtub appeared first on domino.
]]>By Jon Linkov
Since it arrived in North America in early 2001, the Toyota Highlander has been an incredibly popular SUV, both with Consumer Reports’ members and the general public.
It has also been a strong performer in CR’s testing, ranking among the top-scoring models and capturing the midsized SUV Top Pick award an impressive 10 times since it was first eligible in 2002.
But in recent years, a number of competitors have caught up to—and surpassed—the Highlander, dethroning it from both the top of CR’s ratings charts and the coveted Top Pick status.
One of those is the Kia Telluride, a no-compromises three-row SUV that debuted for the 2020 model year with a V6 engine, front- or all-wheel drive, and seating for up to eight passengers. That same year Toyota introduced a redesigned Highlander with similar attributes. But Toyota also offers a four-cylinder hybrid version, something Kia can’t match.
Both SUVs received updates for 2023. While the Kia’s were mainly cosmetic, the regular Highlander received a new 2.4-liter turbocharged four-cylinder engine, which replaced the smooth V6.
These two SUVs are similar in many ways, including size, weight, and cargo capacity, and both include a number of active safety systems as standard equipment.
But there are differences between them, too, especially since their road test and Overall Scores differ significantly. To unpack these differences, we take an in-depth look at these SUVs, compare how they fare in CR’s testing, and determine which one is the clear-cut winner in our metrics . . . and which one is right for you.
We also note which advanced safety equipment—including automatic emergency braking (AEB) with pedestrian detection, AEB that works at highway speeds, blind spot warning (BSW), and rear cross traffic warning (RCTW)—comes as standard or optional.
If you’re a CR member, this article and the list below are already available to you. But if you haven’t signed up, click below and become a member to access this list and all our exclusive ratings and reviews for each vehicle we buy and test.
Joining also gives you full access to exclusive ratings for the other products our experts evaluate in several categories, including electronics and home appliances.
Sign up for CR’s Cars email newsletter to be notified when we post our latest road tests.
The Case for It
When it came time to make a true midsized three-row SUV, Kia did its homework. The Kia Telluride is a very well-thought-out SUV, and it put other midsized three-row SUVs on notice as soon as it debuted. It’s a popular vehicle with Consumer Reports members, and sales remain strong. Kia has given the Telluride a freshening for the 2023 model year, but aside from two off-road-oriented trims and a 12.3-inch infotainment screen, the changes are mostly cosmetic.
2023 Kia Telluride
Photo: Kia
Its 3.8-liter V6 engine is smooth and quickly delivers power when the driver asks for it, such as when merging at the end of a highway on-ramp or passing a slower vehicle in traffic.
The Kia’s engine is paired with a slick eight-speed automatic that downshifts willingly to the driver’s right foot commands. We got 21 mpg overall in our tests, which places the Telluride just 1 mpg behind the Highlander.
This powertrain gives the Telluride a tiny performance edge, making it about a half-second quicker than the nonhybrid Highlander in the 0-to-60-mph and quarter-mile acceleration tests, though it can scoot away from the hybrid version with greater ease.
But the Kia is a cut above when it comes to scrubbing off all that speed. It performed better in both our dry- and wet-braking evaluations, stopping 6 and 10 feet shorter, respectively, than the regular Highlander.
The Kia did very well in our avoidance maneuver, where we simulate having to swerve to avoid an object in the road. The Telluride’s well-calibrated electronic stability control helped it post an impressive 53.5 mph in our test, a touch better than the Highlander’s speed of 52.
The ride is quite comfortable, thanks to a suspension that does a very good job absorbing most bumps and road ruts. Uneven pavement can elicit some side-to-side motions, but it doesn’t compromise comfort very much.
The Kia’s standard low-beam halogen headlights do an excellent job of lighting the road ahead. While the high-beam lights send light farther down the road, they don’t reach quite as far as the high beams on most vehicles. Still, overall performance is better than the Highlander’s.
Both the Kia and Toyota are super-easy to get into and out of. Though they have similar ratings for front- and rear-seat comfort, the Kia does offer slightly more space—2 inches more headroom, an inch more legroom, and nearly 4 inches more front shoulder room. They also have similar third-row seats. Both are best for kids, though the boxier Telluride offers more shoulder room.
However, it’s easier to get into the Telluride’s third-row seat. Getting back there (or getting out when sitting in the back) entails pushing a single button, which flips the second-row seat out of the way. The resulting path is narrow but manageable, even for adults.
The Telluride’s interior is much nicer than the Highlander’s—and almost every other nonluxury midsized SUV’s. The EX trim we tested has a near-luxury appearance, with plenty of soft-touch surfaces at just the proper locations where hands and arms come to rest.
Small things, such as sturdy door latches and grab handles, the lined glove box, and the high-quality satin-finished trim throughout, add to the upmarket appearance. Plus, it’s incredibly quiet inside, better than most competitors. Okay, there’s one complaint: The imitation wood isn’t going to trick anyone into thinking it’s the real thing.
We like the Kia’s controls, which are easy to read and simple to use, and the traditional gear selector is a bonus. The infotainment system has a big touchscreen and responds quickly to inputs, and it has standard Android Auto and Apple CarPlay compatibility. The new, larger infotainment screen on the freshened Telluride retains knobs for volume and tuning, which we appreciate.
A slick feature: USB outlets set into the sides of the front seatbacks. They’re up high and easy for second-row passengers to reach. Other manufacturers have since copied this smart idea.
2023 Kia Telluride interior
Photo: Kia
The Kia’s 47.5 cubic feet of usable cargo space is better than the Highlander’s, thanks to a big opening that allows larger items to fit in. (Read how we measure cargo space.)
Both the Kia and Toyota come with a number of standard active safety systems, including AEB with pedestrian detection and AEB highway. But Kia ups the ante by including BSW and RCTW standard on all trims.
Finally, the Telluride’s warranty coverage is also superior. The basic bumper-to-bumper warranty is the first five years of ownership or up to 60,000 miles of use, whichever comes first. And the powertrain warranty is the first 10 years of ownership or up to 100,000 miles of use, whichever comes first, though only for the first owner; if you buy your Telluride as a used model the remaining powertrain warranty doesn’t carry over. Roadside aid coverage is also better: five years or 60,000 miles.
2023 Kia Telluride
Photo: Kia
The Case Against It
As we’ve noted in other comparisons, the Telluride’s score of 92 in our road tests shows that it doesn’t have many faults. Still, it isn’t without shortcomings, and there are several areas where the Highlander performs better or has a superior feature.
Neither one of these SUVs is going to be anointed a driving enthusiast’s companion. While the Kia has competent handling, its pronounced body lean erodes driver confidence and gives the SUV a lumbering feel when driving around corners.
As nice as the cabin is, there are a few places where Kia obviously saved money. The glove box and under-the-armrest storage bin are made of hard, unlined plastic, and the glossy plastic surfaces around the center console don’t feel very solid.
Our drivers who sit farther back from the steering wheel commented that it’s a long reach to use the touchscreen. And the gray buttons on the center console below the screen have light-colored text, which can make them challenging to read in full sunlight.
We aren’t fans of the various beeps and vibrations that are part of the lane departure warning system. Unfortunately, it isn’t possible to turn it off without also deactivating lane keeping assistance.
The Case for It
The fourth-generation Highlander is much more of an evolutionary redesign rather than a revolutionary one. It looks much like its predecessor, and drives and feels very familiar as well. But some incremental changes and improvements continue to make it a smart choice for families.
Toyota Highlander
Photo: Toyota
Toyota’s winning combination of a lively V6 engine and responsive eight-speed automatic makes the Highlander not only quick in our acceleration evaluations but also frugal—particularly for a V6 engine. Its 22 mpg overall matches that of the Mazda CX-9 and Subaru Ascent (both have a turbo four-cylinder).
Want even better mileage? The Highlander Hybrid, which uses a four-cylinder engine and an electric motor, got an astounding 35 mpg overall in our tests—with all-wheel drive. That’s better than every nonhybrid compact SUV.
Of course, buyers who want better fuel economy can opt for the Highlander Hybrid, which gets a stellar 35 mpg overall, is almost as quick, and can propel itself on electric power at low speeds.
We like how well the Highlander absorbs and softens the impact from rough road surfaces, and the overall ride quality is compliant and controlled. It’s on a par with the Telluride.
Both versions of the Highlander are quiet but not up to the librarylike interior of the Telluride. The turbocharged four-cylinder engine has a gritty sound under even moderate acceleration. The Hybrid version is better, getting noisy only under hard acceleration. Both do a good job of keeping road noises subdued.
The regular Highlander performed very well in our braking tests. While it can’t match the Telluride, we measured short stops on both dry and wet pavement.
Getting into and out of the Highlander is as easy as in the Telluride. The doorsill is low and narrow, the seats are at the perfect height to slide onto, and the door openings are wide. It’s even easier to get into the second row, thanks to the more generous openings and wide path.
The Highlander scores very similarly to the Telluride in our seat comfort evaluations. Measurements are marginally smaller in some areas—an inch less legroom or headroom—though the wider, boxier Telluride provides more shoulder room in each row. The third-row seat is best for kids, though bigger children may find the path to the third-row seat a bit narrow—adults certainly will.
Most controls are logically positioned, easy to use, and well labeled. We like that physical knobs are used for the climate system, and the volume and tuning adjustments for the audio system. The standard Android Auto and Apple CarPlay are a welcomed convenience. While an 8-inch infotainment screen is standard, for 2023 the top Limited and Platinum trims get a 12.3-inch screen standard. This screen is optional on the XLE and XSE trims.
The Highlander also comes with the Toyota Safety Sense system as standard equipment, and includes AEB with pedestrian detection, AEB highway, lane departure warning, and lane keeping assistance.
In addition, the Highlander comes with free scheduled maintenance for the first two years of ownership or up to 25,000 miles of use, whichever comes first. The Kia doesn’t include free maintenance.
Toyota Highlander with the standard 8-inch infotainment screen
Photo: Toyota
The Case Against It
Both SUVs have similar handling and agility characteristics: fine, but not overly sporty. But the Highlander posted a lower speed than the Telluride in our avoidance maneuver. Our drivers found it challenging to exceed 50 mph when going through the course, and the Highlander felt a little clumsy as it lumbered around our track. However, the well-tuned electronic stability control kept the big SUV under control.
In our braking tests the Hybrid version had longer stopping distances than both the Telluride and regular Highlander—20 feet longer than the Telluride and 10 feet longer than the regular Highlander on the wet surfaces. The tires on the regular Highlander and Telluride are grippier than those on the Hybrid, which uses tires designed for low rolling resistance to squeeze out the best fuel economy.
One of the bigger letdowns is the Highlander’s interior. It has a nice mix of materials but looks quite bland unless you opt for the Platinum version. Most surfaces are black, and there’s not much in the way of contrasting trim. In addition, many of the trim panels feel hard and low-cost, and the front window sills are barely padded and the rear ones are hard plastic. In general, the Highlander’s cabin appearance trails the Telluride’s.
Though the view straight ahead and around the front roof pillars is good, the short side windows hurt the view to the side and the second-row headrest blocks a bit of the view over the driver’s right shoulder. The thick rearmost roof pillars, small rear window, and second-row headrests all combine to limit the view straight back.
In addition, the Highlander has numerous handles and levers to lower the second-row seatbacks or slide the seat forward for third-row access. It’s far more convoluted than the Kia’s one-button approach.
Even with the abundance of standard ADAS equipment, the Highlander doesn’t include BSW or RCTW as standard equipment. They aren’t available on the base L model at all, although they are standard on all other versions and come standard on all Highlander Hybrids.
Toyota Highlander
Photo: Toyota
Bottom line: If you are buying purely on fuel economy, then either version of the Highlander is the choice for you. While the Toyota’s turbocharged four-cylinder does well in our fuel economy testing, the Hybrid’s mileage is stellar for some cars, let alone a three-row SUV.
Loyal Toyota buyers may want to stay with the brand, too, because they’ll feel at home from the second they slide into the cabin. In short, the Highlander is a family-friendly—though unexciting—SUV. Note that historically the Highlander holds its value very well.
But the Telluride is better in many ways, even topping the Highlander in CR’s owner satisfaction surveys. Add in the smoother transmission, better braking, nicer cabin, greater interior and cargo room, and standard BSW and RCTW, and you have a winning SUV.
Shoppers who are considering the Kia may also want to look at the Hyundai Palisade, which uses the same platform (frame, suspension, engine, transmission) as the Telluride.
Consumer Reports is an independent, nonprofit organization that works side by side with consumers to create a fairer, safer, and healthier world. CR does not endorse products or services, and does not accept advertising. Copyright © 2023, Consumer Reports, Inc.
]]>
Since so much of today’s communication happens online, it makes sense that we tend to cherish handwritten or handcrafted items—especially when they’re from the people closest to us. The problem? Over the years, sentimental cards and letters can pile up, leaving you more overwhelmed than appreciated. Finding an effective way to store cards is essential.
If you’re not quite sure what to do with old cards and letters, you’re in luck! There are many great opportunities to display, repurpose, and store your favorite notes. Whether you’re looking for creative ways to display love letters, wondering what to do with old birthday cards or anything in between, we’ll walk you through your options.
The first step is simple: sorting through your cards to decide which category each note falls into. Take some time to review your stack, and make one pile for your favorites to display. Then, make another for any that can be repurposed and a third for any you want to keep stored away.
Once that’s done, start exploring the creative organizing tips below!
via Care2
Framing your favorite cards is a tried-and-true solution. Think of it as a longer-term alternative to setting your cards on a bookshelf or pinning them to the fridge. Framing gives your cards a more permanent home, and they’ll look more like intentional décor than a sweet afterthought.
Take inspiration from an art gallery by giving each letter or card its own frame, then hang those frames on one wall for a dramatic impact. Or, if you have keepsakes you want to display with the card, consider putting those items in a shadow box and hanging that on the wall.
How should you decide which cards to display? Experts say it depends on the contents of the note. The more personal and intimate the card, the more likely it should be kept private. “Obviously, a very old love letter from an ex should not be framed, but one from your current partner could be framed and put somewhere discreet where only you might see it,” recommends Apartment Therapy writer Laure Joliet. “It’s a nice way to bring the personal into your home and to help tell the story of your relationship.”
Another option is turning sentimental cards into a scrapbook or special album. Professional organizer Nancy McGivney recommends cards and letters be treated like kids’ artwork. “Keep only the best. Then make a holiday album you store with the seasonal decor to remember great holidays past,” she adds.
With some chipboard, a hole punch, and some rings, you can create an album of cards to flip through anytime. Or, if you want a more secure option, a binder with plastic sleeve inserts also works well.
If you’re hoping for a more creative, dynamic display, choose a few of your favorite cards and arrange them on a photo mat so the images you like the best are highlighted. Use craft glue to secure the cards to the mat, and flip the mat over when it’s dry. Cut away the excess using a razor blade, then insert the mat around a related photo. When you’re done, you’ll have a themed frame that tells a deeper story than the photo itself.
Another way to store cards is to use them as decór inside mason jars. This craft is so easy, you’ll wonder why you didn’t think of it yourself!
Just slide your favorite cards into mason jars, wrap them around the interior surface, then put the lid on. Finish it off with some ribbon or seasonal greenery. When you’re done, you’ll have the perfect tabletop display to set up in your home. Mommy Kat and Kids have the full tutorial, which you can modify with the seasons to keep sentimental cards on display year-round.
Some cards feel like they have sentimental value, but they don’t quite make the cut for display or storage. Whether the card itself just isn’t your style, the message was sweet but nothing special, or you just have too many cards for a particular occasion (or from a particular person), repurposing is a great way to keep the special meaning without keeping the clutter. Here are a few repurposing options to consider.
If you’re like most people, you can never have enough magnets. Luckily, custom magnets are easy to create, and greeting cards make the perfect material.
Start by cutting out your favorite images or notes and glue them to a magnet sheet, then cut the magnet sheet to size. That’s it! Using this technique, you can easily display your special items on your refrigerator for everyone to see.
If any of your cards are for specific holidays, you can also use this process to create themed magnets that make up a set. Motherhood on a Dime used this technique to create a nativity scene for her kids, but you can easily modify the steps in this tutorial and apply it to any cards you might have at home.
via Penina Finger, CC
For those cards that you’re just not sure what to do with, cut out the images and turn them into cute gift tags. It’s a win-win: you’ll always have gift tags when you need them, and your cards get a second life alongside someone else’s gift.
When you look closely at a card, you can find all sorts of shapes that will make great tags. Cut out common images like hearts, stars, cakes, flowers, and other common graphics, and you’ll probably end up with tags for a variety of holidays and occasions.
When you find an image you like, just cut it out and punch a small hole in your tag. Then, string some twine or ribbon through the hole. When you’re done, store your tags in an envelope in the same place as the rest of your gift-wrapping supplies so you can easily find them when you need them.
Many people hang on to items because they fear how the giver might feel if they don’t hold on to them. If you’ve ever thought, “My grandmother would be devastated if I got rid of that!” this one’s for you.
We don’t often consider giving cards back to the sender, but it’s a fun option that also becomes a nostalgic gift. If you want to go this route, just package up all the cards and notes you have from each person, and send them back with a quick note of your own.
The Art of Simple writer Katie Clemons recalls when someone sent a package like this to her grandmother. “It was filled with about 24 letters and Christmas cards that she had written to her closest college friend over the years! Getting those letters back was like receiving a time capsule. It was the first time we got to learn about my dad’s first Christmas.”
Your cards can create a similar feel-good moment for the original sender, so don’t be afraid to send your cards back if they’ve already served their purpose in your home.
Using a circle punch and some twine, you can create your own garland out of notes and cards that you have around your house. Take each circle, fold it in half, and then glue the right sides together. Bobbi Lewin uses five circles to create this design, but you can use however many you want. Let them dry, punch a hole in the center, and then string twine through each one. This is an especially fun way to repurpose holiday cards as a heartfelt holiday decoration!
Another simple way to repurpose your sentimental notes and cards is to create your own postcards. If the inside of the card’s front cover is blank, cut off the front of the card for your new “postcard.”
You can store or display the note that was inside the card, or you can toss it in the recycling bin. Then, using a corner shaper that you can find at your local craft store, round out the corners so they’re nice and smooth. Add a note, an address, and a stamp, and you’re done! Just drop it in the mail like a regular postcard whenever it’s convenient.
via Sarah Parrott, CC
Make a simple bottle of wine even more special by adding your own personalized gift tag. Start by cutting a piece of cardstock into a 3-inch by 7-inch rectangle. Then, use scissors to score the card about 2.5 inches from the top (where you’ll fold it) and use a 1.25-inch hole punch to create a hole large enough for the neck of the bottle. Once your cardstock is cut and ready to go, cut a section of your greeting card to your desired size. Secure the card to the cardstock, then hang the tag on the bottle when the glue is dry. This is a great trick to make a last-minute wine gift feel more thoughtful and put together.
At the end of the day, most people will have some cards that are too special to keep but too personal to display. That’s where effective greeting card storage comes in. For those cards that don’t fall into the other categories, here are a few simple storage options.
If you’re nervous about losing the physical copies of your old notes and greeting cards—or you just won’t interact with them that way—moving your cards to a digital space is a worthwhile project.
You can scan all of your sentimental cards into your computer or find a company that will scan them for you. If you have cards that are three-dimensional or have a look that scanning can’t capture, set up a light box and take photos of your cards. When you’re done, you can transfer all your images into a digital scrapbook.
“Digital Scrapbooking is simply creating a scrapbook layout on the computer. You use paper and elements that are created digitally using graphic design software,” Michele McGraw writes on Scraps of my Geek Life. “There are many different programs available starting from $29 to over $500. If you are just starting out, I recommend you start with a dedicated scrapbooking program because the software will come with some digital kits to give you a head start.”
Storing the actual item is a little more sensitive because cards, letters, and ink can deteriorate over time. “If you would like to store some items in a box, make sure it is waterproof, sealed, and limited in size,” recommends Claire Kurtz. “In order to not grow beyond the chosen size box, maintain a strategy of removing one item before adding a new one.” Make sure to store this box in a climate-controlled storage unit to ensure your valuables won’t be damaged by heat, cold, or moisture.
Finally, if you decide you don’t need to store your sentimental cards (or you’re wondering what to do with old sympathy cards), consider donating them to the Recycled Cards Program offered through St. Jude’s Ranch for Children. They turn your used cards into new all-occasion and holiday cards. The cards they create are then sold, and that money helps support their programs for homeless, neglected, or abused children, young adults, and families.
“The program is beneficial to everyone – customers receive fun, “green” holiday or other occasion cards they can feel good sending to their friends and loved ones,” according to St. Jude’s, “and the children at St. Jude’s Ranch receive payment for their work and learn basic job skills and the importance of recycling.”
Many people struggle with how to store cards and letters, so if you don’t have a system in place, you’re not alone! But when it comes to sentimental items, it’s worth the effort to handle them with care. Take the time to display, repurpose, and store each card and letter to ensure they will last a lifetime. One day, you’ll be glad you did!
Updated on 2/3/16 & 6/27/23 from an article originally published on 5/9/14.
This post How to Display, Repurpose, and Store Sentimental Cards appeared first on Life Storage Blog.
]]>Every few months or so, I clean out the refrigerator, tossing items that have expired, wiping down grimy surfaces, and reorganizing everything. It can be a daunting task, but there are ways you can organize your fridge to make both retrieving items and cleaning much simpler. These hacks can also help you get the most out of food, maximize freshness, and maintain an overall much neater look.
Here are some tips and hacks for both keeping your refrigerator organized and simplifying cleaning.
The first, most obvious step, is to clean out the fridge. This means emptying it entirely, wiping down shelves, cleaning our crispers, and, as noted, tossing things that are no no longer good, either having spoiled or gone beyond their “expiry” or “best before” dates. See our guide on how long food will last in the refrigerator if you are unsure (hint: yes, even ketchup expires!) Once you have cleaned out the interior of the fridge and are left with only the contents that need to be put back inside, the reorganizing fun can begin!
If you shop for fresh fruits and vegetables at the grocery store, chances are you place them in clear plastic bags or they come in cardboard or plastic containers. Take everything out when you get home and organize them neatly in the crispers of the fridge. Put fruits in one crisper and vegetables in another, for example, or store items that emit a lot of ethylene gas away from those that will ripen quickly because of it.
If you prefer to keep small items like raspberries and blueberries neatly organized, wash and place them in your own Tupperware and put that in the crisper. Keep an eye on fruits and when they getting close to becoming too ripe, place them in a Ziplock bag in the freezer and draw from that selection to make smoothies. See our tips on storage tips for how to get the most of our your produce to ensure they’re not only organized well, but also stored for maximum life.
The door storage areas of refrigerators are ideally suited for storing small and bottled items that you need to access frequently versus tucking them in the coldest part of the back of the fridge’s main area or leaving them at the front where you have to push them out of the way to get to other things. Organize them from tallest bottles to smallest, or by use (e.g. hot sauces on one shelf, condiments on the other, marinades on the next, and so on).
A neat trick is to place a portion of an empty egg carton on the bottom of a door storage area. Place condiment bottles upside down on top of it to keep them from toppling over as well as so you can get every last drop out of them. If you’re like me and love to keep those little packets of ketchup, vinegar, soy sauce, and dip from fast food restaurants, keep them together in a small Ziplock or container in the door storage area as well.
To go the extra mile, buy a set of condiment bottles that you can label (or that come pre-labeled) and transfer condiments to them to keep things neat and tidy in the door instead of maneuvering bottles of various shapes and sizes into a storage bin.
When you come home with a fresh selection of meat, poultry, and fish, store it on the bottom shelf of the refrigerator. This is for a number of reasons. First, it’s the section that tends to be the coldest as well as the largest for fitting big trays. Second, this also prevents juices from potentially leaking onto food below. And note the guide above in terms of how long to store food, like meat, poultry, and fish, in the refrigerator. Dedicate a section in the freezer to store meats, poultry, and fish before they expire so you can keep them frozen (and free from bacteria and spoilage) if you aren’t going to get to them right away. Having a dedicated spot will make it easier for you to remember to move them to the freezer without having to shift everything around to make them fit.
Regardless of their size, put the most frequently used and perishable items at the front of each shelf, like milk, cheese, and yogurt, for quick and easy access. This will make it easier to grab them and prevent you from forgetting those yogurts way at the back that end up expiring before you can eat them.
Use Tupperware to organize things in the fridge (and it absolutely has to be stackable Tupperware!) If you want to be extra-organized, consider labeling and dating everything.
If I know I’m not going to get through a huge pack of chicken breasts or ground beef, I like to transfer it to individual serving sizes stored in Ziplock bags that are clearly marked with what’s inside as well as the best by date. Roll things like ground beef and pork flat so they don’t take up as much room and stack them neatly. This also makes it simple to check the eyeball the best buy date and if necessary, transfer items to the freezer where they can be kept safely until you’re ready to defrost.
If your fridge is like mine, it is fully stocked with condiments and, thanks to my husband and his obsession, multiple bottles of hot sauce. If you have the space, consider adding a Lazy Susan to the top shelf to accommodate these items, which will leave your door storage areas open for other things. Organize items like sauces, herbs, chopped nuts, and things used for cooking or spicing up dishes so you can quickly rotate and grab the one you need instead of digging through a wide selection and knocking bottles over in the process.
Whether it’s the fresh peanut butter and bottles jam or deli meats and cheeses, store them together so you can easily grab and go when it’s time to make a sandwich and you don’t keep the refrigerator door open for too long as you hunt for each item.
Maybe your fridge has three shelves but the bottom one is spacious and high. If you use door storage for tall bottles like milk and juice, you can maximize that height by using a baking tray to turn one shelf into two. Then stack multiple things on top of others and remove the tray when you need to get what’s underneath. Keep essential items you access all the time on the top and place items you might use less frequently underneath. This leaves the back of the fridge free for those truly once-in-a-blue-moon items like Maraschino cherries used exclusively for Christmas baking or cornmeal you break out a few times a year when the inspiration for cornbread or homemade English muffins hits.
Sometimes, reorganizing food in your refrigerator can seem like a game of Tetris you just can’t win. But there’s a lot of cool tips that can not only make things neater, and easier to clean, but can also help you get the most out of your food. You can potentially keep food fresher, longer, reduce the amount of food waste, get every last drop out of condiment and sauce bottles, and fit more inside to allow for creative meals.
Check out a wide selection of refrigerators at Best Buy Online, including models with plenty of useful storage options, including door-in-door, four- and five-door designs, French doors, adjustable shelves, and more.
The post Tips for reorganizing your fridge appeared first on Best Buy Blog.
]]>This online community is home to 2.3 million members who are always ready to help people identify the mysterious objects they found.
The gig is simple: someone uploads a photo of whatever it is they want the name of, and the gang starts commenting under it, offering their input until, inevitably, a person shows up who knows exactly what it is.
However, even if you're not posting anything, scrolling through their solved cases feels like an interesting challenge, where you can test (and expand) your own knowledge. So we invite you to do just that!
Answer: It's a magazine rack installed upside down because people decorating Airbnb's don't know what they're doing.
Image credits: mmay_a
Answer: This setup prevents Muslims from having to lift our legs up dangerously high while trying to stick our feet in the sink one at a time. The alternative to that is we have to take a handful of water and pour it onto our feet below the sink causing the floor to get wet. Muslims also have to keep their feet clean before praying, which is obviously problematic in a bathroom where everyone pisses on the floor and walks with their shoes between the stalls and the sink, so you might see them trying to keep one shoe on while washing the other foot and then switching. It’s also why we take our shoes off before praying and use prayer rugs to avoid touching unclean things while praying.
Image credits: atomicdragon136
Answer: They look like silkworm cocoons.
Image credits: loveofGod12345
Answer: Steel "soap" bar. Removes odors like onion from ur hands when u wash with it by just adding a strong steel odor on top.
Image credits: inzombiac
Answer: It's a place to rest your beer while you play cards.
Image credits: One_Has_Lepers
Answer: A Himalayan Calendar. The outer ring as 12 balls, each corresponding to a month. The next two rings have a tens and ones digit. The tens has three balls for up to the 31st, and the next has nine balls, for 0 to 9. And then four rings for the year, up to 9999.
Image credits: Oxfordcommapreacher
Answer: Micro plastic particles. Probably to show how Nike helps to clean up our planet. Greenwashing at best.
Image credits: tsirs
Answer: Looks like a page spreader for reading. Point end goes into the spine and thumb in hole so you can one hand books easy.
Image credits: Karljoneill
Answer: Cabbage sliced for making sauerkraut.
Image credits: Interesting_Usual882
Answer: It's whale sick get it checked it could be worth thousands a kg. It's an ingredient used in high end perfumes.
Image credits: Swimming_Sea964
Answer: My wife says horse hoof cleaning tool, and she's a major horse gal. Also, burying an iron object within the foundation of a home was once considered good luck.
Image credits: StarsSuck
Answer: They can be used to avoid chairs scratching your floors. So they are socks, but for chairs rather than humans.
Image credits: InevitableDevice2182
Answer: You hang weights on chains to power mechanical cuckoo clocks. One powers the clock mechanism, and the other powers the cuckoo. The weight turns gears in the mechanism as the chain drops. To wind the clock, you pull on the other end of the chain and bring the weight back up, and the same for the chain that powers the cuckoo.
Image credits: reddit.com
Answer: Probably a horse. The bottom is the sire and dam.
Image credits: Wequiwa
Answer: It's a butter curler, for making fancy bits of butter.
Image credits: Curious-Creation
Answer: Terra cotta sugar saver. You put it in with your brown sugar to keep it from clumping or drying out in storage.
Image credits: potatochild001
Answer: It's actually a purse. There's space in there for some coins for bus/cab fare, some powder makeup (behind the little door), and calling cards.
Image credits: didilamour
Answer: It's an early 19th C Gaslamp. The gas is piped up the pole, and a copper pipe would have extended into the glass lamp house, which fitted into the hoop.
Image credits: scientificdramatist
Answer: HPDFCU Ultrasonic Animal Deterrent.
Image credits: BloodyBender
Answer: It’s a lamp. It’s literally an oil lamp, to be used to create light. The wick goes in the spout. The oil goes in the belly. You light the wick and a flame will burn on the end of the spout like a little candle, and you can carry your lantern around with you.
Image credits: FlaxxtotheMaxx
Answer: Telephone dialer. You put the ball end in the desired number of the phone dial instead of your finger tip and used it to turn the dial.
Image credits: boneyheimer
Answer: Anti-wolf collar for sheepdogs.
Image credits: delilahgabj
Answer: These are pretty much radiators that were filled with embers and/or hot stones when needed.
Image credits: Shadow_F3r4L
Answer: This is a mushroom growing in the ceiling and is likely the result of water damage from the floor above.
Image credits: AFROSS
Answer: A cigarette lighter.
Image credits: junkshopper2000
Answer: A vintage spoon pendant used for illegal substances.
Image credits: tlmsmith
Answer: It is a cold box.
Image credits: reddit.com
Answer: It is a spoon designed to separate the fat from the sauce, called "cuillère dégraisseuse".
Image credits: bazoid
Answer: Boards that keep stray dogs from peeing on the door.
Image credits: GOBLINH8ER
Answer: It’s for the manufacturing of the product so that it can be turned while standing up.
Image credits: Eastern-East1476
Answer: Your mechanic is gonna want that back. It’s part of a lift.
Image credits: BlueFlames1723
Answer: "Black Money Scam". It's construction paper or similar, he was scammed to believe it was currency dyed to be smuggled and could be restored.
Image credits: sbs_str_9091
Answer: Linen press.
Image credits: boredaugust
Answer: It's a container for keeping herbs fresh in your refrigerator.
Image credits: Jahstar7
Answer: It is a Vasculum, a sturdy collection container used by botanists on field excursions in which plant specimens can be collected without damaging them.
Image credits: Valuable-Camera-7107
Answer: It’s a diver rescue marker, for ocean rescue. You release it to dye the water around you and even at night a blacklight can light it up.
Image credits: howitzer1
Answer: Part of an old telephone. The bell is for incoming calls. The crank is to buzz the operator to connect you to the other party.
Image credits: Radio-Groundbreaking
Answer: It's a chair, howdah style.
Image credits: ali_cat_
Answer: Immersion heater. The metal piece goes into a cup of water and heats it.
Image credits: Commercial_Wasabi_86
Answer: YVW Water Watchers! Initiative to remind children to conserve water when possible. This is insanely clever. The Hawthorne effect is when people behave differently when they know or feel like they’re being watched—choosing a healthier meal at lunch with your fit friends, or being more productive at work when you sit near the boss’s office.
Image credits: Johanso
Answer: It's a "claw" to help pull in fishing nets.
Image credits: machukahn
Answer: An old Beltone type hearing aid. There's a transistor in the tie clip, and it plugs into a cord for the hearing aid.
Image credits: badluckninja13
Answer: Carpenter Bee traps.
Image credits: redscarfdemon
Answer: This is a ULV mosquito adulticiding fogger.
Image credits: LibyanKing
Answer: Old septic tank.
Image credits: bbush721
Answer: Looks like the membrane from a kazoo.
Image credits: isabel_77
Answer: Wow, that's a blast from the past. It's for write protecting a 5.25" floppy disk.
It’s for making a single sided disk double sided.
Image credits: R_McN
Answer: Mirror guy here, there are lots of things related to the adhesive that can pull off or degrade the silver backing, including: forceful detachment of the adhesive which pulls off the silver, using an acid curing adhesive instead of a neutral curing adhesive, putting the adhesive onto unpainted Sheetrock which screws up the curing process, or drawing a closed shape with the adhesive so air gets trapped in it when the mirror is pressed against the wall.
Image credits: AdamCohn
Answer: Obfuscation pattern, it's there to hide info or keep people from trying to read through an envelope and look at personal information.
Image credits: 1nesandzer0s
Answer: Worked at a Ponderosa back in my teens as a line cook and we had one of these. When an order was up we would press a button on a box and it would light up a number, so a server would know their order was ready for a table.
Image credits: Gusto74
Answer: It's a perfume diffuser. You can spray your perfume on it, and it will absorb it and release the smell into the air.
Image credits: Solve-Problems
Answer: This is just a scientific specimen cabinet, which could be used for anything from geology to lepidopterology.
Image credits: IGutenberg
Answer: It's a button hook.
Image credits: MiniRipperton
Answer: An oil lamp.
Image credits: watamat
Answer: A wash tamper or "wasstamper" in Dutch.
Image credits: solidboom
Answer: A leather fishing belt. You can put the end of the fishing rod in the hole for support.
Image credits: nyxfriesian
Answer: It's for transporting racing pigeons.
Image credits: Subaru_turtle
Answer: It is a space for a wireless pod that tracks your running workout called Nike+ sensor.
Image credits: Zyloph
Answer: This is used to measure the height of the net in tennis.
Image credits: Mcmakar
Answer: It’s for drafting. It’s an eraser shield.
Image credits: bu11fr0g
Answer: It’s a baler! The metal bands have small metal prongs protitruding, they pick up the hay. The corkscrew in the back moves it into the baling chamber, where a ram compresses it into a bale, after that it’s tied together and pushed out of the machine.
Image credits: only1jellybeanz
Answer: Chicken steamer, it's used to add humidity to the house.
Image credits: uberCalifornia
Answer: It’s an avocado slicer. You cut the avocado in half and seed it, then scoop out slices.
Image credits: Whatsername868
Answer: This happens a lot in seawater. You see it in the beach all the time as a thick brownish foam. Basically, as marine creatures and so on (especially algae) decompose after death their bodies break down into various components. One of the processes is called saponification and basically converts fats into soap (fun fact, the same thing can happen to un-preserved humans). This coats the sand, gravel, rocks etc and then it is stirred up into foam by the water and (usually) high winds. On the beach it’s usually a mix of these animal byproducts, sand and other contaminants, it’s likely similar here but with less sand. In a canal it is likely stirred up by the wake of watercraft.
Image credits: hamo804
Answer: It's a window breaker for car windows.
Image credits: hardcuts26
Answer: It's for holding books.
Image credits: el_gato_uno
Answer: Hydraulic fluid reservoir for a military vehicle, possibly a hercules.
Image credits: FollowTheScript
Answer: It’s a sensor to turn the heated sidewalk on and off.
Image credits: littleteethparty
Answer: It’s a comb hammer for dressing stone.
Image credits: CallanSeabs
Answer: I think the dowel was put into a shelf slot after the fact to possibly make this into a paper towel holder. I say breadbox.
Image credits: DrDirtyJ
Answer: It's a back support.
Image credits: cubswin16
Answer: An old blade honer/sharpener.
Image credits: perfectlowstorm
Answer: A rotisserie clamp.
Image credits: Anxious-Kiwi-92
Answer: Knife rests.
Image credits: Echidnado
Answer: A tick removal tool. It's called a "tick twister".
Image credits: Repulsive-Wear8696
Answer: It's a tooth pick in a design patented in 1881.
Image credits: ruby_dust17
Answer: It's a vintage police restraint chain called "chain nipper".
Image credits: Mrandres21
Answer: It's a phone “booth.” At one point it likely held a phone (likely a payphone). You could stand it in, have your call, and not be in the middle of the hallway.
Image credits: Major-tomm
Answer: It's a dry water massage bed. A person lays inside and water pummels them.
Image credits: Wraldpyk
Answer: A hanger cover. It's to prevent suits or similar from getting a crease when hanging on a hanger with sharp angles.
Image credits: ellanaKG
Answer: Guide rails for keeping a derailed car from getting too off center.
Image credits: marxman28
Answer: A display for hats.
Image credits: rramirezcantu
Answer: A pull pin from a fire extinguisher.
Image credits: LoganSlendy
Answer: They're measuring wifi strength and saturation as part of MLB's deal with Extreme Networks.
Image credits: paradigmjumper
Answer: It's a temperature sensor for a humidifier.
Image credits: hiberniagermania
Answer: It’s for laptop/tablet storage while charging.
Image credits: fred_lincoln
Answer: It’s a badger gate.
Image credits: 3sponge
Answer: It's part of a cream separator for milk.
Image credits: Wht-ever
Answer: A wagon brake.
Image credits: WrinkledWatchman
Answer: This is a seafood or cocktail fork.
Image credits: GnedTheGnome
Answer: It is a phone holder.
Image credits: Different-Aerie-6508
Answer: Basically there are huge underground tunnels that take water to the power plants, these gates shut the water to them.
Image credits: Limelight_019283
Answer: These are old kilns.
Image credits: Check_M88
Answer: Looks like a it’s maybe a flagpole finial, possibly 19th century or early twentieth.
Image credits: nate8334
Answer: Chef's hat.
Image credits: reddit.com
Answer: They are granaries, for corn and grain.
Image credits: ProperNomenclature
Answer: It’s a home observatory. The telescope inside doesn’t have to be particularly big, but chances are if they spent the money on the dome they have a pretty nice scope.
Image credits: jlol8452
Answer: Saildrone.
Image credits: ShireHorseRider
Answer: Sonde device to measure pipe blockage / delineation using acoustic waves.
Image credits: PSN_ALadyCat
Answer: It's one of a pair of "rattlesnake eggs". You hold them separated slightly in your hand, and toss them up in the air, and they make a cool noise when they magnetize together. That's about it.
Image credits: MotherOfMagpies23
Answer: These are Japanese folding screen weights.
Image credits: RepTheDee
Answer: It’s a keyboard key remover. It’s to help install custom keys but if it didn’t come with any custom keys, they probably gave it to you to help you remove all the keys to make cleaning easier.
Image credits: NuclearHoagie
Answer: They are anti theft strips and will sound the alarm if you try to pass the detectors at the door when not having paid the item.
Image credits: lucian_blignaut
Answer: It’s a core plug for a large roll of paper. You take them out when you load them onto a cutting machine to make smaller rolls like adding machine tapes or toilet paper rolls.
Image credits: Kcnabrev
Answer: It’s part of a magic kit where the magician “guesses” someone’s number… should be like 6 of them with various numbers on them…
Image credits: Backup-AccountHLS
Answer: It’s a spoon rest for cooking so your counter top doesn’t get dirty. Can hold multiple utensils at once. Easy to wash and clean.
Image credits: PoetryOfLogicalIdeas
Answer: That is a paddle designed to swat back a small ball 'a hornet' in the traditional swiss sport or hornussen.
Image credits: rojothered
Answer: It is an outrigger for trolling. you attach a long line to it and this carries it out away from the side of the boat so you can put out two long lines at once. Used for tuna and swordfish in the gulf stream.
Image credits: avery4206
Answer: It's a fishing net float.
Image credits: redblackrider
Answer: A waterproof bathroom mirror TV.
Image credits: natalie_grrr
Answer: It is an Eruv.
Image credits: fjbruzr
Answer: A vintage craftsman wet wheel sharpening stone tool.
Image credits: DonKiedicRPG
Answer: A holder for moth balls, called "mortemoth".
Image credits: pocketfullasunshine1
Answer: It’s a manual massage roller ball.
Image credits: doogal580
Answer: It's a foldable flying disk.
Image credits: ActivityFar178
Answer: It's a vintage “Midget” folding garment hanger.
Image credits: MediumSizeMoose
Answer: The month and year of manufacture. It’s a permanent dent made in the tool steel of the injection molding tooling, so the most recent dent is the birth date of the wheel arch.
Image credits: xrawmonkey
Answer: A Hoosier flour sifter. The flour is contained in a box above or in this case - the conical bag and you crank out what you need below.
Image credits: 98_percent_angel
Answer: A ball mill. Similar in concept to a rock tumbler, but used by industry to powderize or smooth materials.
Image credits: BoutelouaGracilis
Answer: To hold bottles up, so they don't fall out of the door.
Image credits: perksofbeingcrafty
Answer: A Remfly Perimeter Trip Alarm.
Image credits: johnnycross798
Answer: It's a lazy dog. A small bomb dropped in large numbers. No explosives in it.
Image credits: maxuhmillion28
Answer: These are tiny mock versions of what they used to use on riversides to stop erosion. Now they're mostly just decorations or hashi holders (chopstiick holders, but they have much smaller ones - i have some in my cuppard) so your food-covered hashi doesn't touch the table. They were called Takejakago.
Image credits: Sea_Negotiation_2651
Answer: Mk 25 marine location marker.
Image credits: JForce1
Answer: It’s a pull chain and hanging bracket for a solid door bell.
Image credits: tired-until-infinity
Answer: It's a hose holder that prevents tangling.
Image credits: No_Maintenance_550
Answer: Fidget toy.
Image credits: Far_Ad8215
Answer: It's an infrared based occupancy sensor. The TV controller is outputting an infrared signal activating the sensor. Source: husband who is an electrical engineer.
Image credits: Infomaniac63
Answer: Snack plate. Circle is for a cup to rest in.
Image credits: aft25
Answer: Canopy covers for glider cockpits.
Image credits: No-Adeptness1671
Answer: It’s a pog slammer.
Image credits: Tribulus_terrestris
Answer: It’s for ties.
Image credits: elliebelliemk
Answer: An inflatable cushion for securing cargo.
Image credits: SmartGround754
Answer: A South African Knobkerrie.
Image credits: Zeeplebooplebrix
Answer: It's a type of WAP for the hotel staff called AT&T Staff Alert.
Image credits: S3-000
Answer: Cell phone holder for the car vent.
Image credits: aut0asfixiacion
Answer: It’s an old style attachment for a child seat.
Image credits: AlfajorConFernet
Answer: It's a paperweight.
Image credits: iang626
Answer: I think it's actually to evenly distribute the coffee rather than tamp it, the tamper would be used after this thing and has a flat bottom.
Image credits: motherherbivore_
He started to request things to make the room feel more “grown-up”. We added a desk and a magnetic board. But really didn’t do much else to the space.
The room was just blah, and he was feeling it. Since he started kindergarten this year, he has taken on more ownership of his room. So I felt it was time to update his room to create bedroom decor that will last and grow with him throughout the years.
Curious What His Bedroom Looked Like Before? Here’s Some Posts You May Enjoy:
Navy, Grey and Orange Toddler Room
Stop feeling like you are the only one in your family who has to do it all. The Organized Kids Workbook is your guide to giving your kiddos expectations + chores to support the entire household. Checklists and visual supports and provided to allow the tiny humans to do their tasks independently. When everyone in the family contributes, things run smoother. So learn the strategies that can support you in your home!
By creating a solid base, we can easily swap out pictures, wall decor, and bedding, but the large pieces of furniture are the things that can grow with him. Yes, we will probably transform his headboard at some point, but for now, he likes it!
We started this total transformation by looking at his room and figuring out what his space was missing. The first thing we noticed was that he lacked bookshelves for all his books and Lego creations. He had a toy storage bin that was being used as a bookcase, but with his ample amount of books, it wasn’t really making the cut anymore. And all his Legos were taking over the shelves in his closet. They needed to go because he was running out of room for his clothes.
So we decided to move his bed to the center of the room and have two bookcases, one on each side. We would remove his nightstand and use a shelf to act as a nightstand for his glasses and water, and Kleenex. The bookcases would be the perfect way to create longevity in the space, as the shelving can grow with him. He can change up what he stores on the shelving based on his interests.
Currently, bookcases could be perfect for holding books, Lego, and all his collectibles. This would clear up shelving in his closet for his clothes. I would use bins to hold each type of clothing based on category. We would have one bin to hold pajamas. One for t-shirts. Another for sports t-shirts. Long-sleeved shirts would go into another bin. And his sweatshirts would be stored in two different bins, one for zippered and another for pull-over. Pants, shorts, socks, and boxers are in his drawers on the other side of the closet.
We decided to move his desk to a corner that would give him some space to spread out. Plus, we can create a bigger desk in that space as needed. On the same wall as his desk, we created a photo gallery wall. This is an easy way to change up decor without really doing much to the space. We went with sports images as he really is into sports at the moment. If he wants to swap them out for other things, we can easily change out the picture to change the look and feel of his room.
His closet doors were another area we transformed. My son is currently into ocean animals, specifically sharks. Like the bigger and feistier the shark, the better. So we transformed his black closet doors to create different zones of the ocean. I cut out ocean animals on vinyl using my Cricut Maker vinyl cutter. We stuck the ocean animals onto the doors at the varying levels of the ocean on his closet door.
Next to his closet, we added a magnetic board. This is simply a giant drip pan that is found at any home improvement store. We used 3M velcro strips to hold the drip pan in place. This giant magnetic board is perfect for his papers. Then, when he doesn’t need it anymore, we can simply remove it from the wall and stick it under our cars in the garage. Love finding multiple uses for items around the home!
When setting up boy’s bedroom decor that will last, find pieces that will grow with the kiddos. Create wall decor that can easily be switched out for new interests. Establish systems to keep things organized. By having a system or routine for things like clothing, it makes everything in the room feel fresh. And allow room to grow. If your kiddo is using a smaller desk now, make sure you have space for him to grow into if he needs a larger desk.
Some links may contain affiliates. Please see disclosure for more information.
The post How To Set Up Bedroom Decor In A Boy’s Room That Will Last appeared first on The Organized Mama.
]]>That's the best price we could find for this quantity of these containers by $11. Buy Now at eBay
“My whole journey, which started four years ago, was [started with] one thing, and it was the thing I interacted with the most. It was my cups,” she says over Zoom. “I used to use Styrofoam cups… but I switched my ways and got metal cups and have flat-head straws. I just searched until I found the things that worked for me.”
Rethinking one single object she interacted with regularly quickly gave her the momentum to go on and make other lifestyle changes she was using in her day-to-day routine, like swapping plastic garbage bags for compostable options, or single-use food storage for reusable containers. “It had this trickle effect that started snowballing, and it got me really excited to look for alternatives,” Barrymore says.
With Plastic-Free July around the corner, Barrymore has teamed up with sustainable lifestyle brand, Grove Co., to help others cut down on waste next month, and every month, for that matter. Here are her tips for living a more eco-friendly lifestyle at home, and her favorite Grove Co. products to do it with.
It can be easy fall into the overwhelming “I need to revamp my whole life to be eco-friendly” trap, which can easily make you feel disheartened and frustrated before you even start.
“I think a major life overhaul is not necessarily always the best way [for going plastic free],” Barrymore says. “It works for some people, but for me, I’m like, ‘one small thing leads to another small thing [that] leads to another small thing…'”
Rather than trying to get rid of all the plastic in your life, Barrymore suggests focusing on the swaps (like she did with her metal cup!) that make sense for you. If you realize you’re using a lot of paper towels, maybe invest in a reusable Swedish Dish Cloth ($8) instead. Maybe you’re disappointed in the amount of food waste you’re throwing in the garbage can—invest in compost bin or program. Or, if you’re going through bottles of beauty products, give shampoo bars or facial bars a whirl. Start small, and over time, you’ll start to see (and hopefully, want to change) the other aspects of your life that aren’t as sustainable.
It’s one thing to convince yourself to go plastic-free. But what about the other members of your household, like partners and children?
As a mother of two, Barrymore recommends leading by example, shopping for compostable, recyclable, or plastic-free products, and communicating honestly about sustainability. She explains that she started talking about the plastic crisis with her children when they were younger and receiving toys with “radical amounts of plastic” in them, which opened the door to more candid conversations.
“One positive is that they’re very aware, much more aware than I think other generations were around politics and the environment,” she says. “They see everything I’m doing and know I work with Grove… and now when they get stuff, they’re like, ‘Oh, that’s full of plastic.’ I’m so happy they get it and that they’re aware.”
Barrymore knows how frustrating it can be to wait around for large-scale change, but the “doomsday” approach to sustainability isn’t necessarily a fun or empowering one. “If it gets doomsday and dark, I’m out—I just shut down. It’s not what inspires me. Like, fear—I have plenty of it,” she says. “What I’d like are positive solutions, and ever since I’ve started working with Grove, they’ve changed my life.”
She recommends shopping for sustainable swaps that bring you joy, which, luckily, Grove Co. has in spades. Particularly, its limited-edition Fresh Horizons collection, which was designed in partnership with Barrymore herself and features fresh, tropical scents, summery colors, and serotonin-boosting styles. “The packaging makes me feel good. It’s like great to look at, it’s designer-friendly, it functions well, it smells good, it’s good for the environment—I’m really really proud of that,” she says. “I think if you start with like one thing that you really interact with all the time, it feels good, and then you want that feeling and get really aware of better practices around you. Then it kind of just gets going.”
Originally $10, now $8
How can you look at these Swedish dish cloths and not feel a burst of happiness?! They’re so cute, and they’re way more eco-friendly than traditional paper towels, nixing the single-use paper waste for good.
“The thing no one tells you about these laundry sheets—you don’t need softener anymore. They’re so softening,” Barrymore says. And they’re so easy to use—simply throw one in with your dirty laundry and let it do its thing. The dissolvable sheets blend in with your clothes, letting the plant-based cleansers and stain removers go to work, without the mess or waste. Bonus: it smells heavenly, too.
Originally $27, now $24
“The hardest [swap] for me was the dryer balls, because I love fabric softener,” she says. “But the chemicals [were] starting to bother me and my daughters’ skin, and I then I’d look at the big plastic jug and think, ‘I can’t do it.'”
Barrymore can confirm the swap to these wool dryer balls is worth it. Made from pure New Zealand wool, these eco-friendly balls eliminate wrinkles while drying your clothes. Choose from the classic dryer balls or an essential oil set, which add a burst of sunny fragrance to every laundry load.
Originally $19, now $10
The limited-edition Fresh Horizons collection is discounted ahead of summer, and we recommend stocking up with all sorts of sustainable must-haves. Top of our list is this summery set that’s bound to put some sunshine on your sink. Each kit includes a bright yellow glass soap dispenser and aluminum refill of soap in either the flowery “Island Orchid” or clean, dewy “Palm Leaf Mist.”
Originally $58, now $38
Or, double down on a kitchen’s worth of cleaning supplies with this Sinkside Set, which includes two glass dispensers, a bottle of dish soap, bottle of hand soap, a tray, and a walnut scrubber sponge. Available in both “Island Orchid” and “Palm Leaf Mist.”
Originally $10, now $7
Transform your home into a tropical island getaway with this refreshing candle. It’s made from a soy-wax blend and totally natural fragrance to give you 40 hours of clean, safe burn time. And it smells absolutely magical, with notes of “sun-kissed orchid & frangipani and fresh-cut tropical leaves.”
Let’s face it. Some days are just better spent outdoors, basking in the sunshine and getting a good dose of fresh air. Take advantage of beautiful sunny days by creating DIY outdoor projects to turn your backyard or front yard into the one you’ve always wanted.
Upgrade your garden and landscape with a few DIY outdoor projects for your patio! This roundup contains DIYs for outdoor pergola curtains, a treehouse, and so much more!
Take inspiration from Yard Crashers and begin building your dream yard. Don’t have good soil in your garden? No worries, a raised flower bed can still turn your flower dreams into a reality.
Give a unique spin to your garden with these DIY outdoor projects. I bet the neighbors will love this topsy-turvy TerraPot planter if you place it out on the patio or in your front yard.
Some of these landscaping ideas will turn your backyard into a fairy tale. By the way, who knew these mushroom-like stools could be made from log stumps?
Turn leftover pallets into outdoor furniture with a few of these DIY outdoor projects. Before you start, don’t forget to double check if your pallets are safe to use.
Increasing your curb appeal doesn’t have to mean you'll break the bank. These budget hacks are all you need! Check out this list to see more options for flower displays and eyesore camouflage ideas.
Make the most of the sunny day with these yard projects. I’m sure your kids will love lounging around in these mini water blobs! Try your hand at making bigger ones for the adults, too.
I love this roundup because it involves a bit of upcycling to create these backyard projects. This is a double win: you are not only reducing and recycling your waste, but you are also creating something new for your home. Score!
Save on electricity bills by opting for a few solar panel options. I’ve even thrown in a bonus guide for you to DIY panels to power up your gadgets.
Make your front yard stand out with these DIY outdoor projects. Whether it’s a dual purpose number sign or a few tin can lanterns lined up along your home, these projects are bound to make the neighbors take a second look.
Crazy about macrame? DIY a macrame lawn chair today! I recommend using 200 yards of macrame craft cord for this project. If you’d like, you can also opt to have 2 colors — 100 yards for each color.
This DIY floating deck is a great spot to unwind after a long day. Remember to keep the ground leveled before constructing your deck. Need extra tips? Use a mattock to help in removing the grass and an iron rake for pulling out large rocks found in the soil.
Stay outdoors more this #Spring! So get one with your #garden deck #repairs with this guide! https://t.co/9HF4UUj0O4 pic.twitter.com/IwKmT2bU9A
— DIY Projects (@DIYProjectsCom) April 7, 2017
It takes only 4 steps to create this DIY concrete walkway. Start by prepping your area and adding gravel in. Then, place your concrete mix in the mold. Lastly, spray with water to prevent the concrete slabs from cracking.
Are you a huge fan of the Lord Of The Rings franchise? You may want to check this DIY. Remember, it's super important to seal the hobbit house. You definitely won’t want any moisture seeping in through the roof.
Relax on an aesthetically pleasing log lounger after a hard day’s work. This tutorial uses 16 log pieces to construct its lounger, but feel free to add or remove log pieces as you deem fit.
This two-tiered backyard fountain is a great way to add water therapy to your yard without having to overhaul a big space. By the way, don’t forget to place the pumps and tube inside the pot first, before putting the rocks.
One of the things I love the most about these DIY crafts is how they reuse old containers such as yogurt cups and glass jars. Just remember to clean them thoroughly before using.
Homesteaders do almost everything on a DIY scale. They make their own fire, build their own water pumps, and sometimes, even construct their own ovens. Check out how self-sufficient homesteaders do it by looking at this list.
One of the important steps in making these stepping stones is to coat the mold with mold release before pouring in the concrete mix. Trust me, making sure the mold release is in all the crevices will make the DIY project so much easier.
Watch birds flock to your garden when you create a bird feeder. Be sure to place the holes on opposite sides of the bottle when drilling. These will ensure your dowels will be leveled for the birds to perch on.
Always wanted a pond in your garden? Well, now you can DIY one! Don’t forget to place rocks around your liner before pouring the water in. Doing so will prevent your liner from collapsing into the hole you’ve dug.
Turn your gardening up a notch with a DIY potting bench project you can take advantage of. Once you’ve built the potting bench, paint on a coat of varnish to help preserve the wood.
There’s nothing I love more than relaxing in a hammock with a book in hand and a cold drink nearby. Check out some of these hammock stand options you can choose from.
Love being around nature? Decorate your backyard with more planters this weekend. I especially love the ones that display all my favorite herbs.
My kids love running around barefoot in the yard, so I’ve set up a little spot where they can wash their feet before going inside the house. But that's not the only thing you can do recreate for your kids, this list covers crafts and redecorating projects too.
Entertaining will be a breeze with this fold-down hanging bar. This project not only doubles as a bar where people can mix and grab their drinks, but it works as a storage compartment for the different liquor bottles, as well. Just make sure the roof is screwed on tight and sealed to prevent moisture from seeping in.
Have your cushions ready before making your outdoor sofa. That way, you can adapt the measurements of your sofa lengths accordingly.
Who knew you could make wind chimes out of spare utensils? Want more design options? Check out this list to see tutorials for clay and seashell choices.
DIY a tool shed for your backyard in 5 easy steps. When building the frame for the shed, Dave suggests making the floor frame first. That way, it’ll be easier to connect the other pieces of the frame together.
Our family went through a phase where we were obsessed with biking everywhere, which led us to making this DIY bike stand. Don’t forget to leave spaces in between the bikes. A measurement of at least 16” would do.
Keep scum out of your pond by placing a DIY filter. By the way, it’s really important to seal the drain on the inside when attaching it to the bucket. Don’t skimp on the sealant either. You’d want a good amount to make sure there won’t be any leaks.
Hosting a barbecue soon? Impress everyone with this temporary brick grill. Simply build the bricks to fit your grill and place the coal inside. That’s all it takes.
Can’t get enough of beautiful succulents? Line your patio with all your favorite plants! I’ve got tons of tutorials for you to choose from!
Make your patio look prettier without spending too much on these DIY outdoor projects! This farmhouse table, for example, simply makes use of leftover pallet pieces taken apart to make the tabletop.
This outdoor pizza oven will be such a hit with your friends, you might be hosting pizza parties every week. Start by making a strong and structured base using cinder blocks. Once that’s done, you can then place your bricks on top.
Give your plants an interesting spin by placing them in wine bottle planters. Cut the bottle by placing a strip of tape on it, then score the bottle with a glass cutter. Once ready, place the scored area above a flame. Dunk it in a bucket of ice water after.
Make use of your empty wine bottles by making a few DIY crafts. I fully recommend DIYing these succulent planters. The wine bottle base makes for such a unique planter, don’t you think?
You’d be amazed at the number of DIYs you can make with a 55 gallon drum. If you’re keen on reducing your water usage, I suggest pressing play on the video to learn about rainwater collection.
Bring life to your used bottles by turning them into DIY planters. Remember to have evenly spaced holes on the bottom of the bottle. If your bottle has raised ends, simply place a hole in each of the ends.
Who knew glass bottles could end up as pretty home decors? I’m a sucker for pretty things so this glass bottle turned vase is one of my favorites. I have a couple of them placed on my backyard coffee table.
There are a ton of DIY outdoor projects when it comes to reclaimed wood. Personally, one of the things Dave and I love doing is etching our initials on the wood. It gives our project a more personal touch.
These wood projects are sure to give a nice rustic touch to any backyard. Personally, my favorite has to be the folding gardening table. It’s such a space-saver, making it perfect for small yards.
Turn oil lanterns into electrical ones. To be honest, I think this is one of Dave's personal favorites. Here are a few other DIYs perfect for the men in your life!
Love how simple and chic country pieces can be? Check out this list for a few DIY outdoor projects. They’ll definitely make you feel like you’re in a lovely country home.
This moss graffiti is an enchanting piece of artwork sans harmful chemicals and toxins. By the way, if you don’t have buttermilk, you can simply swap this out with some yogurt.
Upgrade your cooler by giving it a rustic twist with some pallet boards. Don’t forget to drill the pallets to the cooler lid. Doing so will help hold the lid in place.
Your kids will love looking at the birds that visit your homemade bird feeder. In case glass isn't your thing, try making a feeder from a simple sports drink bottle.
DIY a compost tumbler for your sustainable lifestyle. All you’ll need to start is a 15-gallon trash can, some rope, and a drill to make holes.
Did you know a compost bin works wonders for a garden? This tutorial uses 5 pallets of the same size, but if you’d like, you can choose to use a smaller amount for a smaller frame.
Cool nights spent outdoors are made cozier with a stone fire pit. Begin by removing the sod of your fireplace. To do this, make an outline using your bricks and trace around them to get your markings.
Looking for more fire pit ideas to choose from? I’ve got you covered! Check this out for options using concrete, an old chimney, and even an old washing machine drum!
Keep toasty and comfortable with these fireplace options for your backyard. On a budget? One of these DIY options will only cost you $30!
You and the family will have a blast roasting marshmallows in your new fire pit. It's important to get the concrete into all the nooks and crannies, so make sure to push down as you pour the concrete in.
Wine lovers unite! I've got 3 different DIY outdoor projects to turn your favorite bottles of wine into lighting fixtures for your backyard. By the way, I think these will look cool displayed out in your front yard, too.
This fence can serve as a backdrop for the backyard with its beautiful lights. By the way, the secret in making sure the jars don’t fall is to tighten the zip ties around the mason jars.
Make your backyard luau ready with these DIY tiki torches. Don't forget to keep the wick in place with a few pebbles first before pouring your tiki fuel in.
Light up your backyard with these outdoor lantern ideas. The best part is some of the materials might already be in your home, just waiting to be put together in a DIY project.
This wooden candle holder helps a lot when it comes to a backyard’s mood lighting. I’ve actually placed mine as a centerpiece on our coffee table out on the patio, and it gives out a nice warm light in the early evenings.
Almost everyone gets excited whenever they see our Jenga set. You may need to do a bit of sanding for this project though to ensure no one gets punctured by a splinter. To make things easier, grab an orbital sander. It’ll make the minutes fly by.
Have some fun under the sun with these outdoor games. They’re bound to keep you and the kids occupied for hours on end!
Looking for more family games to try this weekend? This list features a few old time favorites you can teach your kids to play. It'll give you a chance to reminisce the wonder years, as well.
Let the family bond over a good old movie, one from your backyard that is. Make sure to use a thick fabric for your movie screen. The thicker the fabric, the better the movie experience.
Your little ones will love making these fairy gardens. You can even have them put in old toys they don’t use anymore to decorate the fairy garden.
Why buy an outdoor speaker when you can make one from scratch? This DIY even lets you upcycle your old MP3 player’s speakers, bringing the cost down even lower.
Need some inspiration to help decorate your corn hole boards? Here’s a roundup just for you! My family’s favorite is the Harry Potter-inspired design for a team Gryffindor vs. team Slytherin match!
Give your little pets some love with these adorable DIY outdoor projects. My favorite’s the DIY teepee, only because it’s so cute whenever our dog sticks his head out from under the covers!
A DIY sandbox is one of the ways you can bring the beach to your kids. Don’t forget to give them little toys like a bucket and a shovel to make sandcastles with.
Dave and I treat ourselves to a little spring DIY whenever we're done spring cleaning. We can’t help it when it comes to DIY outdoor projects. Seeing our dream home materialize in front of our eyes just makes us so happy!
Dave loves this rolling island because he usually hosts grill nights with his buds. Wondering what other DIY outdoor projects you can do this summer? Check this out!
Show off your patriotic side by throwing a 4th of July party! These tips and tricks will help you throw one of the best parties ever!
Bring out some spooktacular fun with these Halloween decor ideas! These DIY projects will definitely make your house trick-or-treat ready!
Looking for more DIY outdoor projects? Check out this super cool bread oven!
And there you have it! Now, you’ve got the ultimate list for all your upcoming DIY outdoor projects! I sure hope these projects help give you and your family more reasons to enjoy sunny days out in the yard.
Let us know your favorite DIY outdoor projects by leaving a comment below!
Prepping for a summer barbecue? Find out which fuel you should use for the grill!
Stay connected with us on Facebook, Twitter, Pinterest, and Instagram!
]]>Storing keepsake papers, awards, report cards, artwork, etc. can become so overwhelming as a parent. Ideally, you’d like to keep everything, but realistically that’s probably not going to be possible… unless you make a school paper organizer! This way you’ll be able to hold everything in one place.
I’d like to say that I’m an organized person, but in all honestly, I’ve always struggled with paper clutter and knowing what to do with my children’s “stuff.” For instance, I have papers stashed in my office, the kitchen, their rooms, and even the garage.
With that said, I’m working on this paper storage project to get myself motivated to identify the BEST pieces to hold onto, and so far it’s working!
This easy filing system keeps only the very best memories of each school year, and stores them all together in a plastic hanging file bin for each child. This school paper organizer solution has been such a helpful idea for me, and it’s working out great for our family!
I’m sharing these FREE printable labels and cover sheets to print and organize a hanging file bin for your kids, too!
1
Fill out the hanging file cover sheets for each grade including year, teacher, school, etc., and attach a school photo for each year. Glue or tape to the front of a hanging file.
2
Attach labels for each school year to file folders. If desired, you can create multiple file folders for each year and separate them into different categories such as schoolwork, artwork, awards, etc. File papers according to each grade level.
3
Label the bin with your child’s name. Feel free to use a marker, or save this blank label with a school supply border and open it in an image editor to add text. I used PicMonkey.com, an online editing tool, to add text to images. The font pictured is called Yesteryear.
Honestly, I wish I would have done this classroom paper organizer years ago when my first child started school. I love looking back at all my kids’ special writing assignments and memories, and I know that they will too in the future!
But finding a robust commercial vacuum cleaner that lives up to its promises can be more difficult than vacuuming all the pet hair off your favorite area rug! Don’t worry. We’re going to cover all the ins and outs of heavy-duty vacuum cleaners to ensure you find the best one for your commercial needs.
Why does your business need a heavy-duty vacuum cleaner, you may ask? Well, imagine this: it’s a busy workday, and your trusty little home vacuum is huffing and puffing, struggling to clean large spaces and handle the tough cleaning task that a bustling office or storefront brings. Clearly, you need a heavy-duty upgrade!
Regular vacuum cleaners are great for domestic cleaning, but when it comes to commercial cleaning, they may require more effort. Why? Because commercial spaces deal with a heavier influx of dirt and debris. Commercial vacuum cleaners are designed to be a thorough, long-lasting solution for spaces that see a lot of action. They not only ensure deep cleaning but are also built to last, thanks to heavy-duty plastic and other robust materials.
Commercial vacuums come in different shapes and sizes, from upright vacuums to canister vacuums, cordless stick vacuums, and even backpack vacuum models. Each type has its own pros and cons, so understanding your specific needs and preferences is crucial in making the right choice.
When browsing through the seemingly endless list of commercial vacuum cleaners, you might find yourself feeling a bit overwhelmed. Here are a few key factors to help you narrow down your options:
Now, let’s move to the fun part – the product recommendations! Remember, this is not a one-size-fits-all list. We’ve considered a variety of factors to bring you a selection of vacuum cleaners that offer the best in terms of performance, durability, and value.
Top Pick: Sanitaire Force Upright Commercial Vacuum Cleaner | Runner Up: ProTeam ProForce 1500XP Commercial Upright Vacuum Cleaner | Best Value: Bissell Commercial Pro Upright Dirt Cup Vacuum | |
---|---|---|---|
Design | Upright with 15-inch cleaning path and removable 3.5-quart dirt cup | Upright with dual-motor system and rubberized wheels | Upright with large capacity dirt container and onboard tool storage |
Filtration System | Washable HEPA filter | Four-level advanced filtration with HEPA media filter | Washable filters |
Cleaning Tools Included | Hose, two-piece wand, crevice tool, dusting brush | 12 extra filter bags included | Crevice tool, dusting brush/upholstery tool, extension wand |
Power Source and Cord Length | Corded with 40-foot detachable power cord | Corded electric power source | Corded with 30 ft. power cord that's easy to replace |
Performance on Different Surfaces | Best on carpets, not recommended for hard floors | Effective on both carpet and hard floor surfaces | Versatile with 5-position height adjustment for optimum cleaning efficiency on different surface types |
Certifications | Carpet and Rug Institute certification | Bronze certification from the Carpet and Rug Institute (CRI) | Not specified |
Additional Features | Commercial-grade detachable power cord | Rubberized wheels for easy maneuverability | Affordable price, adjustable height for versatile cleaning |
Top Pick: Our top pick, The Sanitaire Force upright vacuum cleaner, is a high-performing vacuum cleaner designed for comprehensive commercial cleaning. Boasting a Carpet and Rug Institute certification, this vacuum guarantees an exceptional cleaning experience.
This upright vacuum has a broad 15-inch cleaning path, meaning more productivity and less time spent cleaning. It also includes a washable HEPA filter, ensuring superior air filtration and a healthier environment.
Not limited to floor cleaning, this upright vacuum cleaner is equipped with a hose, two-piece wand, crevice tool, and dusting brush, making above-floor cleaning hassle-free. It comes with a removable 3.5-quart dirt cup, bypassing the need for vacuum bags and making maintenance more straightforward.
Pros:
Cons:
Sanitaire Force Upright Commercial Vacuum Cleaner
Runner Up: The ProTeam ProForce 1500XP vacuum cleaner is an ideal solution for the demanding requirements of busy small businesses. This corded, electric vacuum is equipped with a dual-motor system that consistently delivers powerful suction, ensuring optimal cleanliness for both carpets and hard floors.
The vacuum includes 12 extra filter bags, minimizing any interruption to your cleaning schedule. With a powerful 924 W, 10 A, 120 volts motor, this appliance guarantees a high-level clean that reaches even the most challenging areas like under the bed. Its large, rubberized wheels ensure maneuverability across varied floor surfaces.
The commercial vacuum cleaner also promotes better air quality thanks to its four-level advanced filtration system with HEPA media filter. It has earned a Bronze certification from the Carpet and Rug Institute (CRI) for its exceptional performance.
Pros:
Cons:
ProTeam ProForce 1500XP Commercial Upright Vacuum Cleaner
Best Value: The Bissell Commercial Pro Upright Vacuum delivers powerful suction, making it effective for cleaning carpets, bare floors, and upholstery. This commercial vacuum cleaner features a large capacity dirt container, minimizing the frequency of emptying. It comes with on-board tools, including a crevice tool, a combination dusting brush/upholstery tool, and an extension wand. These tools are conveniently stored at the back of the vacuum for easy access.
An added advantage is the vacuum’s 30 ft. power cord, connected using a cord clamp. This design facilitates effortless replacement of a damaged cord without needing costly repairs or rewiring. All of these features and more come at a very affordable price, making it a great value.
Pros:
Cons:
Bissell Commercial Pro Upright Dirt Cup Vacuum
The Hoover Commercial TaskVac Bagless Upright Vacuum Cleaner is a well-thought-out tool for small business owners who want to maintain their spaces effectively. This commercial vacuum cleaner is equipped with an easy-change brushroll and belt system that requires only two levers to flip for access. At 15 pounds, the vacuum is relatively lightweight, ensuring smooth transport between rooms and up staircases.
The bagless design can reduce maintenance costs, eliminating the need for frequent bag purchases. The machine boasts a 35-foot, 3-wire high visibility cord that makes transitioning between rooms seamless, without frequent unplugging. Included with the vacuum is an accessory pack that contains a 12-inch wand, an 11-inch long-reach crevice tool, and an upholstery/dusting brush.
Pros:
Cons:
Hoover Commercial TaskVac Bagless Upright Vacuum Cleaner
The Prolux 2.0 Bagless Backpack Vacuum Cleaner is the first ever commercial-grade bagless backpack vacuum! It enables you to empty the dust chamber while cleaning, reducing the weight you carry and improving cleaning effectiveness. Boasting a powerful yet lightweight design, this vacuum cleaner delivers 40% more power and weighs 30% less than conventional models.
This vacuum requires minimal maintenance, thanks to its self-cleaning HEPA filter and washable secondary HEPA filter. Its innovative design features a “vortex chamber” that propels dust away from the filter, effectively reducing clogs and prolonging filter life.
Pros:
Cons:
Prolux 2.0 Lightweight Commercial Bagless Backpack Vacuum Cleaner
The Sanitaire Tradition Commercial Vacuum can elevate your cleaning routine. Designed to withstand the rigors of commercial use, this machine’s extended life motor offers over 2,000 hours of robust cleaning performance – five times the lifespan of an average household vacuum.
Its structure is enhanced by a durable chrome hood, while the looped handle increases comfort during use. This upright vacuum simplifies maintenance tasks with its tool-free brush roll and belt replacement, Quick Kleen Fan Chamber, and a metal clip bag release system.
Additional features include a large-capacity shake-out bag that accommodates up to 18 quarts of dirt and debris and a commercial-grade 50 ft. detachable power cord.
Pros:
Cons:
Sanitaire Tradition Upright Bagged Commercial Vacuum
Experience top-notch cleaning with the Oreck XL Commercial Upright Vacuum Cleaner, a professional-grade appliance designed for diverse floor types. It can seamlessly transition from carpet to bare floors with no adjustment required due to its MicroSweep feature. And it’s expertly designed for getting close to cabinets and baseboards, and it fits conveniently under most furniture, clothes racks, chairs, and desks.
The vacuum cleaner delivers a deep clean courtesy of its high-speed roller brush spinning at 5,000 to 6,500 RPMs. The device has a broad 12-inch cleaning path, and an ample 35-foot power cord, and weighs just 9 pounds.
The Oreck XL Vacuum’s thoughtful design also features the ‘Helping Hand Handle’ which eliminates hand strain and a top-fill inner bag that retains maximum power as it fills. Clear, non-marring bumpers and side brushes further contribute to efficient cleaning and protection of furniture and walls.
Pros:
Cons:
ORECK XL COMMERCIAL Upright Vacuum Cleaner
The Kenmore Intuition Bagged Upright Vacuum Cleaner is an efficient tool for small business owners prioritizing clean, healthy environments. This vacuum cleaner offers a ‘Lift-Up’ feature, providing handheld versatility to clean above-ground surfaces and stairs, and No Touch Bag Technology, ensuring hands-free operation and a clean surrounding during bag replacement. The vacuum’s PowerFlow bag chamber maintains robust suction even as the bag fills.
Despite its powerful functionality, this vacuum is lightweight (14 lbs.) and easily maneuverable, thanks to its swivel steering. This ease of use, coupled with adjustable height and LED headlights, ensures maximum cleaning efficiency and accessibility.
Pros:
Cons:
Kenmore Intuition Bagged Upright Vacuum
The Hoover Commercial PORTAPOWER is a compact and lightweight canister vacuum cleaner designed for a flexible cleaning experience. Its unique features make it suitable for cleaning upholstery, carpet, and a range of hard floors including wood, laminate, bare and tile floors.
It features a built-in blower for jobs that require forced air, making it efficient for removing dust and debris. This vacuum comes with an accessory pack which includes a shoulder strap, two chrome wands, a crevice tool, a dusting brush, a furniture nozzle, a rug/floor nozzle, a wall/floor brush, and a cord storage strap.
Pros:
Cons:
Hoover PORTAPOWER Lightweight Canister Commercial Vacuum Cleaner
The Bissell BigGreen Commercial Stick Vacuum is a cleverly designed 2-in-1 device that acts as both a floor stick vacuum and a handheld vacuum. This versatile vacuum is ideal for cleaning a variety of surfaces including carpets, floors, and even vehicles.
Its 22.2V removable Lithium Smart battery can provide you with the freedom of cordless cleaning and an impressive runtime of 45 minutes on a full charge. The vacuum comes with a convenient wall-mounted charging station, ensuring it’s always ready to use.
Pros:
Cons:
Bissell BigGreen Commercial Cordless Stick Vacuum
Once you’ve secured your perfect vacuum, it’s time to get the most out of it. A well-maintained vacuum means a longer lifespan, better performance, and ultimately, more value for your money.
First off, familiarize yourself with different cleaning tools and attachments like the crevice tool, dusting brush, and telescoping wand. These can help you tackle a variety of surfaces – from hardwood floors to carpets and hard floors, and even tricky corners.
Next, don’t ignore maintenance. Regularly empty the dust cup or change the dust bag, and clean or replace filters as recommended by the manufacturer. This not only ensures peak suction power but also prolongs your vacuum’s lifespan.
A heavy-duty vacuum cleaner is designed to handle tougher cleaning tasks, larger areas, and more frequent use compared to regular household vacuums. They feature powerful suction, durable construction, and larger dust capacity, making them perfect for commercial environments.
The frequency of servicing your vacuum cleaner depends on usage. However, it’s good practice to check and clean the dust bin or change the disposable dust bag and clean or replace the filter regularly. Always refer to the manufacturer’s instructions.
Absolutely! A heavy-duty commercial vacuum is a long-term investment. Given the robust construction, powerful performance, and larger cleaning capacity, they offer greater value, especially for commercial use.
Yes, you can. In fact, a heavy-duty vacuum cleaner can do a great job of deep cleaning carpets, hard surfaces, and area rugs at home. However, they may be a bit overkill for smaller, less busy households.
The lifespan of a vacuum cleaner depends on its quality, how it’s used, and how well it’s maintained. With proper care, a good commercial vacuum cleaner should last several years.
There you have it – your complete guide to buying the best heavy-duty vacuum cleaner. Remember, running a successful janitorial business, or simply maintaining a clean, professional space doesn’t have to be a daunting task. The right tools, coupled with the right knowledge, can make the process super easy, and even enjoyable!
YOU MIGHT ALSO LIKE:
Qualify for discounts, special offers and more with a Business Prime account from Amazon. You can create a FREE account to get started today.
Image: amazon
This article, "Best Heavy-Duty Vacuum Cleaners for Your Business in 2023" was first published on Small Business Trends
]]>Our little coat closet has seen a lot of change in the three and a half years we’ve lived here. But, last year I finally installed a DIY built-in organization system, and that has been a game changer for us. The only problem? Pretty shelves only do so much good if the shelves themselves aren’t organized!
A couple of weeks ago, I got sick of the chaos (again), and decided to do something about it. I’m working with The Container Store over on Instagram as an ambassador this year, so I did a ton of browsing and planning over on their website and came up with a plan.
And so far? It’s holding up pretty well!
As we all know, I’m not a pro when it comes to keeping a coat closet organized. But, I have learned a lot of lessons in my time trying to figure it out so far. So, here are five quick tips that will hopefully help you get started on getting yours organized too.
The first (and most important) step to take is to plan out everything you need to store in the closet. Sure, you probably have a general idea in your head of what goes in the space but do you know everything?
I found one of the most helpful steps in the process this time around was to actually write down all of the things we store in here or would like to store in here. This should include the things you don’t technically store in the closet that somehow end up in the closet anyways.
Once you’ve got your list, make a plan. Think about a space inside that closet for each and every category of items. I even took the time to sit down and use Canva to plan out how things would look and fit on the shelves before I even hit the “order” button!
Having a plan is key and you won’t regret taking the time to sit down and plot it all out ahead of time.
When I was creating our built-ins, I planned one shelf for each person in our family. That makes it a lot easier for me to plan and gives everyone a space for all of their random stuff. The boys each have a spot for their backpacks along with a sturdy bin that can hold anything else they want. This usually means hats, books or small toys they don’t feel like carrying upstairs yet, or water bottles. It’s random and I try not to micromanage in – the bin contains their chaos and I don’t have to think about it!
This was a big lesson for me this time around and I think it has made a big difference in how the closet feels! Last time I bought stuff to organize this closet, I used my favorite see-through storage bins. I use them all over my house because I love how easy it is to see what’s inside and find things when I’m looking.
The only problem? They can add a lot of visual clutter to a space, too! In this closet, we mostly know what’s in each bin. There aren’t as many categories as there are in our pantry or the art closet, so I don’t need to be able to see inside the bins. It just stressed me out!
So instead, I opted for bins that would hide the clutter a bit. For mine and Corey’s shelves, I also went with baskets that have lids. We access the things in ours less frequently, so it’s preferable to be able to stack them and keep everything fully hidden away. The boys use their bins on the daily, so they’re super sturdy and don’t have lids on them.
I mean, this tip goes into pretty much every post about organizing, but it’s important so it’s worth repeating again and again and again. I’m a firm believer that storage systems will not last if you don’t use labels. Especially if someone other than you is going to be using them!
Make it so that your family absolutely cannot claim they don’t know where things go. I promise, it’ll make a difference. We’ve got shoe and sock baskets in the bottom of our closet, and each one is clearly labeled with what’s inside. Just adding labels to these baskets increased the likelihood that shoes would end up where they belong by a solid 90%. It was kind of like magic.
It’ll also reduce the amount of times your family asks you “hey where’s X item?” At least, after you show them the label a few times.
A note on this: I also think it’s valuable to spend a little bit of time living with your system before labeling everything. For example, in our closet we have labeled the shoe baskets but the baskets on mine and Corey’s shelves are mostly unlabeled. Why? Because I want to make sure what we have in there works for us first! After we’ve lived with it for a month or two and know we like the system, I’ll go back in and label things.
I think in any organization project, it’s important to remember that what works for one family might not work for another. You could copy and paste my exact entry closet into your home and find it impossible to keep up with. That’s because every family has different systems, needs, and rhythms.
Why is it important to keep this in mind? Because you shouldn’t just go out and buy everything I’ve linked here and try to make your closet look just like mine! It probably won’t work! It’s important that you take the time to figure out what your family needs, how they use your space, and what they can keep up with.
For example – our kids do best being able to toss their shoes in a basket. Maybe you’d prefer shoe cubbies, putting them on a shelf, or keeping them in the garage!
We live in Texas, so we delegate very little space for coat storage. Maybe you need twice what we need. Or maybe you only use your coat closet to store one or two coats per person with the rest kept elsewhere.
My kids come in the front door after school and drop their backpacks in the coat closet right away. Maybe you come in through the garage and a mudroom or wall hooks near that door would make more sense. Or maybe, you need to add hooks to the door because the closet doesn’t have room for a shelf.
You get the idea. Spend some time thinking about your family’s rhythms and systems and make a plan based on how you already move throughout your day. It’ll last a lot longer that way. And finally…
I think this is a key to keeping yourself sane when trying to organize your home. No system is perfect – because your family won’t be perfect about keeping up with it. Over time, various extra things will make their way into the room. Things won’t get put up where they belong, and your pretty organization efforts won’t look so pretty anymore.
It’s impossible to avoid. Just plan for it, accept it, and embrace it. It’s okay!
I generally plan on doing a closet cleanup at the beginning of each season. As our needs shift, it always helps to take a second to reset things. This time, I packed our winter gear up high, cleaned out coats we don’t need anymore, and made a little extra room for sunglasses, water bottles, and pool gear. Before school starts, I’ll take a second to remove all of the summer chaos and leave more room for backpacks!
Going into an organization project knowing that you’ll have to touch it up on occasion makes it less painful when you have to touch it up. I don’t think there’s a family on the planet that keeps up their coat closet organization perfectly all the time. I promise.
Here’s a look at everything I used in this closet. It’s only been a few weeks but so far I’m thrilled with the new setup. The kids are keeping it better organized than they ever have, and I don’t find myself cringing at it when the door gets left open. It’s all so pretty!
The post Entry Coat Closet Organization (Tips & Tricks) appeared first on Love & Renovations.
]]>Do long summer days have you running out of ideas for how to entertain your children? Do your kids ever complain about being bored? Maybe the answer is to put them to work, because believe it or not, kids can organize!
When it comes to getting organized, children may seem like more of a liability than an asset. While kids can certainly be “contributors to the chaos,” they can also be helpful in establishing order. Of course, very young children have limited attention spans and skills, but it is all about matching the task to the child. It also helps to be very specific, with small, discrete little projects. For instance, rather than telling kids to “clean up their room,” try making a game of “let’s gather all the shoes in the house and find a place for them to live. You might also want to put on a fun song or set a timer. Additionally, offering an incentive (e.g. an ice cream, a trip to the park, etc.) can make tasks appealing and fun.
Here is a list of ideas to consider for a rainy (or steamy!) day:
Want to go even further? Why not set your kids off on a Decluttering Scavenger Hunt?
Do you think kids can organize? Do you have ideas to add to this list?
The post Kids Can Organize first appeared on The Seana Method Organizing & Productivity.]]>Commercial ice makers can produce large amounts of ice in short periods of time, as well as store the ice and keep it cool.
A commercial ice maker can range from hundreds to thousands of dollars, and you might be wondering if it’s something you really need. Here are some benefits to having a commercial ice maker in your business:
Top Pick: VEVOR Commercial Ice Machine | Runner Up: Manitowoc Air Cooled Undercounter Ice Machine | Best Value: Foster Commercial Ice Maker | |
---|---|---|---|
Ice Production | 110-120 lbs/day | 132 lbs/day | 350 lbs/day |
Ice Storage | 33 lbs | Not specified | 265 lbs |
Ice Cycle Time | 8-15 minutes | Not specified | Not specified |
Material | Stainless steel, food-grade PP | Not specified | Stainless steel |
Features | Adjustable and removable feet, 2 water filters, drainage pump, control display | Small footprint, forward sliding bin, pop-out air filters, multiple cube choices | Quiet operation, air cooling system, water filter |
Benefits | High production, easy control, various adjustments | Easy access and maintenance, flexible placement | High production and storage, perfectly shaped and diced cubes, quiet operation |
Warranty | Not specified | Not specified | 1-year warranty |
Price Range | $$$ (Top Pick) | $$ (Runner Up) | $ (Best Value) |
Top Pick: Our pick for the best commercial ice maker is this model by Vevor. This commercial ice maker can produce 110-120 lbs of ice cubes per day, with an 8- 15 minute cycle time, and has a 33 lb capacity ice storage bin, ensuring you never run out of fresh ice.
This unit is made from stainless steel and food-grade PP material. Features include adjustable and removable feet, 2 water filters and a drainage pump, and an easy display where you can control the temperature, timer, ice thickness, etc. If you are a busy business with a big demand for ice, this ice machine may be the right one for you.
VEVOR Heavy Duty Stainless Steel Commercial Ice Maker
Runner Up: This ice machine by Manitowoc can produce a large amount of ice with a small footprint. It has a smaller size, allowing it to go neatly underneath a counter and a forward sliding bin for easy access and pop-out air filters for easy maintenance.
This ice maker has a 132 lb production capacity, and you can choose between full cubes, half cubes or regular dice cubes.
Manitowoc UDF0140A NEO 26″ Air Cooled Undercounter Dice Cube Ice Machine
Best Value: If your business needs a lot of ice, check out the Foster Commercial Ice Maker. This quiet operating automatic modular ice machine produces up to 350 lbs. per day and has an ice bin that can hold up to 265 lbs.
It promises perfectly shaped and diced cubes and quiet operation. It has an air cooling system and a water filter and is backed by a 1-year warranty.
Commercial Ice Maker by Foster with 235 lb Storage Bin – Stainless Steel
This stainless steel ice machine by Euhomy fits a variety of spaces, including under the bar counter, in the food truck, or coffee shop. It produces 100 lbs of ice daily and has a 33 lb capacity storage bin.
An easy-to-operate LCD screen allows you to adjust the ice size, use the auto-clean function, and more. This ice machine is energy star certified.
Euhomy Commercial Under Counter Ice Maker Machine Stainless Steel
This multi-functional ice machine offers you the availability of making ice cubes and shaved crushed ice at the same time. It can produce 18 ice bullet cubes every 11 minutes for one operation cycle, making up to 44 lbs in 24 hrs. It can then shave those ice cubes in seconds.
A powerful compression cooling system allows this ice machine to have a quiet operation, and it is ETL certified.
SYCEES Countertop 2-in-1 Ice Maker & Ice Shaver Machine
Another one of the smaller machines on our list, Newair’s nugget ice dispenser provides crunchy ice or shaved from your countertop. It is lightweight and portable, while still capable of making 44 lbs of nugget ice per day.
The compact size of this model makes it perfect for smaller store corners, health clubs, bars, or even your home.
Newair 44lb. Nugget Countertop Ice Maker with Self-Cleaning Function
Scotsman ice machines produce gourmet ice using a self-contained, air-cooled condenser. It can produce 64 lbs of ice per day and has a compact design for placement in smaller areas.
This unit features a water quality sensor, user-friendly controls, and a gravity drain.
Scotsman CU50GA Undercounter Gourmet Ice Maker, Air Cooled 115V
Newair uses proprietary Frozen Fall technology in its ice-making process, promising great-looking, great-tasting ice every time. It can produce up to 45 lbs of ice per day.
Versatile controls allow you to choose the thickness of the cube ice and the large viewing window makes it easy to check the ice production progress and capacity. This ice machine uses up to a gallon of bottled water.
Newair Portable Countertop Ice Maker with FrozenFall Technology
This ice machine is equipped with a large 4.3-inch LCD touchscreen which allows you to control the entire ice production process with the push of a button. It produces 60 pieces of ice at a time and 200 lbs of ice per day.
The built-in blue light displays the fresh ice and provides ambiance, and the EMBRACO brand compressor provides strong cooling, low noise, and low energy consumption.
GSEICE 304 Stainless Steel Ice Machine with Advanced Touch Screen, Food-Grade Materials
Costway’s modular ice machine has all the features to meet your ice demands. It can produce 353 lbs of ice per day and the storage capacity reaches 198 lbs.
This unit offers a low-noise compressor, user-friendly LCD control panel, and quick ice-making time. Unlike some modular ice machines, its split design allows you to save space by keeping the ice machine head on top of the storage bin. This machine also has ETL certification and automatic shutoff. It comes with ice scoops, a water supply pipe, a drain pipe, tape, and a water quick connector.
COSTWAY Split Ice Machine Full-Automatic Vertical Industrial Modular
Machines with water dispensers can improve your customer experience by offering fresh ice water. Scotsman ice machines are quite expensive but can be a worthwhile investment and popular addition to your business or breakroom. This one can produce up to 500 lbs of ice in 24 hours.
This machine’s features include removable front panels and storage bin, specially designed contoured sides for enhanced breathability, and durable stainless steel evaporator and exterior panels. In addition, this unit boasts the industry’s smallest operational footprint relative to capacity.
Scotsman Meridian Nugget Ice & Water Dispenser Stainless Steel, 115-Volts, NSF
Choosing the right commercial ice machine can make all the difference in your business’s efficiency, customer satisfaction, and bottom line. To help you navigate this decision, let’s expand on the points already highlighted, adding some practical advice.
When considering size and placement, remember that your business layout and customer volume can significantly influence the type of ice machine you need. Small cafes or office settings may find an under-counter model ideal due to their compact size and low to medium ice output. However, for high-demand environments such as restaurants or hotels, a freestanding unit would be more suitable.
The water source and power requirements are also important considerations. Most commercial ice machines require a steady water supply and an outlet with sufficient power. Ensure your workspace can accommodate these requirements before finalizing a purchase.
Production speed is another factor directly influenced by your customer volume and their ice consumption habits. Here are some typical speed tiers:
Noise level is an important but often overlooked factor. While some machines have noise-reducing components, larger units can still generate noticeable noise. A quiet environment might demand an under-counter or remote-cooled model.
Bin capacity, or how much ice the machine can hold at any given time, directly affects your service capacity. Machines with larger bin capacity allow for less frequent ice replacement, ideal for peak service times.
Regarding use and types of ice, consider your needs carefully. Cubed ice is popular for cocktails, while flaked or nugget ice is best for healthcare or food presentation applications.
Lastly, energy consumption is crucial for ongoing operating costs. Ice machines with energy-saving features such as auto shutoff, sleep mode, or ETL certification can lower your utility bills over time.
Choosing the best commercial ice maker means taking a good look at what your needs are and whether you expect growth in the near future. An ice machine may be a bit more than you need now, but as your business grows you may find your needs change.
This depends on how much ice is typically used. A very busy restaurant that serves a lot of drinks will want a machine that can keep up with the demand.
A well-built, well-maintained commercial ice maker can last for many years. Look for units that are made from durable materials, and for ones that offer a warranty.
Save money on shipping costs for your Amazon purchases. Plus, enjoy thousands of titles from Amazons video library with an Amazon Prime membership. Learn more and sign up for a free trial today.
Image: amazon
This article, "Commercial Ice Machine – Get One For Your Business" was first published on Small Business Trends
]]>
I shot the Nikon Z8! (but I did not shoot the deputy) by RC Jenkins:
My Z8 finally arrived! I’m writing this in real-time over a few weeks as I mess with the camera, so I have no idea what I’m going to write. Weeksauce, bro. This will be all over the place, and I will probably go back and add asynchronous edits that make no sense in context. And I’m guessing it will mostly be a comparison to my Z6 that I’ve had since it launched almost 5 years ago. And everyone likes sprinkles, so I might even sprinkle some Nikon DSLR comparisons in as well.
Here it goes. Dear diary…
I have no idea why I bought this camera. I didn’t actually want it–what I really wanted was a Z6iii. And when it comes out next year, I’ll probably regret buying this Z8 instead of waiting. So please, feel sooo bad for me.
I’ve really liked my Z6 since the day I got it back in 2018. It’s a great camera with versatility that works great for a wide spectrum of use cases. I’ve personally been all over the place in how I use it.
But there have been some things that I found annoying or limiting. It’s ok when it comes to following action like sports or wildlife, but could be better. Autofocus has been good but sometimes less consistent than I’d like–and tracking has been annoying enough to use that I don’t use it. Video is good but could be better when it comes to formats, detail, and malleability (mainly due to bit depths & bitrates)–and I don’t want an external recorder. Buttons are OK but I found myself menu or i-menu diving a decent amount. 24MP is…actually that part is great for me. I don’t actually want 45MP because of lossless file sizes and other speed- and storage- and workflow- related implications. I find 24MP / 6K to be an excellent blend of resolution, speed, and storage. But I’m not going to complain about perfectly oversampled 4K-from-8K video resolution either.
So because we know what we have with the Z8, and the Z6iii looks like it’s not coming out until next year (and we have no idea if Nikon will lean more consumer or pro with it), I just bit the bullet. Nikon won. They got twice as much of my money (and a year earlier) with the Z8.
Let’s see if I regret it.
(Seriously, I have no idea yet).
The first thing I see is the body. I immediately notice the size and weight. It is…not bad at all, coming from a Z6. It’s slightly heavier? Maybe? I can’t really tell, honestly. By Z6 battery is charged, so as I swap it out, I realize the battery feels heavier than the difference in weight between the two.
I remember when I got my Z6, I thought it was so small compared to my DSLRs; but I don’t feel the Z8 is too big in the opposite way. I added a base plate / L to my Z6 because I always swap between handheld, tripod, and gimbal; and I sometimes set my camera down on available flat surfaces, so I hate the little square tripod…squares. And I don’t like my pinky dangling. I like the height of my Z6 after adding the plate.
Luckily, I also bought a Z8 base plate / L bracket. And oh, I should take a picture of this so everyone can see. And ooo the closest camera to me to take a picture of these two is my Nikon 1 V3, which is also great for comparisons. It also shoots 20FPS and ultimately helped develop the Z8.
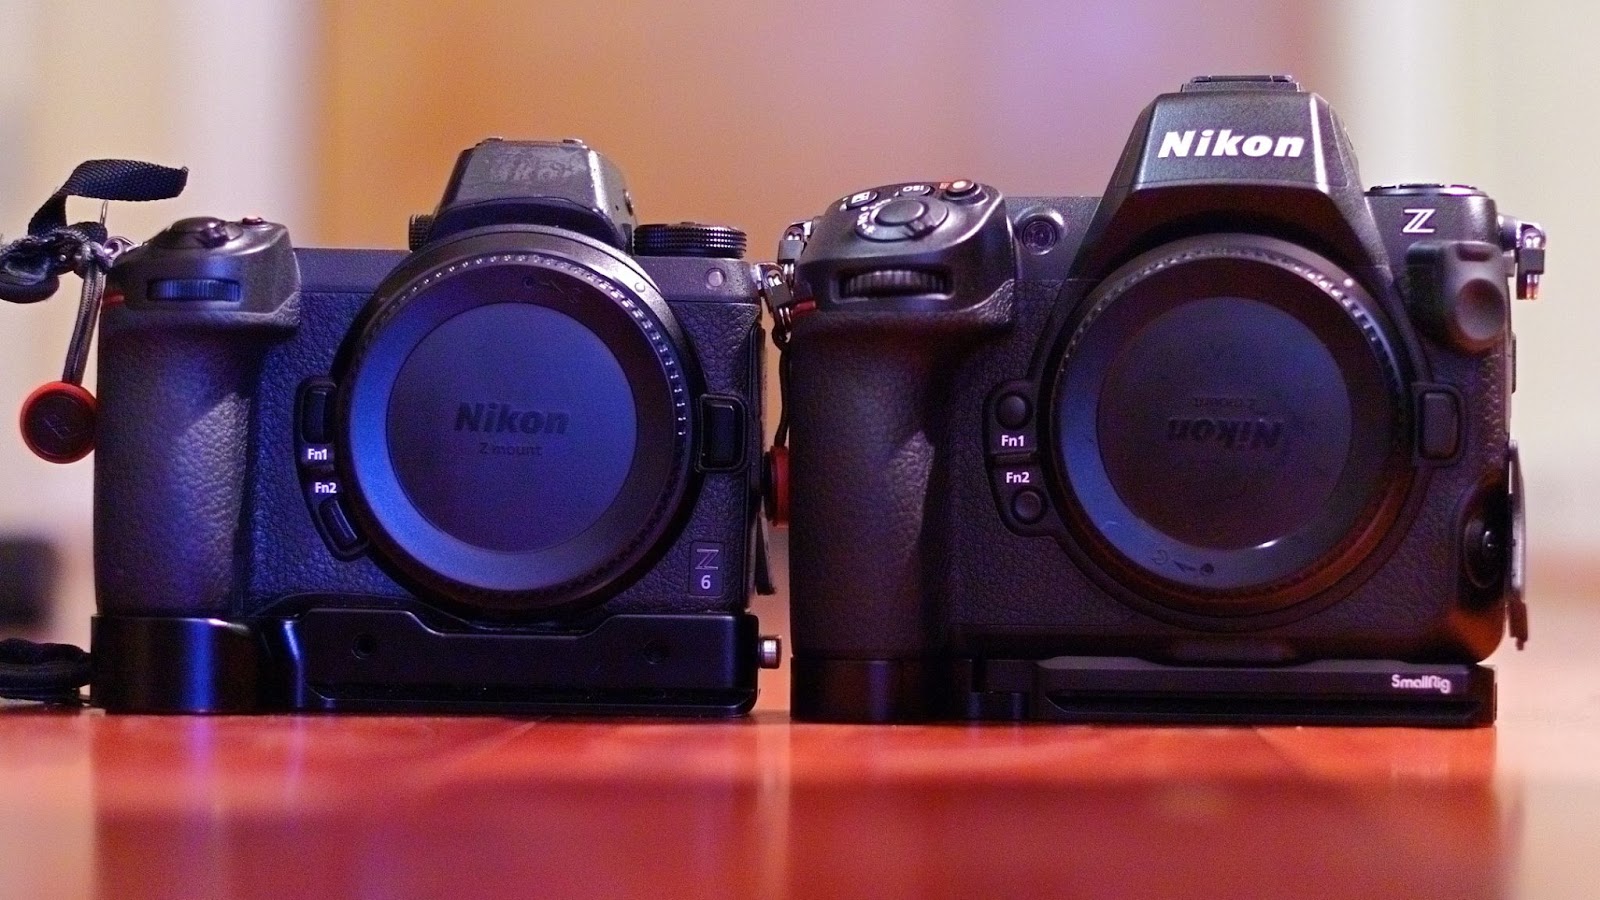
The Z8 has a good grip height–actually quite similar between the two now. The difference in viewfinder height is more major–but as long as it’s not too tall for my bag, I’m not bothered. I am so glad that the base plate is thinner than my Z6 version; and also that the base plate doesn’t poke at my fingers like the Z6 version. We can’t see it here, but the camera’s grip is also noticeably deeper (and/or the camera is thicker). This is good. This feels good. Real good. I like the Z6 height & weight better for travel and packing. But this feels better when I hold it.
Now, I’m pushing buttons. A few minor things:
A reminder: on my DSLRs, the EC button would change EC with the rear dial and metering mode with the front dial, which makes sense since they are related functions. On my Z6, they inexplicably changed it so both dials do the same thing: EC. This is a waste of controls and redundant. (Nikon: are you reading this?)
The Z8 carries on this EC button redundancy rather than function. This essentially means I will never ever use highlight-weighted metering ever again, just like I never did on my Z6. I’ll just use EC or swap to manual ISO in those situations. Not a huge deal, but slightly annoying.
As I’m just feeling around the camera body, I keep swapping back to my Z6 to compare. I notice it’s getting harder and harder to tell which is which. They both feel familiar.
The Z8 body feels more comfortable. But the Z6 buttons and dials feel better–and it just feels like it will be more portable. But the Z8 has more buttons.
I would give the Z8 body a win over the Z6 overall, due to the extra buttons and grip feel.
And now, after using it after a few weeks as my primary camera for a few shoots (alongside a Z6), I like the Z8 body even more in practice.
Durability is important to me, because I don’t want to worry about my camera. I tapped the Z8 like a watermelon a few times. It doesn’t feel like it will break. Test complete.
It feels just as well built as my Z6, which itself is very well built and has lasted me 5 years so far (and still feels new). Both cameras feel much more solid than my old short-lived D810 or my D750 that lasted 10 years. My D750 is lighter, but that’s because some of it’s internals became externals and it also decided to slowly take its rubber suit off over the years:
(That was a joke for humor purposes).
My cameras usually get abused. I will abuse this Z8 too.
In fact, during a shoot a few days ago, I’ve already somehow cracked the screen protector I put over the top LCD (the actual LCD glass & camera are fine). I thought I’d start the abuse early. But I’m still not worried about it at all, and there’s no damage to the camera whatsoever. This camera feels well built.
So in conclusion, the camera is durable enough to last at least 2 weeks.
I load up my custom picture controls, which I might need to recalibrate for the Z8 raws–though at first glance, things look fine. (If that statement doesn’t make sense: different cameras have different raw characteristics–and picture controls provide a path to converting between the raws and rendering, using 16-bit precision between the two. Starting with a different raw and taking the same path can sometimes result in a different render).
Then, I do my usual menu options. The menus and options are much deeper and better than the Z6. This is important because useability is vital to performance.
First, I need to change to mode M. Mode button instead of that dial I never use! Missed ya, buddy. Or did I? I don’t really change modes that often. Occasionally S for the weekend sports or wildlife…but only if it’s really sunny, but otherwise still M and auto-ISO. A for portraits or products…though not unless they’re moving and again in harsh lighting–otherwise M. Do I need this dedicated…? Hmmm…
I think that over time, as technology has evolved, I’ve changed and I’ve learned about what I adjust most on my cameras. Time to explore buttons.
I’m very big on aligning intuition, dexterity, and frequency of use when I assign buttons. For example, on my Z6, I used Fn2 for AF mode, because I changed AF all the time and could hold it with my ring finger while easily using 3 other fingers: my middle finger to change the AF area on the front dial, thumb to change AF mode on the rear dial, and my index finger on the shutter button. But I couldn’t do this with Fn1 (middle finger), where I’d have to move my shutter finger to do the front dial and then move it back to the shutter button. So I’d assign Fn1 to settings that I don’t need the front dial for. On my Z6, Fn1 was set to magnify.
But autofocus already has a button. White balance already has a button. Picture controls already has a button. (I shoot raw but I do like these for previews, starting point for editing, assisting in raw exposures, and for video). Great start to the buttons.
What do I use my extra buttons for? Easy: unlike the Z6, the Z8 allows us to assign AF modes + AF-On to some buttons, which means temporarily changing AF mode only while holding that button. So I’m going to make AF-On into 3D Tracking+AF-On. Maybe joystick press for AF-On (only), since I can move the AF box to where I want and then just push it to focus, in an easy spot for my thumb already. And maybe Fn2 for auto-area in a pinch? Now why do I have a dedicated AF/MF button again? I really missed it on the Z6, but think I might not need it as much now. Can I customize it? Nope. Though I can now also speed up how fast my AF points move with the joystick.
3D tracking is back and it’s brilliant! Just like my DSLRs but better. And much better than subject tracking on the Z6, both in interface and performance. It’s very responsive and sticks like glue. Even for fast and erratic pans or subject movement.
Let’s look at more button customizations. As I said earlier, I don’t know if I need the mode button. Can I customize it? Nope. I’ll rarely–if ever–use bracketing. But I can’t customize it either. Because none of the top 4 buttons can be customized. The trash button is non-functional during shooting, so it’s also a wasted button that should be able to be customized (but isn’t). And as I said earlier, metering mode should be dual purpose with EC like it was on DSLRs, but I can’t make this happen either. There are also a few other buttons that have limited customizability, like the OK button; so this is going to be reset AF point to center. Despite all this, I generally like what I can customize and how little I need to since there are a few extra dedicated buttons for things I would normally assign. I felt like I had to waste Fn buttons on the Z6. On the Z8, I don’t feel limited, but being able to reassign every button would be nice to have. And formatting without obscure menu diving is back! But every time you use it, you seem to end up back at that menu item when you re-enter the menu…
After I customize my buttons, I try them out for a while and see how I like them. Adjust, rinse, and repeat until they feel right. Same for the i-menu–but after buttons. Usually takes a week or two, with time away in-between. If I can come back to the camera and just intuitively push the button I want over time, I’m done customizing.
My biggest fear right now is that my Z6 and Z8 will diverge in how I assign buttons and make it hard to switch between the two. When Nikon releases a Z6iii, I hope they keep some consistency with the Z8 button layout and assignment options.
This is a pointless section. So far, IQ is really good, like every camera today. It’s a modern full-frame. And it’s 45MP, which is far more than the 24MP that I (still) personally find ideal for my own workflow.
Before I even try to use the Z8 in practice, I want to see this whole blackout-free situation. I’ve heard mixed messages on when it works, but I know it must be impossible slower than 1/250.
Before we get into details, the Z8 has a nice viewfinder! It’s very bright and clear and big. By default, it appears to be maybe 30FPS? However–and this is true for all Z’s and perhaps all mirrorless cameras–the moment you start autofocusing, the sensor and viewfinder clearly refresh faster (60FPS or 120FPS). This is optimal, and it’s to avoid wasting battery life and build of heat. And this is how the Z8 works too.
Anyway, let’s do a quick menu dive to see if there are related settings. There are. I’d tell you which ones, but I’d like to encourage you to stop being lazy and read the manual.
Blackout test time. click-click-click…
Ohhh. I see. Easy. And it makes sense why people are writing inconsistent things. Ok so here it goes (and this stuff is not in the manual):
First, let’s talk a bit about the sensor & silent/electronic shutter.
The Z8–like the Z9–uses a stacked sensor that does a full pixel readout at ~1/270 (according to the internet). This is roughly 10-20x faster than most other mirrorless cameras that don’t use stacked sensors. Most mirrorless cameras–including the Z6 & Z7–have full readouts somewhere in the range of 1/10 – 1/30.
But 1/270 is also almost as fast as most mechanical rolling shutters that most full-frame cameras have. And this fact significantly complicates comparisons. Mechanical shutters need to accelerate and decelerate, meaning their speeds–and consequently exposures–are inconsistent within a frame. The top and bottom (during acceleration and deceleration) might expose slightly darker, with the horizontal center of the frame exposing more. And because this involves exposure, this fact also impacts on things like measured dynamic range, shutter lag, rolling shutter effects, etc. So overall, things are complicated, and some measurements that might seem simple are not as easily or directly comparable. Most numbers on cameras are simplified estimated averages.
Also remember that during viewfinder display, the sensor does not do a full pixel readout–it doesn’t need to (you don’t need all 45MP to display a 1.2MP / 3.69 dot / 1280×960 viewfinder). Traditionally, sensors have dropped to a lower bit-depth like 12-bit or 10-bit (if available), and they also line-skip and/or pixel bin, which allows for a much more rapid readout and processing and also saves battery life. For reference, this is how the Z7–which has a much slower full pixel readout closer to 1/15ish–can refresh its viewfinder at 60FPS during autofocus: the sensor is only scanning a fraction of the data.
And aside from the viewfinder, when a sensor today is in the middle of exposure, it cannot actually display an image until after the exposure is complete: each pixel has to finish measuring the light before it reports back. And this means it cannot display a frame in the viewfinder while it is exposing–only after it’s done.
So after all that technical context, how does “blackout-free” work??
It’s a very clever trick by Nikon: the camera consistently and rapidly switches sensor readout modes for the viewfinder in-between the pictures you are taking–and it sends each to different memory and processing streams so that they aren’t slowed down. Nikon’s dual stream controller–which is almost certainly outside of the sensor–is like 2 commanders, alternately telling the sensor to take a shot. It is so rapid that you don’t notice. Since the stacked sensor is fast enough to switch modes rapidly and get ready for the next shot near instantaneously, it will take a 1/240 (or faster) line-skipped exposure just for the EVF, 120 times per second. And it also has another 1/240 left over in-between frames (since 1/120 – 1/240 = 1/240). Because the stacked sensor can also do a very fast full pixel readout in less than 1/240, the sensor has time to take a separate full image exposure in-between the EVF shots before the EVF needs the sensor to expose for the next frame. And notably, the camera can also concurrently perform an autofocus calculation immediately after any of the frames, including the 120FPS frames used for the EVF. In other words, the blackout/exposure is so small, that it’s in-between the regular viewfinder frames.
Conceptually, the blackout-free sensor reads during a single shot would look something like this:
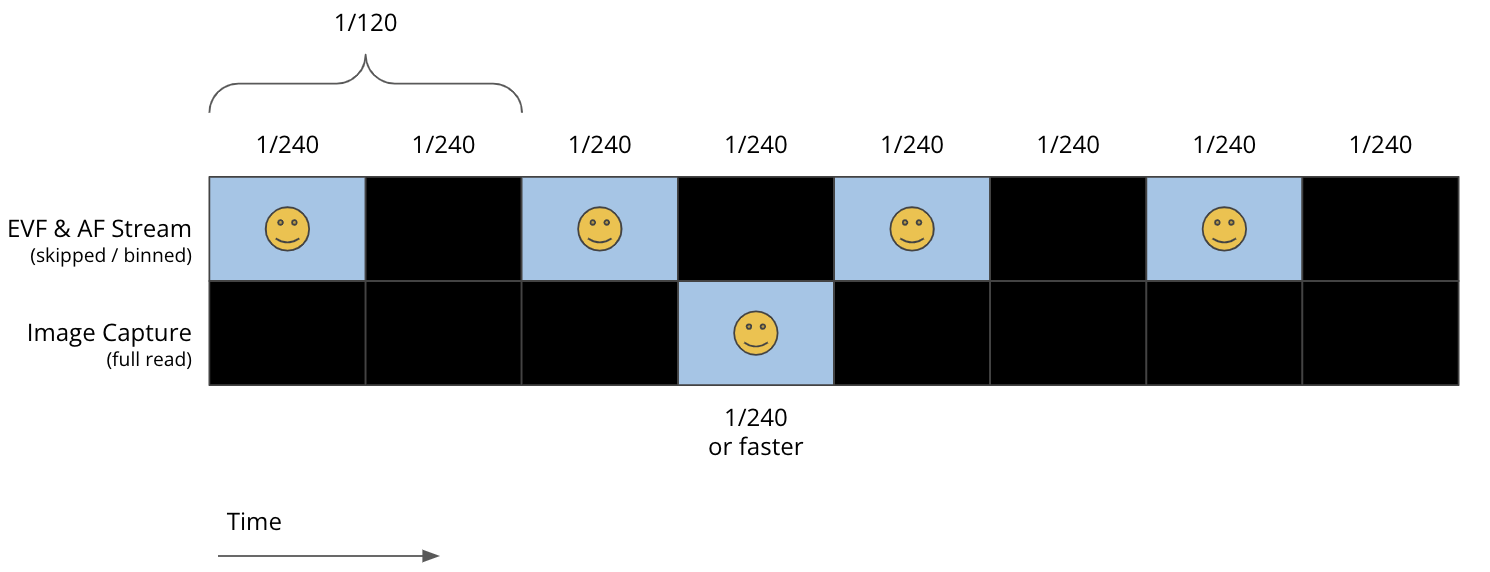
Those black frames in between in the top EVF stream don’t get displayed in the viewfinder. And as a note: the viewfinder frames theoretically don’t even have to be at 120FPS. They could even be at 60FPS or 30FPS, as long as the full exposure has time in-between.
Technically 100% blackout. Practically 0% blackout.
Technically, you never see the moment of the shot that you actually took. You just see the top row. It displays the moment 1/250 (4ms) before and 1/250 (4ms) after; and you see these moments 120 times per second, consistently. For perspective, the blink of a human eye lasts about 100ms; and human reaction time is around 200ms. All this is why it appears blackout-free. And in this case, appearance is what matters. Because appearance is the entire point of a viewfinder.
So that is the “blackout-free” mode; and it currently only works at shutter speeds of 1/250 or faster.
For the next section, I’m assuming setting D12: View All in Continuous Mode is set to On. This setting only seems to apply between (as low as) 1/8 and 1/200. But please, read the manual.
Using a slower shutter speed also seems almost blackout free, but more stuttered? What’s happening? Simple. Between shutter speeds of 1/8 and 1/200 the camera does a hybrid of the above–it switches between showing both the top and bottom rows. Because now that the Image Capture exposure takes longer than half of the 120FPS, the camera cannot refresh EVF in-between every shot. But also, since it’s only shooting those Image Capture exposures at 20FPS, it can do some EVF shots at 120FPS. And as a note: since the image capture frames will also show but take longer, they’ll be delayed. So you are seeing the EVF frames, then the shot you took, then EVF frames, then the shot you took, then EVF frames, etc. This introduces a slight lag and stutter when you see the actual frames, but this effect is not really prominent until slower shutter speeds. This mode is appears to be how cameras like the Sony A1 or Canon R5 shoot bursts.
Once your shutter speed gets below 1/20, you can obviously no longer get 20FPS (and there is no time for any in-between viewfinder frames). So by this point, the camera burst rate slows down and simply displays only the frames you took after you take them, in a pure slideshow mode (just like the Z6 & Z7). So this 1/8 to 1/200 range is a spectrum: at 1/8 you get a pure slideshow; and at 1/200, you get almost blackout free at 120FPS, interrupted intermittently by a slideshow at 20FPS.
I think in theory, Nikon could have kept blackout-free at 30FPS or 60FPS viewfinder. My guess is they didn’t either due to complications in designing the dual stream controller for consistency and low shutter latency or for tracking & autofocus performance.
This “slideshow” mode is how the Z6 & Z7 (ii’s) do it. Except, on the Z8, this is an exceptionally fast slideshow at worst. It feels more like my Nikon 1 V3–shooting super fast with a fast slideshow in the viewfinder and little electronic shutter sounds at 20FPS. Meanwhile, my Z6, displays a more delayed slideshow, and at around half the speed, with mechanical shutter sounds. It appears that not only is the slideshow on the Z6 slower, but the processor might take a moment before it displays, and the sensor might take a moment to switch readout modes.
Earlier, I said setting D12 should be on. If it’s off, instead of the frame you just took, you’ll see the viewfinder but with a blackout frame at 20FPS for each shot you take, roughly equal in duration to your shutter speed. Which brings us to the next section:
Once you get to 1/6 or slower (configurable), the camera completely blacks out the viewfinder during an exposure with no slideshow and then shows a few EVF frames in-between shots. Just like if you had set D12 to off, it no longer shows each shot you just took.
Oh, and then there’s also starlight view, which essentially lengthens the duration of the EVF shutter speed and slows down the refresh rate, so that you can use the viewfinder better in pitch-black conditions (and I haven’t tested extensively, but could even use a different readout mode).
So to summarize:
1/250 or faster: the viewfinder appears completely blackout-free. Better than a DSLR.
1/8 – 1/200: if D12 is on, the viewfinder is partial blackout-free, partial slideshow. The degree of which depends on shutter speed & burst rate. Just like the fastest mirrorless cameras.
1/6 or slower (or 1/200 & slower if D12 is off): the viewfinder is completely black during exposure, and the EVF shows a live view in-between shots. Like a DSLR, but instantaneous for less blackout.
This is a very clever idea by Nikon. This is the best viewfinder experience I’ve ever had on any camera, including both mirrorless and DSLRs.
I’ve now tried this a few times, including at a soccer (/football) match and a few other athletic events. Hands down much better than my Z6 and my DSLRs (that I said I’d still be using but haven’t seriously used in years). It’s easier to follow the action through the viewfinder, quickly choose what to focus on, have the camera focus perfectly, and take faster bursts for longer. It’s also so intuitive–I immediately stopped remembering that my Z6 has blackout/slideshows until I started using it again.
I wanted to spend a lot of time on this topic so that people can understand how to optimize it for their experience. And also so we can think about the possibilities and expectations about how and when this could come to other cameras.
I’m adding in this section after I’ve observed complaints about the buffer and SD card. And what I’ve observed in these complaints is that they often seem to come from a place of not thinking; but rather, perhaps from ease of complaining after drawing extrapolated conclusions from watching limited Youtube test videos without having done adequate exploration on options for solutions in practice. And probably a degree of not understanding basics in how buffers work. But I think there’s more to the story. Sometimes, the solution is up here and not over there. (I just pointed to my brain and then to a YouTube tab, but you can’t see it because this is a written article and not a YouTube video).
I’ve been on the fence with whether I prefer the 2nd slot being SD; but I don’t mind it. While the SD is significantly slower and a 2nd type of card to buy, it is also much more universal and more readily available essentially everywhere. This is important to me since I travel so much and sometimes (for many reasons), I might need to buy or borrow another card in a pinch while out and about. But buffer for continuous shooting is also important. So how do we balance these factors on the Z8?
First, let’s briefly walk through what and why a buffer is. A buffer is just fast temporary memory–when you take a picture, the picture gets temporarily stored in the camera’s internal buffer memory (which is very fast and reliable), and then the camera writes that picture to your card (which is slower than the buffer memory). This buffer allows the camera to shoot continuously for longer–while you are shooting a burst, the buffer images are also being offloaded onto the memory card.
Since these are directly related to buffer performance, let’s look at some file size estimates:
(Note that there are also other options, including an even smaller basic (no star) and Normals, which are halfway between the basic and fines).
That’s quite a range. And let’s also throw up a handful of card rating speeds:
NikonRumors has articles on speed tests that includes more options.
So here are a few observations from these data points:
Multiply each file size you use by 20 (FPS) to estimate the rate at which the buffer will fill (eg. lossless + JPEG-fine* is ~2000MB/s). Look up your card to estimate the rate at which the buffer will empty. And I haven’t done any tests, but I’d assume the Z8 has somewhere around a 1.5-2GB buffer, give or take. The continuous shooting duration or number of continuous burst frames can be calculated by using the size of the buffer, minus input rate (FPS * image sizes in MB/s), plus the output/card speed (MB/s). But this is complicated and not 100% consistent, so tests are usually better.
If set to backup, the Z8 will write both versions of the image to each card and wait for both to be written before offloading the next image. The issue is that when writing images to cards (eg. raw to CFE, JPEG to SD), the buffer will be limited by the slower ratio of card speed to size, reducing the burst speed after the buffer has filled. Frequently, the SD card could become a bottleneck. Note “could”… (…because this is foreshadowing).
There are also numerous buffer tests out there; but they always seem to test JPEG fine* for some reason. And I’m going to challenge this practice. Because years ago, I decided to explore other JPEG options (to improve buffer and file space); and back then, I came to the conclusion that JPEG basic* was fine for backup images during bursts, which is how they are often used. Let’s see if that works for the Z8.
Because on the Z8, a JPEG basic* is still 45MP, and it’s still a 9MB JPEG, which is quite a large image file. And we are exploring this because we might be able to improve the buffer by more than 4x relative to JPEG-fine* when writing to an SD card if JPEG-basic* is sufficient. Or another way to think about this: the ratio of CFE to lossless raw is ~29; and the ratio of SD to JPEG basic* is ~33; so in theory, if shooting lossless raw to CFExpress and JPEG-basic* to SD card, the CFExpress card could sometimes be the bottleneck. And if you want to do even better, take advantage of the camera’s technology: high-efficiency raw to the CFE and JPEG-basic* to the SD card, which will also allow each set of shots to take less space in the camera’s buffer.
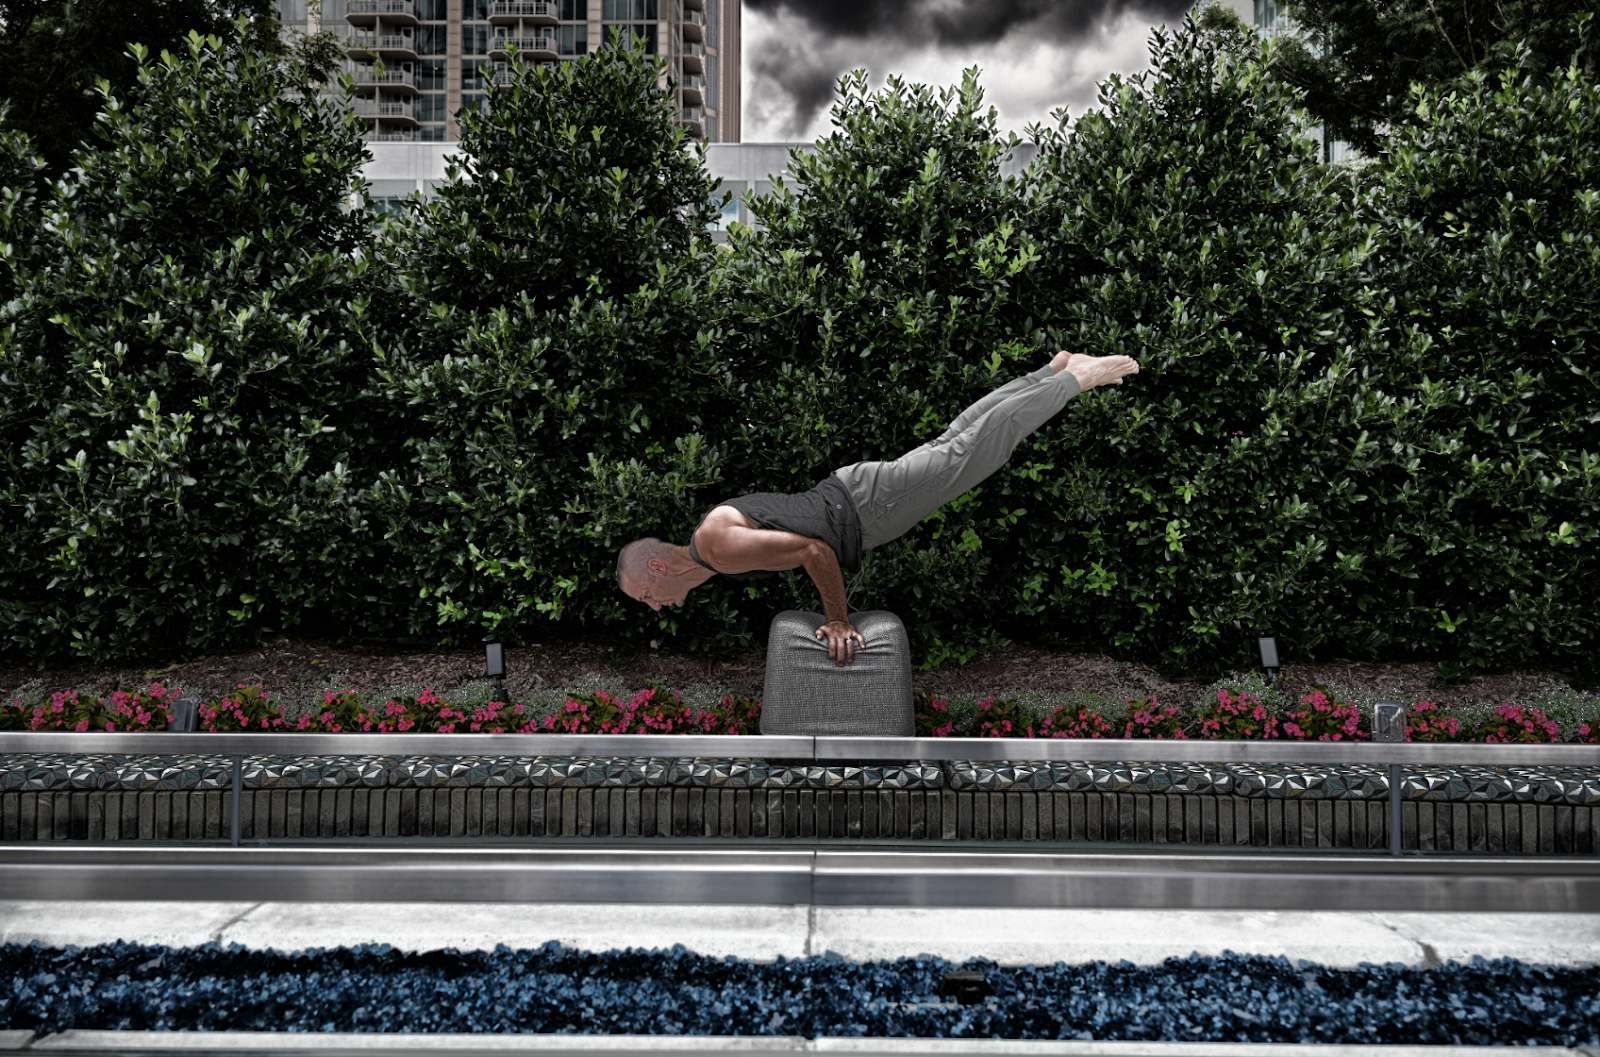
But JPEG-basic*? Eww! Disgusting, right? Let’s just take a quick look at one of these from the Z8 (or rather, a screenshot of a 45MP, unedited JPEG basic* from the Z8):
I don’t see any issues with JPEG compression at this size. Shall we zoom in?
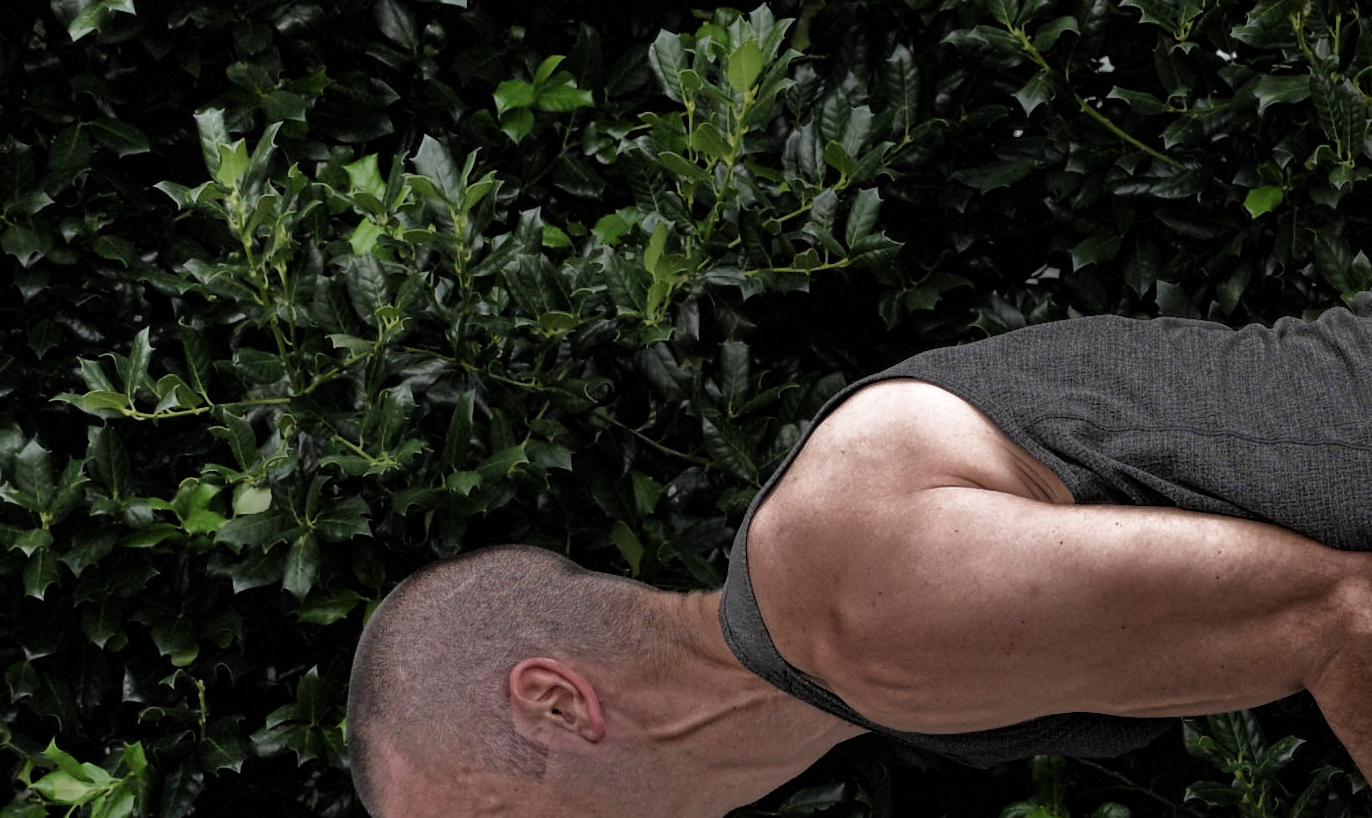
Still looks “fine” to me. Let’s go further:
And now, I can start to see some compression artifacts in the finest details of the hair and in the texture of the shirt. But honestly, it still looks fine even at this level.
But this is a JPEG. What about tonality and malleability? Let’s try tonal compression on this JPEG.
Oh. Seems that the JPEG basic* still has lots of tonality baked in too–likely since this is 9MB and also has 45MP. So now we are pixel peeping and doing extreme HDRs just to see if a JPEG basic* provides terrible, unusable quality from a Z8. And when we actually explore the images, it turns out that it doesn’t.
So now let’s take a step back again, away from the camera specs, and away from the limited YouTube tests. Let’s start using our brains, just for a moment.
Why are we shooting double? Why JPEGs to the SD card and raw to the CFExpress again? The purpose in this scenario is for a backup, in case the CFExpress card fails. Maybe it gets lost, or physically damaged, or corrupted with irrecoverable data loss. Think about the small probability of that happening to your CFExpress card, and where we would be forced to use our JPEGs instead. Because almost always, we are going to throw these JPEGs away–they’ll never see the light of a monitor. My out-of-camera JPEGs usually just take up hard drive space until I go back and delete them.
And after seeing the above examples of both the detail and tonality in JPEG basic* from the Z8, think about what would happen if *gasp* you were forced to use JPEG basic* for that rare occasion of CFExpress failure. Would you die? Would your clients die? Would you get sued because your clients pixel-peeped your 45MP HDR wedding portrait? Would you be forced to quit photography forever, shunned by society for reducing the pixel-peeping quality of those precious memories? Would the memories fade even away?
No. Everyone will be fine. The pictures will be fine too. Basic is fine. Be fine. Be basic. Use JPEG basic* for the SD card if you need both a backup and lots of buffer when you shoot 20FPS continuous bursts.
Or better yet, make some time to assess your priorities and explore the options and test them out; and then pick the one that’s best for your circumstances. Is using JPEG-fine* for a backup that you’ll throw away more important than getting a shot during a burst in the first place? Would JPEG-basic* or JPEG-normal* work better? Should you even be taking hundreds of shots at 20FPS during a prolonged burst for this circumstance? Should you perhaps consider JPEG-basic* as backup for some types of action bursts, while you use raw backups or for slower shooting backups such as landscapes or some portraits? Could this be one reason that settings banks and the i-menu exists on these cameras?
This is what settings options are for. This is what skills and experience are for. This is what brains are for. Use them.
We don’t need to blindly follow someone whining on the internet about the Z8 buffer and SD cards if we can be efficient to do what we need to do. Oh, and speaking of blindly following some random person on the internet, I forgot to actually give you numbers so that you can blindly follow what I write. And why don’t we have fun and go closer to worst case…?
Using an ancient Sandisk Extreme Pro 95MB/s UHS-I V30 SD card that I was surprised I still had lying around and 20FPS on a single burst, I was able to get:
^ Take another look at those card specs. I can buy a 64GB version of that card (new) for $30 today; and a used one for $12. That’s a very slow card by today’s standards. And despite its already adequate performance, I would expect significantly better buffer performance on a modern UHS-II V90 SD card. I wouldn’t even be surprised if I were able to achieve near unlimited buffer for practical purposes. And so I’ve got a newer Delkin Black SD card on the way, and I can repeat the test & update in the comments in case anyone is interested.
But suffice to say: I don’t plan on ever having the buffer–or the SD card–be a problem for me in practice.
This is an important subject, but it’s been beaten to death, and it’s so tedious and difficult to quantify and compare properly that most don’t and just give a subjective opinion or feeling. Here’s mine: autofocus works really well. And the button customization makes it even better. In my brief time with the camera so far, I’ve not had any problems with the autofocus. It just works, and it just works far better than any other camera I’ve ever used. In both stills and in video.
There are the usual weaknesses that almost all mirrorless cameras have today. Horizontal lines (eg. focusing on a horizon) is a (rare) weakness for landscapes–some simple remedies are slightly tilting the camera so that the PDAF system can actually compare parallax; or using the zoom function to force the camera into CDAF. Subject recognition (though less, autofocus) in pitch black environments can be a weakness, as it is on all cameras. Those are the only weaknesses I’ve come across. In all other cases, the AF is just brilliant.
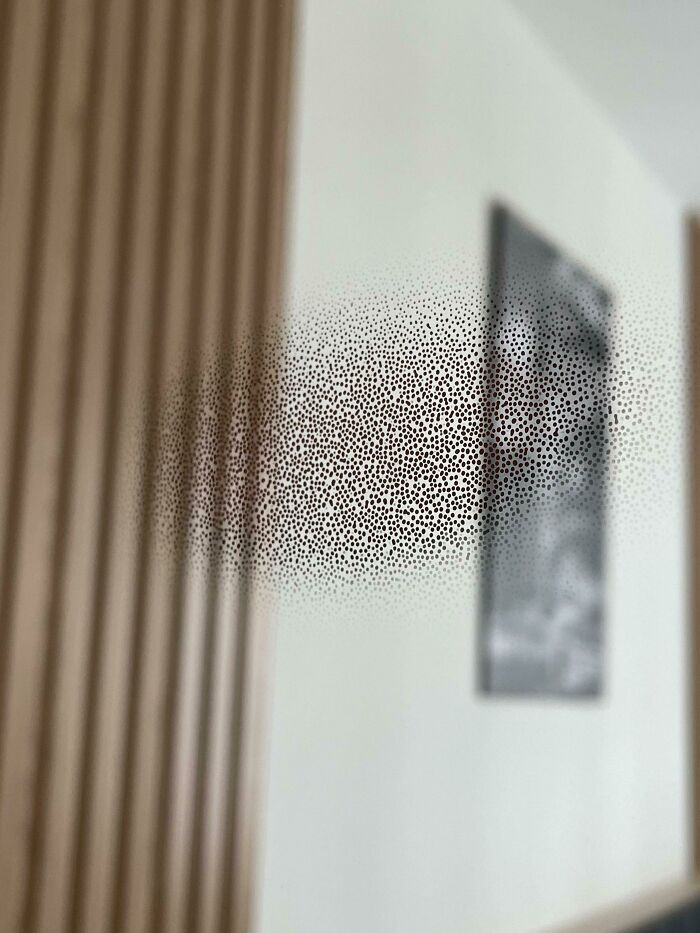
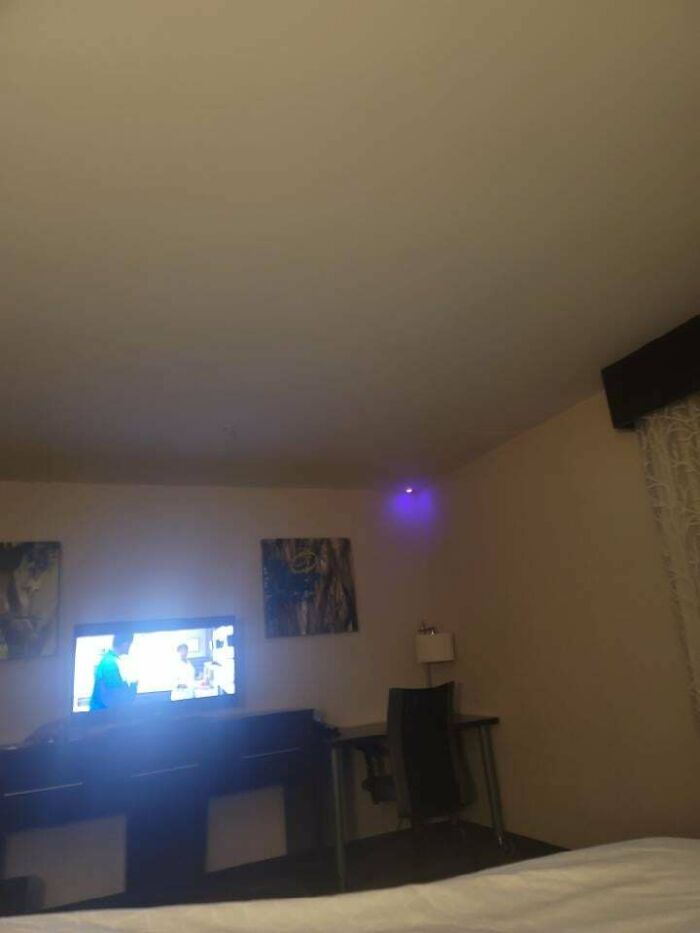
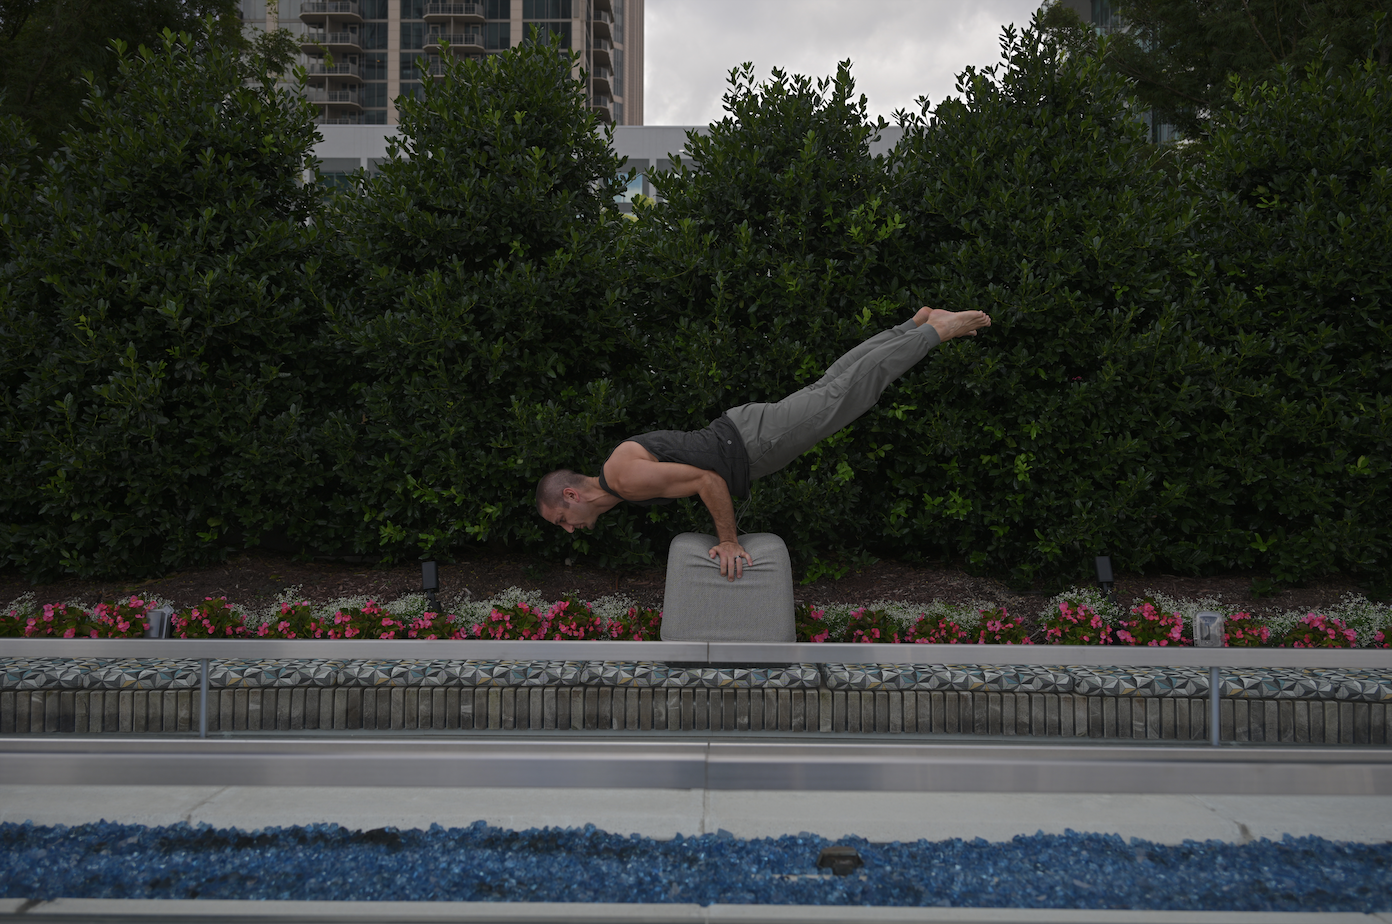
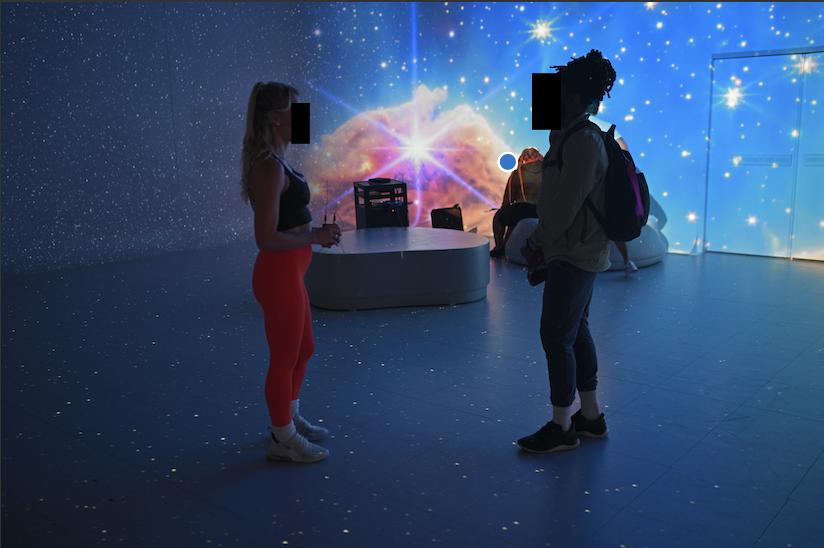
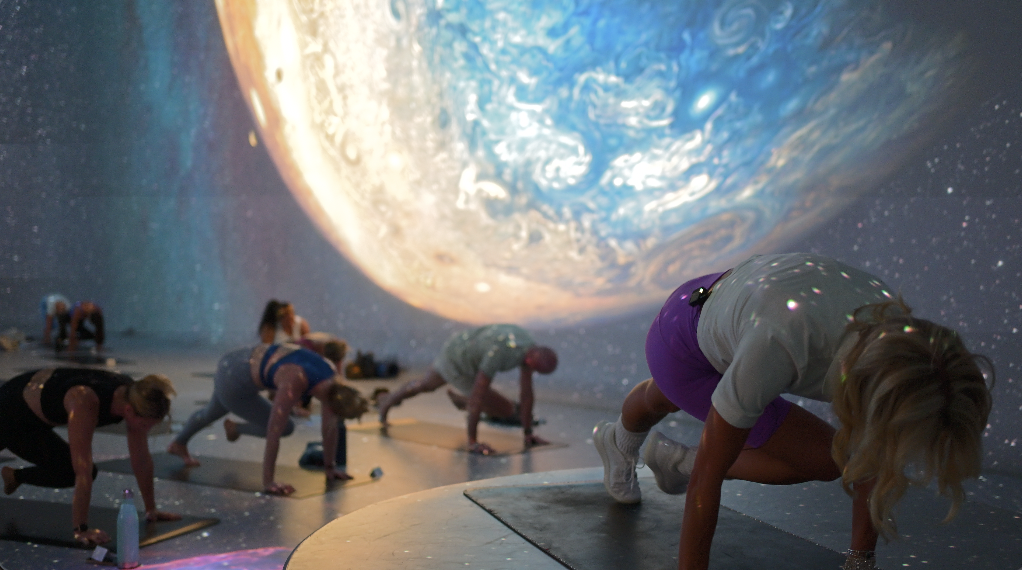
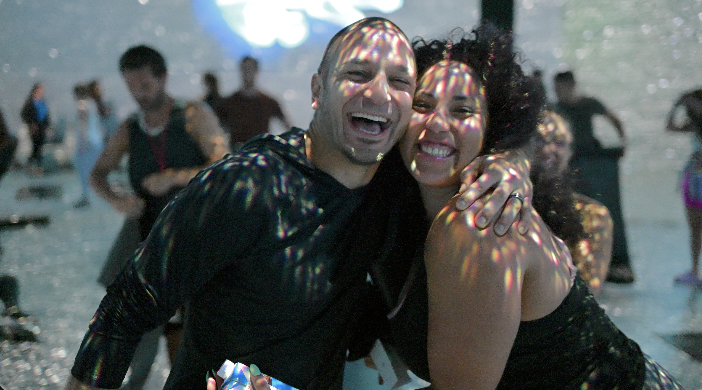
And just to qualify this: I did a few shoots with the Z8 already in some of the worst conditions I could have imagined–moving subjects in the dark where the only ambient lighting was bright movies being projected onto both the subject and the background. This shoot was mainly for video–I was doing a lot of running around with a gimbal, but I took a few stills too,mainly just to test out the camera. The camera sometimes struggled a bit with subject identification (though autofocus was usually fine) from around ISO 12800 through Hi2 (ISO 102400), all while at F/1.8. My remedy when this happened–inconsistently–was either Fn2 (which I’ve assigned as “emergency” auto-area autofocus) or AF-On / 3D tracking to put the box on the subject and recompose–this instantly got me perfectly focused shots. To get a sense of what I mean by these conditions, here is one shot at ISO 12800, at F/1.8 and 1/50. The camera subject detection worked in circumstances like this, but it was more inconsistent than usual, sometimes working, sometimes not.
(And the lighting and projections were constantly changing–just a moment earlier, the scene looked like this):
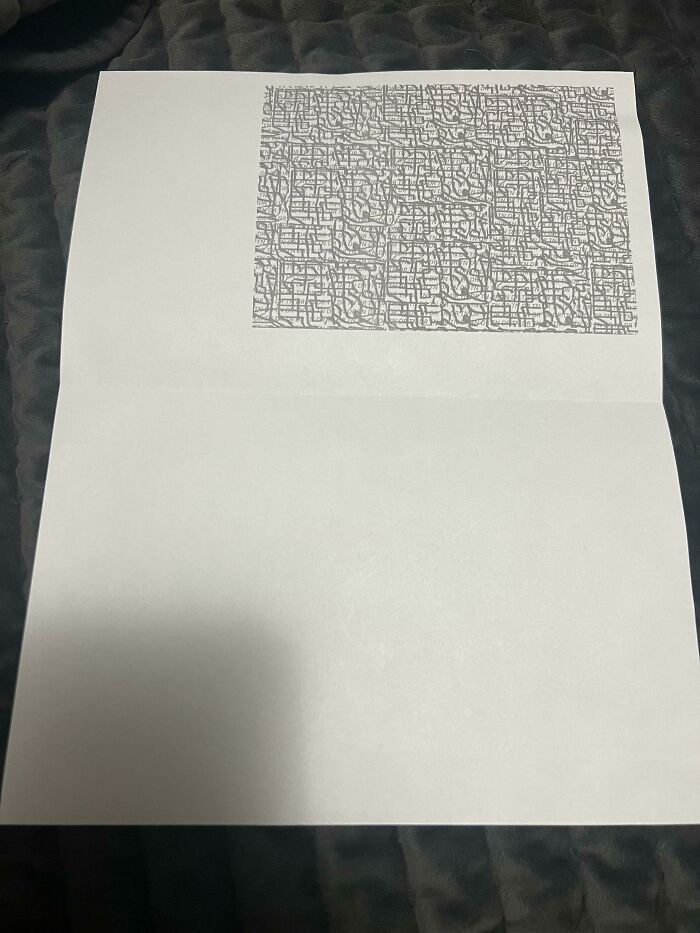
And here are some video screenshots, also using very high ISOs. (It was darker than it appears here–in person, the walls and floor looked almost black):
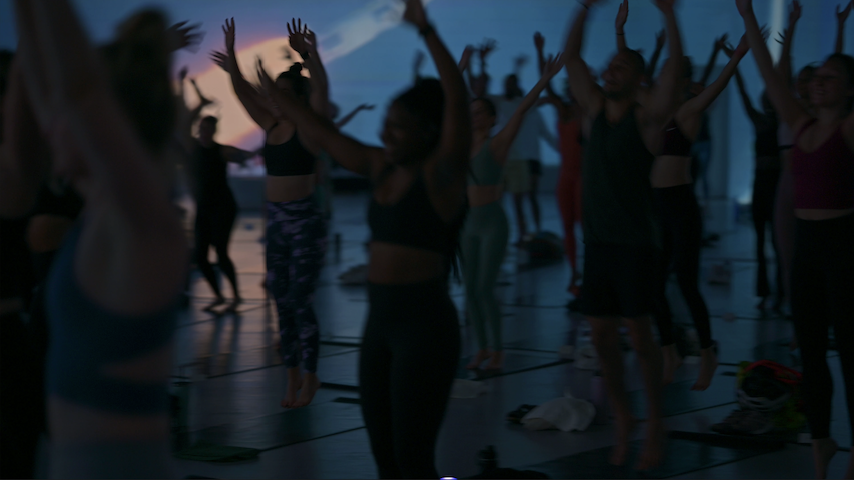
These were challenging conditions, to say the least. But didn’t appear to be much of a challenge for the Z8. (And the Z6 AF did better than I expected, but not as good as the Z8).
I do quite a bit of video and always prefer a small setup, and this was a big factor for me choosing the Z6 and now the Z8. And why I’d have preferred a Z6iii. There are a few things I don’t particularly like on the Z8. Some of these are minor, and some are pretty major for me:
That above list would be up to 66 menu items using Nikon’s current menu system. So Nikon: as you get more serious about video, please split these and give us more resolutions and framerates. Like how other manufacturers do.
There are also a few things I really like about video on the Z8:
Then, there are things that I think I’m supposed to like about video on the Z8 but really don’t care about:
I think if Nikon could specifically add support for 4K DCI and true 24FPS in ProRes HQ 422, it would enable more use cases for anyone with a cinema-type application. The closest thing currently is 4K UHD at 23.976 in ProRes HQ 422–close but not quite there. The camera is technically capable of this–there’s no technical reason it couldn’t be deployed via firmware.
The internal video is clearly better than on my Z6, which is already good. Due to the combination of codecs, bit depths, and oversampling methods, video quality (detail and tonality) is much improved, even just comparing 4K. This makes less of a difference if one is producing video that will be recompressed to be streamed online through something like Youtube, so it’s overkill for that (unless one is doing heavy grading during editing). On the Z6, I was primarily using picture controls to have the camera do most of the grading for me.
In case you’re wondering, I’ll personally usually be using oversampled 4K in Prores HQ 422 (10-bit), which looks stunning. And I’m doing tests on using NLog vs my custom Picture Controls.
In the context of other future cameras, I think Nikon could theoretically offer most of the above–except 8K–in a Z6iii, as long as they choose a sensor that is fast enough and leverage the Expeed 7 found in the Z9 & Z8. I think a practical solution would be a 6K / 24MP sensor that can do 12-bit scans at 60FPS–and the more the better. Everything else–other than rolling shutter–is a processor limit. And the current Z6 sensor is not too far off of this. Using a slower or higher resolution sensor would likely limit the video quality, probably through cropping, line skipping, or pixel binning and would be a downgrade relative to the current Z6’s, so I hope Nikon doesn’t follow Sony in a pointless megapixel race for a Z6-series camera.
I hate the Z8. Because it is so good that I love it. So far, it already feels like the best and most capable camera I’ve ever owned. It feels like it can do anything. Other than size–of lossless compressed raws, Prores HQ 422 video, and slightly larger physical size–I cannot see anything that it doesn’t do far better–or at minimum just as good–as other cameras I’ve owned. There’s not much more to say than that.
I hope we also get some firmware updates for DCI resolutions and true 24FPS framerates. And I hope Nikon keeps up with firmware updates for quite some time. I feel like there are quite a few easy features, capabilities, and refinements that are not bottlenecked by the hardware (like those video modes, menu updates, and button customizations). But even without these, it’s a brilliant offering from Nikon.
It’s hard to imagine Nikon–or anyone–making a “better” camera than this. It will happen eventually…it’s just hard to imagine. For example, it’s hard for me to imagine everyone owning wall-sized 8K TV’s too. But for now and the foreseeable future, I cannot see being limited by the Z8. It’s an absolute technological leap over the Z6 for many of my circumstances. And I’m really interested and excited to see how Nikon leverages some of the Z9 & Z8 in their future cameras.
– RC Jenkins, a formally educated, world-renowned expert in all subjects & internet user.
If you have an interesting idea for a guest post, contact me here.
Nikon Z8 pre-order links:
US | Europe | Canada |
Adorama B&H Amazon Best Buy Pauls’s Photo Service Photo |
Foto Erhardt (DE) Calumet (DE) Foto Koch (DE) Jessops (UK) WEX (UK) Park Cameras (UK) |
Amazon Canada CameraCanada |
The post I shot the Nikon Z8! (but I did not shoot the deputy) appeared first on Nikon Rumors.
]]>By Mary H.J. Farrell
The compact size of stick vacuums certainly makes them convenient. But that’s not their only selling point.
“In the past few years, stick vacuum suction has gotten a lot stronger, especially in battery-powered stick vacuums,” says Frank Rizzi, a senior test lab engineer at Consumer Reports. “If you don’t have a lot of wall-to-wall carpet, these machines can do a lot of cleaning.” (If you do have wall-to-wall carpet, read our article on the best upright vacuums.)
In fact, the performance of stick vacuums has improved so much in recent years that Consumer Reports has made its stick vacuum tests more challenging to bring them more in line with the way we test full-sized vacuums. As their capabilities have increased, so has the toughness of our tests.
That means we are giving you more decision points to help you choose whether you want a stick vac or a full-sized vacuum. As a result of these changes, our pet hair tests are a bit more challenging and we now embed dirt in the carpeting instead of scattering it on the surface as we used to do. And for bare floor testing, instead of combining all the debris into a messy array of cereal, sand, and rice, we vacuum up each type separately. This is good to know if you have a toddler in a high chair! All in all, we’ve made our stick vacuum tests better reflect real-world situations.
Among stick vacuums, cordless models dominate the market. According to the research firm Gap Intelligence, only about 1 in 4 stick vacuums on the market is a corded model and the rest—more than 100 models and counting—run on batteries.
But cordless stick vacs aren’t problem-free. In our exclusive CR surveys, more than 40 percent of battery-powered stick vacs owned by our members developed problems with the battery within the first five years of ownership. Corded stick vacuums do not have this issue, which is why we give separate reliability ratings for cordless and corded stick vacuum brands.
Because of their low ratings for brand reliability, no cordless model earns a recommendation from CR despite scoring well in our performance tests.
Run times for cordless vacuums can vary widely. In Consumer Reports’ tests, some stick vacs lose power in as little as 7 minutes when running on high and others run for an hour or longer on low. Some brands include an extra battery with their cordless stick vacuums so that you can have one charging while you’re cleaning with the other. (You can also buy an extra battery for some models.)
Here is how we conduct our revamped stick vacuum tests of brands including Bissell, Dyson, Hoover, Kenmore, Samsung, Shark, and Tineco.
For Bare Floors
In separate tests, we scatter cereal, rice, and sand on a section of laminate flooring. We use four swipes to remove the cereal and rice and two to pick up the sand. We weigh the vacuum before and after to calculate how much debris was removed.
For Pet Hair
We embed 1 gram of Maine coon cat hair in a medium-pile carpet and then see how many strokes it takes to remove it, with a maximum of five. We note the number of strokes and see how much fur, if any, is left behind on the carpet or in the brush roll.
For Carpeting
We embed 100 grams of sand into a carpet and vacuum the debris on high speed for 16 strokes using a strobe light to highlight the test area. We weigh the vacuum before and after.
Run Time
To test battery life, we run the cordless vacs on high and then again on low until the battery is depleted, then we note the times. If the vacuum has a medium setting (not every vacuum does), we test that too.
Here are the best performers of each type of stick vacuum—corded and cordless—listed in alphabetical order. For all vacuum types, see our full vacuum ratings and recommendations.
Bissell CleanView Pet Slim 28311
The Bissell CleanView Pet Slim 28311 certainly lives up to its name. It is not only slim but also aces our pet-hair-removal test. It’s also top-notch on bare floors and almost as good at cleaning carpet. And it does all this quietly. The cord is 30 feet long, so you have plenty of running room. It didn’t do so well getting the grit out of edges, but its biggest downfall was on the emissions tests, meaning some of what you vacuum up may be released back into the air.
Shark Vertex Ultralight HZ2002
The “Ultralight” moniker for the Shark Vertex Ultralight HZ2002 refers to its light weight (2.9 pounds) when used in hand vac mode (without the stick). The Shark aces our tests for carpet, bare floors, and pet hair, and does a very good job at edges. Although not as versatile as a cordless vacuum, this model has a 30-foot cord that is long enough so you won’t have to constantly map out your electrical outlets.
Shark Rocket HV322
The Shark Rocket HV322 corded vacuum excels in pet-hair pickup but is only so-so at cleaning carpet. It converts to a hand vacuum, and comes with a bare floor tool and a motorized small brush accessory. This model can be stored compactly, and the dirt chamber can be emptied in just one step. Its Overall Score gets a boost from surveyed owners, who gave the brand high marks for reliability and satisfaction.
Shark Rocket HV302
The corded Shark Rocket HV302 delivers on both carpet cleaning and bare floors. It earns an excellent rating for its pet-hair pickup, leaving little fur behind on a grooved tile floor in our tests. Bonus: It can convert to a handheld vacuum as well. And in our member survey, Shark received top marks for predicted reliability and owner satisfaction.
Shark Rocket Zero-M Ultra-Light ZS352
The Shark Rocket Zero-M Ultra-Light ZS352 is no lightweight when it comes to cleaning bare floors and picking up pet hair, earning excellent ratings on those tests. Its one downfall is that it’s only so-so at carpet cleaning. Otherwise, it zips along edges collecting debris, operates quietly, and contains all the dust particles it collects. The cord is 29 feet long, so you won’t have to change outlets too often, especially if you’re working in a small space.
Dyson Outsize+
The Dyson Outsize Absolute+ features a laser light on its soft roller powerhead that shows the dust in its path. The laser feature works best in low light or on dark flooring. Testers especially like the LCD screen that shows battery countdown and monitors performance. An auto mode changes the vac’s suction according to floor type. A few major pluses: A big dirt bin, so there’s less emptying, and two click-in batteries for versatile cleaning and double the run time.
Samsung Bespoke Jet VS20A95923
Bespoke usually refers to custom-made clothing, not vacuums. But you can customize the Samsung Bespoke Jet VS20A95923 to the task at hand, and it converts into a handheld for cleaning stairs and other tight spots. It also has a multipurpose storage tower that automatically empties the bin after each use, capturing the dust in a bag instead of releasing it into the air. The tower also serves as a recharging station. The vacuum features a digital countdown display for monitoring the battery, which can run for almost an hour on low and for 10 minutes on high.
Samsung Jet 90 Complete VS20R9046T3/AA
The cordless Samsung Jet 90 Complete vac scores highly in all of CR’s tests and is more powerful than some of its competitors. Our testers like the sleek and solid stand and the digital display that allows you to check the power level, the battery life, and any maintenance issues.
Shark Stratos IZ862H
The cordless Shark Stratos IZ862H has Shark’s signature duo brush roll and a flexible wand for reaching under furniture. It earned top scores for cleaning bare floors and removing debris along edges. But if you have carpet, it’s only so-so. A dirt sensor increases suction when the vacuum senses debris and decreases when the floor is clean. It has a self-cleaning mechanism that prevents hair from getting tangled around the brush roll. The vacuuming mode and battery life are displayed on the console.
Shark Vertex Pro IZ662H
The Shark Vertex Pro IZ662H was a sharp performer in CR’s tough tests. It cruised through our tests for carpet, bare floors, and even pesky pet hair. And it didn’t leave anything behind along the edges. It’s packed with features, and testers liked the duo-clean power head with both bristle and soft rollers. (The roller also uses bristle guards and a combing device to remove hair automatically.) More pluses: It has a flexible wand to streamline its profile for better under-furniture clearance, and it folds for compact storage.
Consumer Reports is an independent, nonprofit organization that works side by side with consumers to create a fairer, safer, and healthier world. CR does not endorse products or services, and does not accept advertising. Copyright © 2023, Consumer Reports, Inc.
]]>Are you getting tired of the clutter taking up space in your child’s closet? Are their closets overflowing with toys and clothes that they have outgrown? Sometimes it can feel like a monumental job to tackle something like our kids’ closets , but if you take it one step at a time, you can get through it.
Use our Weekend Cleanup Challenge to clean out these spaces and get them organized and set up in a more manageable way. This challenge begins on a Friday and continues through Saturday and Sunday, so by Sunday evening, you should be looking at a nice clean, tidy, and organized closet.
Once your kids’ closets are tidied and organized, give your kids a tour of their new space and show them where everything should go in the closet. That way, they can help contribute to keeping the space organized and clean.
Since our challenge begins on a Friday, we kept the task fairly simple and not too time-consuming. All you are required to do today is to declutter and purge, which means to empty the closet(s) completely.
As you are emptying the closet, take time to note anything that can be thrown out immediately. Sort your kids’ items into three or four piles: one pile to keep, one pile to donate or sell, and one pile to throw out. The optional pile will be for items for another child to grow into. These piles do not need to be super organized and try not to overthink your decision.
Go through both clothing and toys to see if there is anything that you can get rid of - clothing your children have outgrown, toys that are too young for them now or that are broken, and any garbage that might have accumulated in the closet.
Once the closet is empty, you’re finished for Day One. Leave the piles where they are, as they will be addressed tomorrow.
Take advantage of the closet being empty to give it a really good cleaning. Wipe down the walls, dust off the shelves, and mop and/or vacuum the floor. Even take time to wipe down the baseboards. Taking time to do this now, will help contribute to keeping the closet clean for a longer period of time.
Now it’s time to tackle the piles that you created yesterday. Start with the pile of clothes. Examine each piece of clothing for stains or tears, and if you’re unsure if it still fits your child, ask them to try it on and make sure. For any clothes that are ripped or stained, you can either throw them out or recycle them into rags for cleaning.
If there are pieces of clothing that are still in good condition, then you can decide if you want to donate them or sell them. If you end up with a pile for both donation and selling, just set them aside for now. You can deal with those once the closet is finished.
Put any clothes for a younger sibling or cousin in a separate tote, bag, or box; those will go in your younger child’s closet, in an area you designate for “to grow into” clothing, or to someone else’s house for their smaller child.
Once the clothing has been addressed, it’s time to take a close look at the toys. Many children hang on to every little tiny toy they can get their hands on, such as those little trinkets from restaurants. Perhaps it’s time to let some of those little items go.
Try to be relatively ruthless when going through the toys, otherwise, you will end up keeping everything and being back in the same spot with a messy closet in no time. Toys that they have outgrown or haven’t played with in quite a while could be toys that you either sell or donate.
When you are finished, you should have a smaller pile of clothes to return to the closet, and a smaller pile of toys to put back in. Tomorrow will be the day you organize them!
On the third day of the challenge, you will want to take some time to plan how you want to set up the closet once you return everything to it. Will you use bins to store the toys? Do the kids need some new, larger hangers for their clothing? Would it be a good time to install a custom closet organizer?
You will want to answer these questions and have a plan in place before you start to set the closet back up again. If you’ve chosen to use storage baskets or bins, get those set up in the closet first. Decide which toys will go in each bin, and get them set up as well.
Consider adding a few little touches or accessories to spruce up the closet, such as new lighting, big wall hooks for their jackets, a stylish hamper for dirty clothes, or a new mirror. The organizing pros at Good Housekeeping recommend using an over-the-door shoe organizer to get shoes up and out of the way.
Last, return the clothing to the closet. You might want to sort the clothes by season, color, or style, to make it easier for your children to find what they’re looking for. Hang them up on hangers, or stack them in bins, however you wish to store their clothes.
Congratulations, you’ve finished the challenge. In three days your kids’ closet has gone from cluttered and chaotic to tidy and organized. Help your child to keep their belongings stored neatly by showing them around their new and improved closet and teaching them how to put their items away when they’re finished with them.
2024 Chevrolet Trax
By Mike Quincy
After taking the 2023 model year off, Chevrolet has redesigned the Trax compact SUV, bestowing upon it a slightly off-road-ready look but offering it with front-wheel drive only.
The new Trax is almost a foot longer than the previous version, making it about the size of the current Chevrolet Trailblazer. The company also says the redesigned model is 2 inches wider, and offers almost 6 more cubic feet of cargo space.
But the key selling point is the Trax’s fairly low introductory cost, starting at just $21,495 (including the $1,095 destination fee). Even the highest trim has a down-to-earth price tag of about $25,000. The standard powertrain is a 137-hp, 1.2-liter three-cylinder turbo matched to a six-speed automatic transmission. This combination is EPA-rated for up to 30 mpg combined, factoring city and highway driving.
The Trax faces a growing legion of competitors, including the Honda HR-V, Hyundai Venue, Kia Seltos, Mitsubishi Outlander Sport, and Nissan Kicks. Plus, it fills a narrow niche in Chevrolet’s crowded SUV lineup that includes the Bolt EUV, Trailblazer, Equinox, and Blazer, plus the larger Traverse, Tahoe, and Suburban.
But the Trax might be an attractive choice for first-time car owners, buyers living in areas where all-wheel drive isn’t needed, or for someone looking for a well-equipped, low-priced car for a college kid. Certainly, General Motors is hoping you’ll make tracks to your local Chevrolet dealer and find out.
If you’re a Consumer Reports member, our initial expert assessment of the Chevrolet Trax is available to you below. Once we complete 2,000 break-in miles, we’ll put the Trax through more than 50 tests at the CR Auto Test Center, including empirical measurements of acceleration, braking, handling, car-seat fit, and usability. CR members will have access to the full road-test results as soon as they’re available.
If you haven’t signed up to be a member yet, click below and become a member to access this full article and all our exclusive ratings and reviews for each vehicle we buy and test. Joining also gives you full access to exclusive ratings for the other products our experts evaluate in several categories, including electronics and home appliances.
Sign up for CR’s Cars email newsletter to be notified when we post our latest road-test results.
What we bought: 2024 Chevrolet Trax 1LT
Powertrain: 137-hp, 1.2-liter turbocharged three-cylinder engine; six-speed automatic transmission; front-wheel drive
MSRP: $22,300
Major options: $650 Driver Confidence package (BSW, RCTW, adaptive cruise control); $595 LT Convenience package (heated seats, exterior mirrors, and steering wheel; keyless entry)
Destination fee: $1,095
Total cost: $24,640
From the side, it is clear how the proportions were stretched for the 2024 Chevrolet Trax.
Photo: John Powers/Consumer Reports
In many ways, it’s quite amazing how much vehicle consumers are getting in the new Trax for less than $25,000. Our 1LT model represents a bundle of brilliant packaging, including features most people care about, like wireless Android Auto and Apple CarPlay; heated front seats; and a heated and leather-wrapped steering wheel. But offering so much “stuff” and keeping the price low means Chevrolet had to make sacrifices elsewhere.
The engine has decent enough power, but a somewhat uneven power delivery. There’s good space inside, including the roomy rear seat. However, the lack of available all-wheel drive puts it in tough company compared with the larger subcompacts, such as the Honda HR-V and Toyota Corolla Cross.
In sum, the Trax won’t dazzle your friends and neighbors, it’s not fast, and it isn’t designed for off-roading or towing.
Potential buyers are faced with the compromises we’ve so far experienced vs. the Trax’s tempting low price. The question is: Will the little SUV’s drawbacks, such as pronounced noise, mediocre fit and finish, and a lack of driving refinement, be overlooked by buyers faced with living with this small SUV day to day? We’ll have more answers once we wrap up our testing.
Controls: We found the controls very straightforward. We appreciated the traditional “PRNDL” gear selector lever—meaning that the sequence goes “Park,” “Reverse,” “Neutral,” “Drive,” and “Low.” The climate switches are all large knobs for the temperature and fan speed, with buttons for everything else, including seat-heaters. The infotainment system has a very easy and intuitive interface, however, the volume and radio station/track advance buttons that are located behind the steering wheel take some familiarization. It’s nice to see USB-A and USB-C ports front and rear at this price.
Cargo room: The rear hatch opening is quite wide, and the flat floor when the seats are folded down creates a useful storage area. One tester managed to fit his full-suspension mountain bike in the back pretty easily with the rear seat folded down—albeit with the front wheel removed. We’re impressed with the Trax’s generous room considering its small footprint.
Value: The equipment levels on our $25,000 as-tested Trax put some luxury models to shame. We recently tested an $80,000 German-branded EV that didn’t have a heated steering wheel, for example.
The wide liftgate makes it easy to load the cargo area with large items, such as a mountain bike.
Photo: John Powers/Consumer Reports
Noise: Most drivers found the Trax to be pretty loud. We did think that the turbo three-cylinder engine is more pleasant than the non-turbo four-cylinder engines you get in the Corolla Cross or HR-V, however. But dipping hard into the throttle, say, when attempting to merge on the highway, unleashes a torrent of noise. Once up to highway speeds, you don’t really hear the engine at all because it’s drowned out by elevated levels of road and tire noise.
Brake pedal feel: Some drivers found that the brake pedal was too touchy. Drivers complained that the brakes would do very little when initially pressed but then would come on too strong as you pressed further. This made it difficult to drive the Trax smoothly.
Seats and driving position: Several drivers complained about the driving position, citing the hard plastic door armrest (the one in the center is pretty hard, as well), and some center console intrusion on your right leg. At least the Trax’s design offers plenty of headroom, a good view out over the hood, and a clear view of the gauges through the steering wheel. The seats, on the other hand, drew unfavorable reviews, with the following Consumer Reports auto test logbook comments: “The cushion is too short”; “The seats are too firm [and don’t have] much bolstering”; and “The cushion loses under-hip support after just 30 minutes.” We were dismayed that our tested LT1 version didn’t come with any lumbar adjustment, but that’s to be expected at this price.
Fit and finish: We realize that expecting Lexus levels of interior refinement in a Chevrolet Trax would be a mistake, but we do give GM some credit in trying to spruce things up a bit. For example, there are varied textures and patterns on some of the plastic trim and nice padded door-panel inserts for the front doors with contrasting lime-green stitching, and the yellow highlights around the dashboard air vents look unique. But we also noticed a few wide panel gaps around some of the plastic trim pieces, and we were underwhelmed with the preponderance of hard, dull plastics, and unimaginative cloth used for the seats. The door pockets have a visible mold line and a slightly rough edge, and the bin under the center armrest has a pretty flimsy-feeling lid. The bottom line here is that this is a rudimentary interior in an inexpensive model.
The interior of the 2024 Chevrolet Trax has visual character, but hard surfaces and some rough edges expose compromises made to achieve the low price.
Photo: John Powers/Consumer Reports
Engine and transmission: The three-cylinder engine is pretty zippy, with a healthy initial spurt and good low-end torque. We experienced some delay when getting going again after a full stop, however, as well as some low-speed/low RPM shudder and roughness. Getting a burst of power results in a fair amount of noise. There’s just enough power and responsiveness here that it makes the whole experience adequate but not dazzling.
While we appreciate the deviation from the class-norm continuously variable transmission, the six-speed transmission is a bit of letdown, with a pronounced hesitancy to downshift, causing the engine to lug along at low revs. We figure this is done to improve the SUV’s fuel economy. Still, most shifts are smooth enough during moderate acceleration, but full-throttle bursts are rougher.
Ride: In most situations, the ride is unexpectedly decent. We noticed a constant firmness present, however, especially when traversing over bumps. Most impacts are well isolated with reasonable absorption that takes undulations in stride. But larger bumps can hit hard, making the suspension feel unrefined.
Handling: Overall, the Trax feels quite mundane to drive. The steering is slow and rubbery with little feedback that doesn’t encourage quick inputs. It gets worse on the highway, with the Trax feeling disconnected from the road; it does little to communicate what it’s doing if you hit bumps mid-corner on longer, high-speed sweeping turns. There’s not much here to suggest that the little Trax wants to dance.
Fuel economy: So far, we’re observing around 28 to 32 mpg on the SUV’s trip computer, but we’re eager to see whether the wee three-cylinder powerplant and six gear ratios (at a time when many manufacturers use eight-, nine-, and even 10-speed transmissions) make up for its generally unrefined nature with stellar fuel economy numbers in our tests.
Connectivity: We’re impressed to get wireless Android Auto and Apple CarPlay at this price. However, some drivers found that the system was occasionally slow to switch between menus, and others also experienced glitches in getting the wireless CarPlay to connect consistently and losing a phone connection mid-call.
The split rear folding seat of the 2024 Chevrolet Trax.
Photo: Chevrolet
All Trax trims come standard with the company’s Chevy Assist Feature, which includes automatic emergency braking with pedestrian detection, lane departure warning, lane keeping assistance, and automatic high beams. Adaptive cruise control, blind spot warning, and rear cross-traffic warning are low-priced options.
Consumer Reports is an independent, nonprofit organization that works side by side with consumers to create a fairer, safer, and healthier world. CR does not endorse products or services, and does not accept advertising. Copyright © 2023, Consumer Reports, Inc.
]]>Pallet flipping is a popular “buy low, sell high” side hustle.
When you return a product to Costco, Amazon, or Walmart, it doesn’t always go back to the shelves. In most cases, that product ends up at a local liquidator that resells it to side hustlers, who then flip it for profit.
Jamie McAuley has been doing just that for the past few years, and he’s earned over $25k in profit in the process.
Jamie is one half of the dynamic duo behind the Jamie and Sarah YouTube channel, where they cover all things return pallets, furniture flipping, and more.
Tune in to this Side Hustle Show interview to learn:
Enter your email to check out the full list now:
Success! The list of the best items to flip will be in your inbox shortly. (If it doesn't show up in 5-10 minutes, check spam/promotions.)
You'll also receive my best side hustle tips and weekly-ish newsletter. Opt-out anytime.
Jamie and his wife Sarah used to flip furniture as a side hustle, so they often hung around Facebook Marketplace.
They’d come across and join Facebook groups of pallet liquidators, where they first learned about the pallet flipping business.
Deciding to give it a go, the couple drove to a local liquidator who sold Walmart pallets. “We had no idea what we were doing, so we just picked the one that looked like the most fun,” Jamie told me.
They paid around $600 for a pallet, which included electric scooters and even an arcade game. “We didn’t end up making a whole bunch of money … but we had a ton of fun and it kind of got us hooked.”
Because pallets are essentially mystery boxes, finding suppliers who haven’t already gone through them can be tricky.
Jamie’s tip? Never buy pallets online.
Large retailers like BULQ make it easy for resellers to buy inventory, but Jamie says he prefers to inspect pallets before buying them.
There are two ways he finds suppliers:
Pallets typically cost $500-$700 apiece, but that’s not including the $300-$500 shipping fee.
“The problem with liquidation pallets is they’re so large that shipping is not really cost-effective,” Jamie told me.
Large retailers buy pallets by truckloads, so shipping costs aren’t an issue. The same can’t be said for small-time resellers.
So rather than fork up a couple hundred bucks for shipping, Jamie and Sarah use their own pickup truck to bring pallets home.
Some resellers also rent U-Haul moving trucks for cheap to pick up big pallets, while others use their own SUVs if the pallets are small enough.
And if you’re nervous about buying large pallets, Jamie recommends checking out bin stores — discounted retail stores where you can handpick and buy items for as low as $5 apiece. The caveat? You’d have stiff competition.
There’s really no way to know for sure what you’re getting in a return pallet — it’s just the luck of the draw.
So Jamie and Sarah play it safe by picking pallets that have 1-2 high-ticket items peeking through. That way, they’ll surely break even and make a profit.
In terms of reselling, Jamie says there are many ways people sell their goods. Some have their own discount stores, so they’re able to buy pallets filled with small items that they can sell for as low as $3 apiece. For their part, Jamie and Sarah prefer to resell products worth $50-$100, so they don’t have to sell as many to break even or make a profit.
Some resellers have storage units where they meet customers, while others prefer to meet with customers in public places.
Jamie and Sarah’s favorite way of reselling is porch pickup, which involves placing the product on the customer’s porch and then getting paid either with cash under the mat or through Venmo.
Jamie and Sarah usually ask for 40-50% of an item’s retail value, but that can vary.
For example, if an item is brand new and is a name-brand item, they can ask for 75-80% of its retail value. But if an item is too niche or has visible flaws, they might sell it for only 30% of its retail value.
Despite their competitive pricing, though, Jamie and Sarah have seen profits go down slightly from when they started. Jamie says this is likely due to the fact that there are now so many people flipping pallets.
But he believes there are still ways to stand out and make money. For example, if there are many resellers in your area, list your products on eBay. “eBay is a great place because you’re reaching outside of your community.”
Once Jamie and Sarah unbox a pallet, they’ll:
The couple goes through only 1-2 pallets a month because YouTube is their main business.
And while scaling their side hustle would require more organization on their part, Jamie says people can definitely make a full-time income flipping pallets.
You might not make $20k a month when you start out, but a couple extra bucks a month could make a huge impact on your life. “I think it’s significant. That’s why we like sharing it,” Jamie said.
The tools Jamie and Sarah use to run their side hustle are:
Jamie and Sarah tend to hold off on selling valuable items until there’s demand for them.
For example, a pallet they bought last fall included a $400 pool lounger. They held onto it until a few weeks ago when they sold it for $180.
They also got a $400 Christmas tree in their last pallet, which they plan to keep until December comes around.
When Jamie and Sarah were starting out flipping pallets, they chose pallets that had items they liked or thought were cool.
They believed people would want those items, but that ultimately cost them money.
Interestingly, they found the opposite to be true — the products they didn’t think were particularly interesting ended up being their best sellers. In fact, they once sold a pallet with 50 TV antennas in two months, and they broke even after selling only 15.
“Just because you think something won’t sell doesn’t mean that it won’t,” Jamie said.
Jamie and Sarah’s YouTube channel now has 130k subscribers.
They didn’t always put out pallet-flipping videos, though. They got their start flipping houses before flipping furniture.
Jamie says their furniture-flipping videos really boosted their channel. They also enjoyed making those because they got to be more creative.
Eventually, the pallet-flipping videos got a lot of views as well, likely due to the appeal of unboxing the mystery boxes that were the pallets.
These days, Jamie and Sarah are doing more reselling and side hustle content in general. They post a video once every 1-2 weeks.
Jamie and Sarah’s pallet-flipping side hustle and YouTube channel go hand in hand — they flip pallets for profit, and then they turn that process into video content.
But even if they didn’t have their channel (which earned six figures last year from ad revenue and sponsorships), Jamie says their side hustle would’ve still been worthwhile.
“I’m not going to be doing [YouTube] when I’m 50 or 60 years old. It’ll change into something else.”
Jamie added that their success with pallet flipping also reassures him that they could make it if they were ever in a pinch.
Jamie and Sarah recently hired an editor so they can put out more content on their YouTube channel.
He says they’re excited to continue using their channel to help people scale their pallet-flipping side hustles.
“Think of it as a journey.”
Enter your email to check out the full list now:
Success! The list of the best items to flip will be in your inbox shortly. (If it doesn't show up in 5-10 minutes, check spam/promotions.)
You'll also receive my best side hustle tips and weekly-ish newsletter. Opt-out anytime.
Rob “The Flea Market Flipper” Stephenson is a professional “money multiplier.” By buying low and selling high, the guy repeatedly turns $100 into $500 … or more!
I love hearing Rob’s awesome stories about the random stuff he finds and flips for big gains. And he’s turned it into a full-time, 6-figure business!
Check out my interview with Rob to learn more, and his free training on how to get started.
The rise of the “bed-in-a-box” industry has resulted in an entirely new side hustle: picking up and flipping mattress returns. When customers aren’t satisfied with their purchase, they can get their money back.
But what happens to the mattress? Companies like Sharetown specialize in “reverse logistics” to pick up those bulky items and either donate them or resell them on secondary marketplaces.
For Sharetown reps, it’s risk-free inventory as long as you have the ability to move and store the mattresses.
There’s an entire industry set up around flipping books. One guest of mine reported earning up to $4000 a month re-selling used books.
569A_-_Pallet_Flipping-_How_We_Made_25k_Flipping_Liquidation_Pallets.mp3 (277 bytes)
]]>We had to swap out some of our outdoor gear to make room for our stroller and other baby items, but thanks to these camper van organization ideas that I’ve developed over the years (and a bit of Tetris), everything fit in the van perfectly.
I consider an organized van to be essential to my sanity on the road. With two adults, two dogs, and now a baby, everything HAS to have a place….otherwise it quickly becomes chaos.
Here are some tips to help you take your van organization to the next level and make life on the road easier.
Before you start packing your van, measure the inside of every cabinet, drawer, and floor area where you plan to store your stuff. Start to visualize what needs to go where.
Then purchase bins that perfectly fit in these spaces in order to compartmentalize your stuff and prevent it from sliding around while you drive. Bins also make it easy to pull things in and out of the van when you are loading and unloading.
For smaller items that need to go in your overhead cabinets and drawers, like toiletries, food, and kitchen utensils, The Container Store has just about every shape and size of bin you can imagine.
For larger items, get some stackable plastic bins with lids that are the right size for your van garage. I like to lump items of the same category in my van’s gear garage bins. For instance, backpacks and hiking gear are all in one bin. Shoes are in another. Dog food in a third. This camper van organization idea will help you keep track of what goes where so you never have to search for things again!
If you’re looking for a lightweight and compact storage solution for your Starlink, check out the gear boxes made by Radius Outfitters. I recently got the Radius Outfitters Starlink Storage Case which is their 5500 Gear Box with a foam insert that is perfectly cut for the Starlink Dishy and Modem.
Previously I had an Alubox that was adapted for the Starlink. The box itself was very high quality, but you really had to wrestle to get the Starlink in and out. This Radius Outfitters Starlink Storage Case makes it so much easier to store and protect my Starlink which is pretty important considering it’s how I work and access the internet on the road.
Radius Outfitters is currently running a 15% sitewide Father’s Day Sale through 6/19. Use the code DAD15 at checkout!
Read next: Get tips for getting reliable internet while you’re traveling in your van
Seems simple, but I bet 90% of us do it anyways. I know I’m still guilty of this even after all these years. Although I have my clothes pared down to what will fit in five packing cubes, once we are on the road, I realize that I still have too much.
For example, we left Salt Lake City 10 days ago, and I’m only on my second shirt. If you choose quick dry, athletic-type fabrics and solid colors that are easily matched, you can get away with a minimal number of outfits. Having fewer clothes that you can wear many times before needing to wash them makes it easier to keep your van clothes folded and tidy. Plus, it’s nice to not have an overwhelming amount of clothes in the van to have to keep organized.
Read next: Get my clothing tips for van life so you can pack efficiently
The same goes for the rest of your belongings. You don’t need to bring every toiletry you might use over the next six months. Unless you’re driving to Alaska, you should have no problem getting what you need on the road. You can even get Amazon packages in most places as you travel if you really need to restock something.
Pare down your outdoor gear so you’re packing stuff for your favorite activities that you know with confidence you will use. That paddleboard that’s been collecting dust for 2 years in your garage? That can probably stay home.
Get this free PDF that will help you pack up your van in a jiffy.
Packing cubes are a genius way to store your clothes in your van. You just need one for shirts, one for pants/shorts, one for socks, one for underwear, and one for miscellaneous items like a beanie, gloves, and a swimsuit. This helps keep your clothing organized so you aren’t searching through a duffel bag or a cabinet for a pair of socks.
This is a fairly new hack for me. I recently realized that utilizing the back of your seats is a great camper van organization idea, as it provides a place to store small things that would otherwise get easily lost in the van.
On the back of my driver’s seat, I have the Overland Gear Guy Sprinter III Seat Organizer. It’s a great place to store charging cords, dog poop bags, business cards, our baby monitor, and other things that we use regularly. It also has a secret laptop compartment which is not only good for security, but also makes it easy for me to reach my computer if I want to get a little work done while Ryan’s driving.
On my passenger seat, I have the Radius Outfitters Small Trash Tube. I’m not using it for trash though. Instead, I’m using this for my dog gear (leashes, harness, chuck it, frisbee, etc) – which we use every single day. It’s so handy having everything all in one place right by the door.
Where to store your trash is an afterthought for many people when they are building out their vans. In my first Sprinter Van, I had nowhere to store my trash because I didn’t think to plan for it. I ended up hanging my trash bag on a hook on my back door. I hated that it was always visible, and when I got a dog, it became a big no-go.
In my newest Sprinter Van, I hide away my trash cans in a cabinet so my dogs can’t get to them. However with a new baby, I didn’t want to be putting dirty diapers in my kitchen trash, so I picked up the Overland Gear Guy Spare Tire Trash Bag.
Made of heavy-duty vinyl, it’s water resistant and can be used for trash, transporting firewood, tools, or anything else that you don’t have room for inside your van. And since it sits outside the van, you don’t have to worry about any funky smells in your living space.
If you’ve run out of space in your van or things are getting cluttered, consider storing some things outside your van. I have the Owl Vans Medium Expedition box on the back of my passenger side door, and I love the added storage it provides (check out my Owl Vans review for more details).
Inside our Owl Vans storage box, we keep our hose, electrical hookups, tools, trekking poles, and even our portable gas Lavabox portable firepit (pictured below).
It’s so nice not having to store that stuff that tends to get dusty and dirty inside the van, and it really helps reduce the clutter.
Use the code ‘BEARFOOT’ to save 10% on any LavaBox.
It’s nice to have some extra pantry goods on hand for easy meal planning, but food can quickly eat up space in your living area. Instead of trying to cram canned goods, pasta, bread, cereal, chips, and other food into your cabinets, consider having a designated food bin.
We have a big bin in our van garage that has all of our food. It’s easily reachable from our van’s living area so whenever we need a snack or are prepping dinner, I just reach under there, open the lid and grab what I need.
For your food bin, I’d suggest something clear so you can see what’s in there and something that latches closed. This way if your dog gets sneaky OR a mouse ever makes its way into your van (it happens!), your food will be protected.
No matter how organized you are, you really have to stay on top of the clutter when living and traveling out of a small space. When you’re in a hurry (ie running out the door to hit the trail), it’s so easy to not put something back “where it goes.”
If you get lazy, before you know it, the van is a mess.
In order to prevent our whole organizational system from getting out of whack, we try to tidy up regularly. Then every couple of days we make a bigger effort to put things back where they belong and do some cleanup.
I hope these practical camper van organization hacks will help you maintain order in your van, so you can focus on enjoying the journey.
Got your own van organization tips? Share them in the comments below!
The post 8 Camper Van Organization Ideas & Smart Storage Solutions appeared first on Bearfoot Theory.
]]>Eliza Anderson, Deseret News
Bookcases with broken backs, bed frames where every support slat had been pulled out, uncovered mattresses coated in at least a decade of dust, high school homework from kids who graduated more than eight years ago, melted candles (after numerous summers in outside storage), bills from 2009, dot matrix printer paper and floppy disks. These are all things I’ve paid money to store. For years.
On Memorial Day weekend, my husband and I and some of our adult kids emptied out our storage unit — the one we’ve had for so long I can’t remember when we got it. We took five trailer loads to the dump and two to Deseret Industries (mostly books).
I found cute baby boy and girl clothes that I kept because I had this fantasy that my kids would want them for their kids. My youngest son turns 23 this month. My youngest daughter is 8. As it turns out, styles change in more than 20 years and my kids who are parents are not that interested in clothes from 2000 or earlier. Go figure. Also, I found out that elastic gets brittle after 20-plus years, making pants and socks useless anyway. For our youngest daughter, I forgot that we had stored baby girl clothes in the storage unit and we bought new items for her. Sigh.
After years of paying for a storage unit, why clean it out now? Well, I’ve been binge-watching the show “Hoarders” and it has been both terrifying and motivating.
Each show begins with the disclaimer that “Compulsive hoarding is a mental disorder marked by an obsessive need to acquire and keep things, even if the items are worthless, hazardous or unsanitary.” Up to 19 million Americans have hoarding disorder, says the show.
The National Study Group on Chronic Disorganization, now the Institute for Challenging Disorganization, developed a five-level scale to define the seriousness of the hoarding. Level 1 has few visible indicators because the hoard can be kept out of sight, but the person who is a Level 1 hoarder has trouble throwing away items and may do a lot of shopping for things that are not really needed. Level 2 has noticeable piles, with at least one blocked exit, the clutter is starting to spill into the walkways and the hoarder is embarrassed to have visitors over. Level 3 involves so much stuff the walkways are narrowed, the home smells and the hoarder typically has poor personal hygiene. Level 4 has homes with structural damage, sewage issues and rooms that cannot be used. And with Level 5, there are clear fire hazards, no electricity or water, and accumulated human waste.
I may not qualify as a hoarder, but I definitely don’t declutter as often as I should. Why? There are a number of reasons, I’m sure. My ADHD means it’s easier to stick stuff in a box and forget about it rather than deal with it. We still have a lot of people living in our home. I’m busy. Sometimes, I have strong emotional attachments to things. When our daughter Angelia died, I held on to her blanket for 10 years before I could donate it. Ten. Years. My husband hangs on to things because his mom grew up in poverty and she held on to things, just in case. You just never know when you might need to reuse bread ties. It took me 20 years to convince Greg that the computer programming books that were current in the 1980s were just no longer relevant.
I asked some of my friends what they were holding onto that they could let go of, and you know what I learned? We all hold onto stuff. Here are some of their answers: broken skates, rocks, old check registers from more than a decade ago, old Playstation games, hand sanitizer bottles, teeth (baby and wisdom), socks without a mate, old magazines, dried up paint, scrapbook stuff we paid a fortune for in the ’90s and haven’t touched since, the first training bra, a candy wrapper from a fun trip, floppy discs, stained clothes and a 33-year-old strawberry basket.
Radio talk show host Debbie Dujanovic shared her story about detaching from greeting cards.
I’m 56 years old and hauled around boxes of cards from my toddler years on up until last summer. I’ve moved at least 13 times and each time unopened plastic containers of well wishes went with me. It sounds ridiculous, but I felt guilty parting with them. Thanks to a conversation I had with Amy Donaldson Brass last summer I dumped the guilt, and thankfully most of the cards. ... I sat down with stacks of birthday, Christmas, graduation cards and went through each one. I kept some — the ones with kind words of encouragement or those from family members and close friends who have had a positive impact on my life. I donated the remainder, boxes of them, to a recycle bin.
At least two other friends have kept cards for decades — one of them more than 60 years. Uh oh. Looks like I have another decluttering project to tackle ...
Stay tuned for Part 2 on what to keep.
Holly Richardson is the editor of Utah Policy.
]]>01. SEVILLE CLASSICS ROLLING WIRE RACKS — These are widely considered the best quality for home storage. We use them in both our basement and garage, but would also be perfect for a pantry. They are heavy-duty, sturdy, and smartly designed. I love that they come in different heights/lengths to accommodate your particular areas of need.
02. ROLLING MESH BIN (40% OFF) — We use this in our garage to house all of the kids’ outdoor toys — balls, gliders, baseball gloves, etc. I love that you can wheel it out so the kids can access everything easily without multiple trips, and the mesh design means nothing gets mildewy/musty.
03. HYACINTH CUBES — Perfect for the bottom of a closet (stow shoes, bulky sweaters, out of season clothing) or for a cube organizer, which we have in our playroom. I love these modular systems for little ones — keeps everything at eye level. We use the bottom row with cubes like these to organize by category: one cube for dress-up, one for dolls, etc, and the upper row we use for books, puzzles, etc.
04. CLEAR PANTRY BINS (30% OFF) — As noted above, these are in heavy use in most cabinets/storage areas of our home. I especially like them to organize our hefty pantry area, where I use them to organize sub-categories, e.g., “FLOURS,” “SUGARS,” “NUTS,” etc. (I use my labelmaker to make the tags.) Makes it really easy to locate what you’re looking for.
05. POPPIN LAUNDRY BIN — We have this in my son’s bedroom in the navy color. I like that it adds depth/texture to the room and is not a plastic eyesore! Plus, the inner liner is removable for easy dump into the laundry.
06. ROLLING LIDDED BINS — The BEST for stowing bulky sets of toys. We have one for Barbies and one for Duplos, but would also be great for magnatiles, blocks, etc.
07. LARGE SEAGRASS HAMPER — Looks like S&L, but under $50. Great for either laundry or children’s toys — I have a few big hamper/bins like these that we specifically use for dolls and stuffed animals. TJ Maxx has other sizes, too.
08. ALL PURPOSE CLEAR BIN (30% OFF) — Another great (more sizable) option for pantry organization.
09. BIGSO FILE BOX — I use these in my closet to organize all important documents. They are so attractive and I have separate ones for personal life, for business, etc.
10. GLASS SPICE JARS — So satisfying to decant all of our spices into these, label with my labelmaker, and then just use Spice House flat packs to refill. Keeps everything organized and much more cost-effective, too.
11. FILE CABINET — We’ve needed one of these for a long time — currently we have a couple of document crates to house old but important documents (paperwork for car, house, business, etc.). This is at the front of my list. I love that it has a locked drawer for sensitive materials.
12. FABRIC STORAGE BIN — Another great buy for stuffed animals or clothing overflow. We have a few of these distributed through the children’s rooms and my closet.
13. BEACHCOMBER BIN — This truly transformed my office space. I receive a lot of packages and it gives me a spot to keep the boxes/items I want to share in one place without having to constantly stare at a stack of boxes/products!
14. STORI DRAWER ORGANIZERS — Great for junk drawers, cosmetics, medicine cabinets, desk drawers, etc! These line any and all of the above in my home. SO good for things like pens, office supplies, makeup, kids medicines, kids hair ties, sunscreen, etc.
P.S. How do you stay on top of household admin?
P.P.S. What do you eat when your fridge is bare?
P.P.P.S. Closet organization favorites.
The post My Favorite Storage Solutions. appeared first on Magpie by Jen Shoop.
]]>Different types of bubble wrap exist, ranging from industrial-grade bubble wrap rolls to consumer-friendly perforated sheets. The global market for bubble wrap is extensive, as its applications span industries and individual use.
Engineers Marc Chavannes and Alfred Fielding initially aimed to create a textured wallpaper, but their invention took an unexpected turn. Sealing two shower curtains together inadvertently formed a layer of trapped air bubbles. Although their idea did not stick as a wall decor trend, it was quickly realized that this innovative product had potential in the packaging industry. Today, bubble wrap is universally recognized as an essential shipping and packaging tool.
Protective Cushioning: One of the greatest benefits of bubble wrap is its ability to provide superior protective cushioning. This attribute stems from its unique design featuring air-filled bubbles. These bubbles act as a protective layer that absorbs shocks and impacts during transit, reducing the risk of damage to the contents. This is particularly beneficial for shipping fragile items, such as glassware, electronics, or ceramics.
Versatility: Bubble wrap is incredibly versatile, making it suitable for wrapping a diverse array of items. Its flexible nature allows it to conform to the shape of the item being wrapped, providing a snug fit that enhances the protective capacity. Whether shipping small trinkets or large appliances, bubble wrap can accommodate your needs.
Lightweight: Bubble wrap is remarkably lightweight. The main component of its structure is air, which adds very little to the overall weight of packages. This can lead to significant savings in shipping costs, especially when sending items over long distances. Despite being lightweight, it doesn’t compromise on the level of protection it provides.
Reusable: A notable benefit of bubble wrap is its potential for reuse. Once an item has been unpacked, the bubble wrap can often be used again for other shipments. This makes it a cost-effective choice for businesses and individuals alike. Additionally, the possibility of reuse contributes to the environmentally friendly nature of bubble wrap.
Insulating: Besides its protective properties, bubble wrap also serves as a useful insulator. The air-filled bubbles help resist heat transfer, protecting items from temperature variations. This is particularly useful when shipping temperature-sensitive items like certain food products or electronics.
Transparent: Bubble wrap is typically transparent, allowing for easy visual inspection of the items inside. This can facilitate the item identification process, making it faster and more efficient. It can also reassure recipients that their items have arrived intact, as they can see the protection provided.
Easy to Use: Bubble wrap is a user-friendly packing material. It’s easy to cut into the desired length, wrap around items, and secure with packing tape. The simplicity and efficiency of this process can be a time-saver during the packing process.
Top Pick: The Amazon Basics Bubble Cushioning Wrap is reliable for moving, shipping, or storing delicate items. This bubble wrap provides consistent coverage and enhanced protection against breakage, dents, and dings. Its tiny air-filled bubbles, measuring 3/16 inches, cover the entire surface, ensuring optimal cushioning.
Features:
Pros:
Cons:
The Amazon Basics Bubble Cushioning Wrap protects delicate items during moving, shipping, or storage. Although it is designed for smaller items and has limited color options, it comes with the assurance of an Amazon Basics 1-year limited warranty.
Amazon Basics Perforated Bubble Cushioning Wrap
Runner Up: Protect your fragile items with Duck Brand Bubble Wrap Original Cushioning. Whether you’re moving, storing, or mailing valuable items, this bubble cushioning provides consistent and reliable protection, ensuring your items remain undamaged. With various bubble sizes, self-cling cushioning, and even color wrap options, you have everything you need to move or ship confidently.
Features:
Pros:
Cons:
Duck Brand Bubble Wrap Original Cushioning is lightweight for cost-effective shipping and conforms easily around items. However, it is important to note that it is available in limited size and clear colors only. Duck Brand is a trusted name in the industry.
Duck Brand Bubble Wrap Original Protective Packaging
Best Value: Scotch Big Bubble Cushion Wrap is designed to provide excellent cushion protection for delicate and valuable items during mailing, shipping, or storage. With its big bubbles and lightweight construction, this bubble cushion is ideal for small business owners looking to safeguard their items without compromising quality.
Features:
Pros:
Cons:
Scotch Big Bubble Cushion Wrap has lightweight and non-scratching material combined with large bubbles, which ensures optimal cushioning without adding unnecessary bulk.
Scotch Big Bubble Cushion Wrap
The USA Made Air Bubble Cushioning Wrap Roll offers premium-quality bubble cushioning wrap designed to prevent the cracking or breaking of fragile objects. Along with 30 fragile stickers included in the package, this roll provides a complete protection package for your household items.
Features:
Pros:
Cons:
The USA Made Air Bubble Cushioning Wrap Roll has 3/16-inch airtight bubbles to ensure secure cushioning and guard delicate items against vibrations, shocks, dings, and scratches. The perforated design allows easy tearing, providing the amount of bubble wrap needed for each item. Made in the USA with top-quality materials, this bubble cushioning wrap roll guarantees maximum protection for your valuable possessions.
USA Made Air Bubble Cushioning Wrap Roll for Heavy-Duty Packing
The 2-Pack Blue Bubble Cushioning Wrap Rolls by OFFITECTURE is 12″x72′ per roll; these bubble cushioning sheets are easy to tear into individual 12″ pieces, ensuring convenient usage. The unique nylon barrier seal technology keeps the bubble air locked inside for extended protection, providing better cushioning for delicate items. The 3/16″ bubble size is perfect for wrapping and safeguarding fragile objects, preventing damages caused by impact or shock.
Features:
Pros:
Cons:
The 2-Pack Blue Bubble Cushioning Wrap Rolls from OFFITECTURE are made from lightweight and reusable nylon material; they provide protection and help minimize shipping costs.
2-Pack Blue Bubble Cushioning Wrap Rolls
The enKo Bubble Cushioning Wrap Roll comes with two rolls of 12″ x 72′ each; this pack provides ample cushioning for your delicate products. The low-density polyethylene material cradles your items, absorbing shocks, vibrations, and preventing scratches or dings. The bubble wrap can also be used to wrap furniture edges, such as corners and legs, to prevent scratches during transportation.
Features:
Pros:
Cons:
The enKo (2 Pack) 12 inch x 72 feet Bubble Cushioning Wrap Roll has 3/16″ air-tight bubbles to provide optimal cushioning, and the wrap is perforated every 12 inches for convenient tearing. Moreover, the included 20 fragile labels make it easy to identify delicate items.
enKo (2 Pack) 12 inch x 72 feet Bubble Cushioning Wrap Roll
Official Sealed Air Bubble Wrap by American Bubble Boy offers premium medium (5/16″) bubble wrap for small business owners proudly made in the USA. This bubble wrap is designed with bubble barrier technology, utilizing a nylon blend to eliminate flat bubbles. The cross-cut perforations every 12 inches ensure clean and easy tearing, providing convenience during packing.
Features:
Pros:
Cons:
Official Sealed Air Bubble Wrap – American Bubble Boy comes with four rolls of 100 feet each; this package offers better packing and storage flexibility than a single large roll.
Official Sealed Air Bubble Wrap – American Bubble Boy
The Uboxes Bubble Roll 24 Wide x 175 ft Small Bubbles is a versatile and convenient packaging solution for small business owners. Its easy tear-off feature and perforations every 12 inches provide a hassle-free packing experience.
Features:
Pros:
Cons:
The Uboxes Bubble Roll 24 Wide x 175 ft Small Bubbles also come in different sizes to accommodate various packing needs.
Uboxes Bubble Roll 24 Wide x 175 ft Small Bubbles
Yens 3/16″ Bubble Cushioning Rolls offer sizes of 12 in. x 700 ft. providing ample cushioning for your valuable products. The small and durable bubbles are perforated every 12 inches, allowing for easy tear-off convenience.
Features:
Pros:
Cons:
Yens 3/16″ Bubble Cushioning Rolls are Made in the USA to guarantee quality and durability.
Yens 3/16″ Bubble Cushioning Rolls, Perforated Every 12″
If you are looking for something other than bubble wrap, experience innovative and effective cushioning with Honeycomb Packing Paper. This honeycomb packaging paper is an alternative to traditional bubble wrap, protecting fragile goods during transportation. Made from recyclable materials, this eco-friendly honeycomb paper roll is degradable and an excellent substitute for plastic bubble bags.
Features:
Pros:
Cons:
Honeycomb Packing Paper’s unique honeycomb structure enhances cushioning performance, ensuring the safety of your wrapped items. This versatile wrapping paper is perfect for packaging various delicate items, ensuring they remain intact and protected throughout shipping.
Honeycomb Packing Paper, 12″ x 65′ Honeycomb Cushioning Wrap Roll
The primary material used in producing bubble wrap is a type of plastic called low-density polyethylene (LDPE). This is heated, blown into a film, and then shaped into bubbles to form a well-known product. LDPE is chosen for its flexibility and resistance to impact and moisture. It is lightweight, reduces shipping costs, and is transparent, allowing customers to see the enclosed items.
The science behind bubble wrap lies in the air trapped within the bubbles. When an object wrapped in bubble wrap faces an impact, the energy from the shock is absorbed and dispersed among the bubbles. This process reduces the force directly hitting the item, offering a protective layer. These bubbles thus provide a mini airbag system, safeguarding your items during transit.
Bubble wrap comes in a variety of forms to match the range of its applications. The options are extensive, from large bubble wrap rolls for industrial use to small, easy-to-tear perforated sheets for personal use. The size of the bubbles can also vary, with larger bubbles providing more cushioning for heavier items. Bubble wrap is also available in different widths and lengths to suit various packaging needs.
Bubble wrap has a broad global market, reaching various industries from electronics to glassware and even art. This packaging material significantly helps reduce shipping costs and potential damage to goods, making it a popular choice worldwide. With growing e-commerce trends, the demand for effective and safe packaging solutions like bubble wrap is continually on the rise.
Bubble wrap begins its journey as polyethylene resin, a type of plastic. The quality of the raw material directly impacts the final product, making it crucial for manufacturers to source high-grade resin. The resin’s specific properties, such as flexibility and durability, play a key role in forming the characteristic bubbles that provide the protective cushioning for which bubble wrap is known.
The manufacturing process of bubble wrap involves several steps. Firstly, the polyethylene resin is melted and extruded into two sheets. One of the sheets undergoes a process of air infusion, forming a bubble pattern. The second sheet is then laminated onto the first, trapping the air inside the bubbles. This process creates cushioning, making bubble wrap an effective protective packaging material.
Quality control is paramount in the manufacturing process of bubble wrap. Once the sheets are laminated together, the product undergoes various tests. These ensure the correct bubble size, adequate air retention, and the overall durability of the wrap. A high-quality assurance standard ensures that the bubble wrap protects items during transit.
As with any plastic product, bubble wrap has an environmental impact. The primary concern comes from its disposal, as it’s not biodegradable and can contribute to landfill waste. However, manufacturers are now more mindful of their ecological footprint, introducing recycling programs and researching biodegradable alternatives to make the product more sustainable.
There’s a significant shift towards environmentally friendly packaging solutions. The bubble wrap industry is also part of this trend, with more sustainable production methods being explored. This includes the development of biodegradable bubble wrap and the promotion of recycling initiatives. Furthermore, manufacturers are looking at innovative design enhancements to increase the product’s protective properties, potentially saving businesses more money in shipping costs.
Bubble wrap is a versatile packaging material, providing extra protection for fragile items. The air-filled bubbles are mini airbags, cushioning the object wrapped inside from shocks and vibrations. This protective layer is particularly valuable for fragile items, electronics, glassware, and other goods prone to damage during transit.
When shipping fragile items, bubble wrap serves as an indispensable tool. Wrapping fragile items in bubble wrap helps absorb shocks and prevent damage, ensuring the items reach their destination in perfect condition. Its lightweight nature also helps keep shipping costs low. For businesses, using bubble wrap significantly reduces the risk of customer dissatisfaction resulting from damaged goods.
Beyond packaging and shipping, bubble wrap has many uses around the home. One such application is insulation. Bubble wrap can insulate windows during winter, as the air bubbles help trap heat. This could lead to a significant reduction in heating costs. Bubble wrap can also be used as a liner for refrigerator drawers to prevent fruits and vegetables from bruising.
While it’s predominantly used for protection during shipping, people have found creative ways to use bubble wrap. It’s been used in the fashion industry, where designers have created unique, textured garments using bubble wrap. In art, it’s been used as a medium or to create interesting paint effects.
Bubble wrap has also found its way into the art and fashion industry. Innovative artists and designers have used it to create unique, textured pieces in art installations and clothing design. Its unique texture and flexibility provide a distinct aesthetic that sparks interest.
Popping bubble wrap has gained widespread popularity as a form of stress relief. The act of pressing the air-filled bubbles, culminating in a satisfying pop, provides a simple yet effective way to alleviate stress. Many people find this activity soothing, and it has become a common practice in office spaces and homes around the globe.
The stress-relieving benefits of popping bubble wrap are backed by science. The physical act of popping the bubbles releases muscle tension, while the repetitive nature of the activity promotes a sense of calm and relaxation. Moreover, the auditory feedback from the popping sound can trigger a positive response in the brain, releasing endorphins, which are feel-good chemicals.
In the digital age, the satisfaction of popping bubble wrap has been captured through smartphone apps and virtual reality experiences. These digital platforms offer an unlimited popping experience, providing users with an easy and accessible form of stress relief they can engage in anytime and anywhere.
Incorporating bubble wrap into your stress relief routine is simple. Keep a sheet or two on hand in your work area and reach for it when you feel overwhelmed. Even just a few minutes of popping can help alleviate tension and refocus your mind. For a more immersive experience, you might try a bubble wrap-popping app or VR game.
While popping bubble wrap can be a fun and satisfying stress reliever, it’s not a comprehensive solution to managing stress. It’s important to maintain a balanced lifestyle and incorporate other stress management techniques such as regular exercise, a balanced diet, and adequate sleep. Additionally, for those mindful of the environmental impact of plastic, paper-based alternatives can offer a similar tactile stress relief experience.
As a plastic product, bubble wrap poses an environmental challenge. It is not biodegradable and can contribute to landfill waste if not properly disposed of. Moreover, improperly discarded bubble wrap can end up in oceans and waterways, causing harm to marine life.
However, bubble wrap can be recycled in your regular curbside recycling bin. Instead, it must be taken to specific drop-off locations that accept this type of plastic. Some mailing and shipping services accept bubble wrap for recycling. Before recycling, it’s important to pop the bubbles to save space and make transport more efficient.
Across the globe, community initiatives are emerging to encourage the collection and recycling of bubble wrap. These programs often involve local businesses, schools, and community centers acting as collection points. This makes it easier for individuals to recycle their bubble wrap and helps raise awareness about the importance of recycling.
As awareness of environmental issues increases, many businesses and individuals are seeking alternatives to traditional bubble wrap. Options include biodegradable bubble wrap, recycled paper, and cornstarch packaging peanuts. These alternatives offer similar protective properties without the environmental drawbacks of conventional bubble wrap.
Some companies are now producing biodegradable bubble wrap in response to environmental concerns. This product decomposes naturally over time, reducing its environmental impact. While it’s currently more expensive than traditional bubble wrap, as demand grows and production becomes more efficient, it’s expected to become more affordable.
Bubble wrap should be used with the bubbles facing in towards the item. The flat side provides a smoother surface for applying tape and prevents the bubbles from popping during transit.
Yes, bubble wrap can be recycled, but it usually cannot be put in standard curbside recycling bins. It’s often accepted at grocery store collection bins where plastic bags are recycled, or at specific recycling facilities.
Yes, some manufacturers have developed a biodegradable version of bubble wrap. It’s made from plant-based materials that naturally decompose over time, causing less harm to the environment.
Bubble wrap is quite effective as a low-cost insulator. The trapped air within the bubbles forms a barrier that reduces heat transfer, making it useful for insulating windows in winter or keeping groceries cool in summer.
Yes, the size of the bubbles in bubble wrap can make a difference. Larger bubbles provide more protection and are suitable for larger, heavier items. Smaller bubbles offer less cushioning but are lighter and more flexible, making them ideal for wrapping small, delicate items.
Beyond packaging, bubble wrap can be used in various creative ways. It’s been used as a medium in art, a textured material in fashion design, and even as a gardening tool to insulate plant roots.
Popping bubble wrap can be a form of stress relief. The act of pressing the bubbles, the small popping sound, and the sensation can be quite satisfying. It’s believed that this action might stimulate the release of endorphins, the body’s natural feel-good chemicals.
YOU MIGHT ALSO LIKE:
Qualify for discounts, special offers and more with a Business Prime account from Amazon. You can create a FREE account to get started today.
Image: amazon
This article, "Bubble Wrap: Top Picks for Your Business" was first published on Small Business Trends
]]>Let’s go back in time a little. Packing peanuts were first introduced in the late 1960s, offering a lightweight and effective solution for protecting items during shipping. They are specifically designed to cushion and secure products, filling in the gaps in boxes and packages to prevent the jostling of goods during transport.
The making of packing peanuts is a fascinating process. They are made by expanding polystyrene, a kind of plastic, into a foam state, then cutting it into small peanut-like shapes. The final product is lightweight, white (though they can be colored), and incredibly effective in providing package protection.
There are mainly two types of packing peanuts that have gained popularity in the shipping and moving industry: Styrofoam packing peanuts and biodegradable packing peanuts.
Styrofoam, a brand-name version of polystyrene foam, is the more traditional option. These packing peanuts are lightweight, cheap, and protect your stock during transit. They are water-resistant, making them suitable for goods that might be exposed to damp conditions. However, the downside of Styrofoam packing peanuts lies in their environmental impact. These peanuts are not biodegradable, taking hundreds, if not thousands, of years to break down in a landfill.
As more businesses are moving towards sustainable options, biodegradable packing peanuts are becoming increasingly popular. They are made from organic materials such as cornstarch, wheat, or sorghum. When exposed to water, they dissolve, leaving no harmful residue. They offer similar protection to Styrofoam peanuts and, despite being slightly more expensive, they align with an eco-conscious business model.
Consideration of the environment is now more important than ever. Customers appreciate businesses that show concern for sustainability.
Styrofoam peanuts have an undeniably negative impact on the environment. They are made from petroleum, a non-renewable resource. When disposed of, they take an incredibly long time to break down, contributing to landfill waste.
Biodegradable packing peanuts, on the other hand, have a much lesser environmental impact. They decompose naturally in the environment, often requiring just water to begin the process. This makes them an excellent option for environmentally-conscious business owners.
Below are our 10 picks for the best packing peanuts on Amazon. Whether you’re a business that ships items, a mover or want a safe storage option for valuables, you’re sure to find what you need among our picks.
Top Pick: Secure Seal offers eco-friendly and effective packaging solutions with Biodegradable White Packing Loosefill Anti Static Peanuts. This product has a 7 Cubic Feet volume, ideal for safely shipping and packing a range of items. These packing peanuts provide superior cushioning and protection for your items and are also crafted from natural plant starch, making them nontoxic and completely biodegradable. Certified by ASTM-6400-12 for municipal and industrial composting, these peanuts dissolve harmlessly in water. They’re also static-free, posing no risk to sensitive electronic components.
Product features:
Secure Seal Biodegradable Loosefill Anti Static Peanuts
Runner Up: U-Haul, the infamous rental and moving company, has its own brand of biodegradable peanuts. They are reusable and non-toxic and come in bags of 1.5 cu. ft each.
Product Features:
U-Haul Biodegradable Packing Peanuts
Best Value: As we all know, often buying in bulk can save big bucks in the long run. Bubblefast offers this 35 cu. ft. bag of pink anti-static peanuts. That’s 225 gallons! If you plan to do a lot of shipping, this generous amount will keep you supplied and save you some money.
Product Features:
Bubblefast Brand Bulk Anti Static Packing Peanuts
StarBoxes packing peanuts, offering a volume of 22.5 gallons or approximately three cubic feet, contribute to secure and stable packaging. Crafted from lightweight polyethylene, they efficiently mitigate the risk of product shifting during transit. Their compact dimensions allow for adequate space utilization and a snug fit. They ship via USPS, ensuring reliable and prompt delivery. The signature white color of these StarBoxes packing peanuts adds a clean and professional touch to your shipments.
Product Features:
StarBoxes White Regular Loose Fill Shipping Packing Peanuts
FunPak offers plant-based, biodegradable packing peanuts that add an environmentally friendly yet fun touch to your packaging. The peanuts, constructed from starch-based materials, come in fun shapes like shamrocks and hearts. With a volume of 1.5 cubic feet per bag, they offer ample filling for your packing needs. An added benefit of these packing peanuts is their water-soluble nature, which leaves no harmful residues and makes disposal easy and guilt-free.
Product Features:
FunPak Plant Based Biodegradable Packing Peanuts
These recyclable peanuts provide a high-performance cushioning solution that effectively fills up space in your boxes, preventing breakage during transit. The packing peanuts come in a sealed bag that measures 12.5 inches in all dimensions, containing enough material to fill a small-sized carton. These peanuts are not only sturdy and reliable, resisting crumbling or tearing, but they’re also versatile, serving as lightweight foam peanuts for crafting or lightening potted plants by replacing heavy soil.
Product Features:
MT Products EPS White Packing Peanuts for Shipping
These popcorn-style loose fill peanuts provide half a cubic foot of material that expertly cushions package contents from all sides, ensuring optimal protection. Crafted from polystyrene, these packing peanuts possess a resilience to temperature fluctuations and are waterproof. Plus, these packing peanuts are 100% recyclable, which aids in minimizing environmental impact.
Product Features:
MWS Loose Fill Packing Peanuts
DMSE Wholesale provides 1/2 cubic foot of Anti Static No Stick Packing Peanuts, designed for your optimal packaging needs. These S-Shape loose fill peanuts are not just recyclable, they also incorporate an anti-static feature, ensuring a hassle-free experience as they won’t stick to your fingers. Their dust-free property ensures a clean packing environment while their shape easily fills gaps in your packaging, offering a more secure and protected package.
Product Features:
These white, loose-fill peanuts are made from annually renewable, starch-based resources, showcasing a commitment to sustainability. They exhibit remarkable features such as disintegrating in water and leaving no harmful residues behind, contributing to environmental friendliness. In addition, these packing peanuts are dust-free, anti-static, and abrasion-resistant, ensuring a clean, hassle-free, and durable packing experience.
Product Features:
BOX USA Shipping & Packing Peanuts White, 7 Cubic Feet
Bubblefast presents its distinctive pink packing peanuts, boasting a volume of 3.5 cubic feet or 22.5 gallons. These anti-static peanuts are made from 100% recycled material and contribute to environmental sustainability while ensuring optimal packing security. The peanuts’ unique “S” shape interlocks to form a robust cushion that reliably protects your packages. Beyond packing, these versatile peanuts can be used to fill bean bag chairs and, due to their water-insoluble nature, they can also serve as lightweight fillers in planters.
Product Features:
Bubblefast! Brand 3.5 cu. ft. Pink Anti-Static Packing Peanuts
Choosing the right packing peanuts for your business is not a one-size-fits-all process. It depends on several factors:
The size and volume of your shipments should influence your decision. If you’re shipping a large volume of goods, you might opt for the cheaper option of Styrofoam peanuts. But remember, the marginal extra cost of biodegradable peanuts could be worth it for their environmental benefits.
The sensitivity of your products is also crucial. If your items are prone to water damage, Styrofoam peanuts might be your best bet due to their water resistance.
If your packages are stored in places that might be exposed to damp conditions, or if your products are sensitive to moisture, it’s best to stick with Styrofoam peanuts, as biodegradable ones will start to break down when exposed to water.
Your business’s stance on environmental issues can also influence your choice. If you’ve committed to be environmentally friendly, it may make more sense to opt for biodegradable packing peanuts.
After your customers unpack their goods, the packing peanuts don’t have to end up in the trash. There are ways to responsibly dispose of both types of packing peanuts.
While Styrofoam peanuts can’t be tossed in your regular recycling bin, they can be reused or taken to a specialized recycling facility. Many shipping stores will gladly accept used Styrofoam peanuts. So, before throwing them away, encourage your customers to check if a local store can reuse them.
Biodegradable packing peanuts are much easier to dispose of. They can be composted, used in gardening, or simply dissolved in water and washed down the drain. Remember to inform your customers about these options, contributing to the collective effort of reducing waste.
Choosing the right packaging, including packing peanuts, can significantly impact your business’s success. It’s not just about protecting the items during transit; it’s also about showing your customers that you care about their purchases and the environment.
Packaging that effectively protects a customer’s purchase can increase customer satisfaction. There’s nothing more disappointing than receiving a damaged item. High-quality packing peanuts can help prevent this.
You show your customers that you’re committed to sustainability by opting for eco-friendly options like biodegradable packing peanuts. This can improve your company’s image and even attract new customers who prioritize environmentally friendly businesses.
Lastly, the quality of your packaging can give you a competitive edge. If a customer is deciding between two companies offering similar products, your commitment to secure, high-quality, and eco-friendly packaging could be the deciding factor.
In the end, choosing the right packing peanuts and other packaging supplies is an important business decision. By considering factors like the type of products you ship, your shipment volume, and your environmental stance, you can choose to benefit both your business and your customers.
Let’s tackle a few common questions about packing peanuts.
Yes, you can! Both Styrofoam and biodegradable packing peanuts can be reused. They are durable and retain their shape after many uses, making them a sustainable choice for multiple shipments.
Biodegradable packing peanuts are made from natural, plant-based materials such as cornstarch or wheat. These materials are processed and expanded into a foam, which is then shaped into peanuts. The end product is light, cushioning, and environmentally friendly.
Styrofoam packing peanuts can be a choking hazard for both pets and children, and they aren’t digestible. Biodegradable packing peanuts are safer in this regard. While they aren’t a food item and shouldn’t be ingested on purpose, they are non-toxic and will dissolve in water, reducing the risk if accidentally swallowed.
YOU MIGHT ALSO LIKE:
Qualify for discounts, special offers and more with a Business Prime account from Amazon. You can create a FREE account to get started today.
Image: amazon
This article, "Packing Peanuts: Best Choices for Your Business" was first published on Small Business Trends
]]>
Hyacinth baskets are more than just a storage space, they add style and a touch of the outdoors to your home. Beautiful woven bins fit in with any décor style while offering a functional storage space. Mixing up the bin sizes is a great way to include texture in your living space, place on shelves, side tables, or coffee tables; the options are endless. DII hyacinth baskets are available in multiple sizes that will add a touch of farmhouse to your space. Get this set of DII Hyacinth Collection Storage Baskets, Large Set, Assorted Sizes, Gray Wash, 5 Piece, for only $61.08!
Remember, Amazon prices can change at any time.
This post contains affiliate links.
]]>By Jeff S. Bartlett
Lexus is expanding its SUV line with the all-new TX, a three-row model that shares its dimensions and many mechanical bits with the new Toyota Grand Highlander. Sized a notch up from the recently redesigned RX, the TX pulls together many established Lexus elements, from the turbo and hybrid powertrains to the large infotainment screen with integrated knobs.
Where the redesigned GX and LX aim for those towing a heavy load or traversing off the beaten path, the TX is focused on refined road manners. It has a much more spacious interior than the RX, with all the features one would expect from a premium SUV.
The Lexus TX has a three-powertrain strategy, with its top offering being a powerful plug-in hybrid with over 400 horsepower and 33 miles of electric-only range.
The TX will be offered in four trims: Standard, Premium, Luxury, and F Sport Performance.
It will be the first Lexus manufactured at Toyota’s assembly plant in Indiana. The model range kicks off in fall 2023 with the base TX 350 and mid-level 500h. The 550h+ plug-in hybrid will join at a later date.
Here is what we know so far:
What it competes with: Acura MDX, Audi Q7, BMW X7, Cadillac XT6, Infiniti QX60, Jeep Grand Cherokee L, Lincoln Aviator, Mazda CX-90, Toyota Grand Highlander
Powertrains:
• 275-hp, 2.4-liter turbocharged four-cylinder; eight-speed automatic transmission; front- or all-wheel drive.
• 366-hp, 2.4-liter turbocharged four-cylinder hybrid; six-speed automatic transmission; all-wheel drive.
• 406-hp, 3.5-liter V6 plug-in hybrid; continuously variable transmission; all-wheel drive.
Price: $50,000-$70,000 (estimated)
On sale: Fall 2023
Consider the TX to be a grander Toyota Grand Highlander. It is another example of how Toyota is able to mix and match platforms, powertrains, and other components from its extensive parts bin. The automaker has taken this to extremes lately, creating a dizzying array of choices for car buyers. Here, with the Lexus TX, there are four trims, three powertrains, and a handful of options.
This fits well in the lineup, serving as a step-up model from the RX (or essentially a successor to the previous generation RX-L, a three-row, last-generation RX) for buyers who want more interior space for a growing family. The RX-L was a sound idea, but the execution came across like the afterthought that it was. Space was tight, and it just didn’t fulfill the mission. The TX promises to be a true three-row model with room for adults in the rear.
As wild as the design is for the latest GX, we’re glad to see a tamer approach with the TX. It is a very straightforward design, augmented by promising powertrains and welcomed features.
The exterior is rather tasteful and timeless, with a restrained interpretation of the modern Lexus grille.
Photo: Lexus
Sized like the Grand Highlander, and stretching 10 inches longer than an RX, the TX wears rather clean sheetmetal, without an extroverted appearance like the upcoming Lexus GX. Most notable, the front spindle grille is more restrained than that seen on past Lexus models, where at times it resembled the sci-fi movie Predator’s maw. The headlights are slim and tidy, flowing right into a horizontal design element ahead of the hood. But their angle gives the TX an angry visage.
The sides are clean, with wheel arch lines stamped in the fenders and unadorned by plastic flares like many other competing models. The little jog line for the rear side glass reminds of the Kia Sedona minivan. That rear pillar is blackened, creating the floating roof design that has become de rigueur.
Overall, the appearance is upscale and classy. It should look right at home alongside competitors like the Acura MDX and Infiniti QX60.
The cabin looks much like any other recent Lexus SUV, with a large screen with integrated graphic-filled knobs and physical controls for key functions.
Photo: Lexus
The TX dash reminds of other recent models, featuring a 12.3-inch digital instrument display and a large 14-inch center infotainment screen. The Lexus trend of using knobs with integrated screens for adjusting the climate temperature is truly a neat bit of engineering. There are physical controls for key functions, like adjusting volume, warming our little hearts. A head-up display is available, putting essential information close to the driver’s sight line. But as with other Lexus models, it appears to be paired with unlabeled steering wheel controls, which we have found tedious and distracting to use on other models. A 21-speaker Mark Levinson stereo is an optional upgrade.
The USB charge points are easily accessible and clearly labeled. Small touches like that make a difference in daily living. There are seven charge ports total throughout the cabin.
Another interesting detail: Some cupholders are removable so those storage nooks can be used in different ways.
The second row can be configured with a 60/40-split bench seat or with two captain’s chairs. Either way, the seats can slide forward to ease access to the third row. There is a separate control to allow the aft passengers to move the second-row seats forward to aid their egress.
Like the Grand Highlander, a key premise for the TX is an adult-friendly third-row and usable rear cargo space, even with the seat up.
As with other recent Lexus models, the TX has electronic door releases. We have mixed feelings about these light-touch releases, which tend to move in a less-natural way than a mechanical release and can puzzle passengers who are unfamiliar with their operation.
The restrained design adapts the floating roof design, an illusion crafted with a black rear pillar, seen on the RX and other models.
Photo: Lexus
Lexus has been generous with powertrains lately, providing more options than one could rightfully expect. First it was the NX, then the RX, and now the TX—each with three or more choices.
The TX 350 comes with a 2.4-liter turbocharged four-cylinder that produces 275 horsepower. It is paired with an eight-speed automatic transmission, and it will be offered in front- or all-wheel drive. Lexus estimates fuel economy to be 21 mpg combined.
Then there is a giant leap to the mid-level powertrain in the TX 500h, a 366-hp, 2.4-liter turbocharged four-cylinder hybrid with a six-speed automatic transmission. This mighty hybrid comes in just an all-wheel drive configuration. The estimated fuel economy is 24 mpg combined.
Joining the TX line at a later date is the 550h+ plug-in hybrid in all-wheel drive. This centers around a 3.5-liter V6 with a continuously variable transmission. Total output is 406 horsepower. The automaker projects 30 mpg combined, with 33 miles of electric-only range.
Lexus Safety System+ 3.0 is standard on the TX, bundling a full suite of active safety and convenience features. These include automatic emergency braking with pedestrian detection, lane departure warning, lane centering assistance, adaptive cruise control, automatic high beams, and road sign assist. Proactive Driving Assist provides light braking and steering assistance when entering turns, and help for reacting to other vehicles, cyclists, and pedestrians. There is a rear seat reminder to help ensure little ones and pets are not left behind.
Available parking assist automates pulling into a parallel or perpendicular parking space.
Consumer Reports is an independent, nonprofit organization that works side by side with consumers to create a fairer, safer, and healthier world. CR does not endorse products or services, and does not accept advertising. Copyright © 2023, Consumer Reports, Inc.
]]>Climbing is an exhilarating activity that requires strength, skill, and courage. It can be a great way to challenge yourself and push your limits while also enjoying the beauty of the outdoors. For those who are interested in pursuing this activity, the Boy Scouts of America offer the Climbing merit badge as a way to develop important climbing skills and safety knowledge.
The Climbing merit badge is one of the many badges offered by the Boy Scouts of America. It is designed to help Scouts learn how to safely climb and rappel on rock faces or indoor climbing walls. To earn this badge, Scouts must demonstrate their knowledge of safety equipment, knot tying, and climbing techniques.
The requirements for the Climbing merit badge are designed to be challenging, but achievable. Scouts must first think about safety. They must also learn about the different types of climbing equipment, such as ropes, harnesses, and carabiners, and how to use them safely.
Once Scouts have mastered the basics of climbing safety, they can start working on their climbing skills. This includes learning how to tie different types of knots and how to belay a climber. Scouts will also learn about the different types of climbing, such as top-roping, lead climbing, and bouldering.
In addition to the technical skills required for climbing, Scouts must also learn about the environmental impact of climbing. They will be taught about Leave No Trace principles and how to minimize their impact on the environment while climbing. This includes using proper waste disposal techniques and respecting the natural surroundings.
One of the most rewarding aspects of earning the Climbing merit badge is the opportunity to push yourself and achieve personal goals. Climbing requires a great deal of physical and mental strength, as well as the ability to stay calm under pressure. By completing the requirements for this badge, Scouts will develop these important skills while also building their confidence and self-esteem.
The Climbing merit badge is a great way for Scouts to explore the world of climbing and develop important skills that will serve them well throughout their lives. Whether you are a seasoned climber or just starting out, this badge offers a great opportunity to learn about the sport of climbing and push yourself to new heights.
Climbing Merit Badge Requirement 1: Hazards and First Aid
Climbing Merit Badge Requirement 2: Outdoor Ethics
Climbing Merit Badge Requirement 3: Clothing
Climbing Merit Badge Requirement 4: Location
Climbing Merit Badge Requirement 5: Verbal Signals
Climbing Merit Badge Requirement 6: Rope
Climbing Merit Badge Requirement 7: Knots
Climbing Merit Badge Requirement 8: Harnesses
Climbing Merit Badge Requirement 9: Belaying
Climbing Merit Badge Requirement 10: Climbing
Climbing Merit Badge 11: Rappelling
Click on the image below to download the Climbing merit badge pamphlet requirements.
Find specific helps for the Climbing merit badge requirements listed on this page. Some of these resources will just give the answers. Others will provide engaging ways for older Scouts to introduce these concepts to new Scouts.
Ask Scouter Mom a question or share your ideas with others
Do the following:
(a) Explain to your counselor the most likely hazards you may encounter while participating in climbing and rappelling activities and what you should do to anticipate, help prevent, mitigate, and respond to these hazards.
(b) Show that you know first aid for and how to prevent injuries or illnesses that could occur during climbing activities, including heat and cold reactions, dehydration, stopped breathing, sprains, abrasions, fractures, rope burns, blisters, snakebite, and insect bites or stings.
(c) Identify the conditions that must exist before performing CPR on a person
Climbing and rappelling are thrilling outdoor activities that can be very rewarding, but they also come with certain risks and hazards. In order to stay safe while participating in these activities, it’s important to anticipate, help prevent, mitigate, and respond to these hazards. Here are some common hazards that you might encounter while climbing and rappelling and what you can do to stay safe:
Climbing and rappelling can be incredibly rewarding activities, but they also come with certain risks and hazards. To stay safe while working on the Climbing merit badge, anticipate and help prevent these hazards by using appropriate safety equipment, inspecting your equipment, checking weather conditions, pacing yourself, and communicating effectively. In the event of a hazard, be prepared to respond appropriately by following established emergency procedures and remaining calm. With the right preparation and mindset, you can enjoy climbing and rappelling safely and confidently. Know this information before doing the other requirements for the Climbing merit badge.
Learn the Leave No Trace principles and Outdoor Code, and explain what they mean.
These principles are important for Scouts working on the Climbing merit badge to follow in order to minimize their impact on the environment while climbing. Here are some ways that the Leave No Trace principles relate to climbing:
By following these Leave No Trace principles, Scouts working on the Climbing merit badge can help to minimize their impact on the natural environment and preserve the beauty of the outdoors for future generations.
The Outdoor Code is a set of principles developed by the Boy Scouts of America to promote responsible outdoor behavior and to protect the natural environment. The Outdoor Code encourages individuals to be mindful of their actions and to take steps to minimize their impact on the environment while enjoying outdoor activities. The Outdoor Code relates directly to the Climbing merit badge as climbing is an outdoor activity that has the potential to impact the natural environment. Here are some ways that the Outdoor Code relates to the Climbing merit badge:
Present yourself properly dressed for belaying, climbing, and rappelling (i.e., appropriate clothing, footwear, and a helmet; rappellers can also wear gloves).
Proper dressing for belaying, climbing, and rappelling is essential for comfort, safety, and performance. Here are some tips on how to properly dress for the Climbing merit badge:
Do the following:
(a) Explain how the difficulty of climbs is classified, and apply classifications to the rock faces or walls where you will demonstrate your climbing skills.
(b) Explain the following: top-rope climbing, lead climbing, and bouldering.
(c) Evaluate the safety of a particular climbing area. Consider weather, visibility, the condition of the climbing surface, and any other environmental hazards.
(d) Determine how to summon aid to the climbing area in case of an emergency.
Understanding the classification of climbing difficulty is crucial for climbers to assess the risks and challenges involved in a climb. As part of the Climbing merit badge, Scouts are required to learn how the difficulty of climbs is classified and apply those classifications to the rock faces or walls where they will demonstrate their climbing skills.
To apply these classifications to the rock faces or walls where you will demonstrate your climbing skills for the Climbing merit badge, you will need to assess the technical difficulty, steepness, and length of the climb. This will typically involve a combination of visual inspection and research to determine the classification of the climb. Here are some steps you can take to apply classifications to the rock faces or walls where you will demonstrate your climbing skills:
It’s important to remember that classifications are subjective and can vary depending on factors such as personal experience, weather conditions, and equipment used. When attempting a climb for the Climbing merit badge, always use your own judgement and be aware of your own limitations to ensure a safe and enjoyable climbing experience.
Top-rope climbing is a form of climbing in which the climber is attached to a rope that runs from the climber, up through an anchor at the top of the climb, and back down to a belayer on the ground. The rope is kept taut by the belayer, which helps to prevent falls. Top-rope climbing is typically done on relatively easy routes, and is a good option for beginner climbers or those who want to practice their technique on more challenging routes without the added danger of falling.
Lead climbing is a more advanced form of climbing in which the climber attaches the rope to protection points as they climb, rather than being attached to a rope that is already in place. The rope is carried up with the climber and attached to protection points, such as bolts or cams, as they ascend. The belayer takes in slack as the climber ascends, and catches the climber in the event of a fall. Lead climbing is more challenging and requires a higher level of skill and experience than top-rope climbing.
Bouldering is a form of climbing that is done on shorter routes, typically no more than 20 feet high, without the use of ropes or other safety equipment. Instead, climbers use pads or mattresses to protect against falls. Bouldering routes are typically more difficult than top-rope routes, and require a high level of skill and technique. Bouldering is a popular form of climbing because it can be done indoors or outdoors and doesn’t require a lot of equipment.
Explain the importance of using verbal signals during every climb and rappel, and while bouldering. With the help of the merit badge counselor or another Scout, demonstrate the verbal signals used by each of the following:
(a) Climbers
(b) Rappellers
(c) Belayers
(d) Boulderers and their spotters
Climbers use verbal signals to communicate with each other during climbs. These signals are important for ensuring safety and efficiency during the climb, as they help climbers to communicate effectively without the need for visual or physical cues. Here are some of the most common verbal signals climbers will use for the Climbing merit badge:
Rappelling is an essential skill for climbers, allowing them to safely descend from a climb. Like climbers, rappellers also use verbal signals to communicate with each other during the rappel. These signals are important for ensuring safety and efficiency during the rappel, as they help rappellers to communicate effectively without the need for visual or physical cues. Here are some of the most common verbal signals rappellers will use for the Climbing merit badge:
Belayers use verbal signals to communicate with climbers during the climb. These signals are important for ensuring safety and efficiency during the climb, as they help belayers to communicate effectively without the need for visual or physical cues. Here are some of the most common verbal signals belayers will use for the Climbing merit badge:
Bouldering is a form of climbing that is typically done on shorter routes, without the use of ropes or other safety equipment. Because bouldering is often done at ground level or close to the ground, climbers will typically have a spotter to help prevent falls and ensure safety. Both boulderers and their spotters use verbal signals to communicate with each other during bouldering. Here are some of the most common verbal signals boulderers and their spotters will use for the Climbing merit badge:
Do the following:
(a) Describe the kinds of rope acceptable for use in climbing and rappelling.
(b) Show how to examine a rope for signs of wear or damage.
(c) Discuss ways to prevent a rope from being damaged.
(d) Explain when and how a rope should be retired.
(e) Properly coil a rope
Selecting the right rope is crucial for both climbing and rappelling, as it is the primary means of safety for the climber. Ropes used for the Climbing merit badge must be strong, durable, and able to withstand the stresses of these activities. Here are the kinds of rope acceptable for use in climbing and rappelling:
Inspecting a rope for signs of wear or damage is an essential part of ensuring safety during climbing or rappelling. Here are the steps you should follow to examine a rope for signs of wear or damage for the Climbing merit badge:
If you notice any signs of wear or damage during the inspection, the rope should be immediately taken out of service and replaced. It’s important to regularly inspect your climbing and rappelling ropes to ensure their safety and longevity. Always consult with a qualified instructor or climbing expert if you have any questions or concerns about the condition of your ropes.
Preventing a rope from being damaged is important to ensure its longevity and to maintain its strength and safety for climbing and rappelling. Here are some steps you can take to prevent a rope from being damaged while working on the Climbing merit badge:
Retiring a rope is an important part of ensuring safety while working on the Climbing merit badge. Over time, ropes can become damaged or weakened, which can increase the risk of accidents and injury. Here are some guidelines for when and how a rope should be retired:
When retiring a rope, it’s important to cut it into smaller pieces to prevent someone from unknowingly using it. This also helps to prevent it from being mistaken for a usable rope and being put back into service.
When disposing of the rope, it’s important to do so in an environmentally responsible way. Check with your local waste management facility for guidelines on how to dispose of climbing and rappelling ropes safely.
Coiling a rope properly is important for keeping it organized, preventing tangling, and extending its lifespan. Here are the steps to properly coil a rope for the Climbing merit badge.
Demonstrate the ability to tie each of the following knots. Give at least one example of how each knot is used in belaying, climbing, or rappelling.
(a) Figure eight on a bight
(b) Figure eight follow-through
(c) Water knot
(d) Double fisherman’s knot (grapevine knot)
(e) Safety knot
A figure eight on a bight is a knot used in rock climbing and rappelling to create a secure and stable loop in a rope. It is created by forming a loop in the middle of the rope, folding the loop in half, and then tying a figure-eight knot in the bight of the loop. The resulting loop can be used to attach a climbing rope to an anchor point, or to create a secure attachment point for a climber or rappeller working on the Climbing merit badge.
To tie a figure eight on a bight, follow these steps:
The resulting loop should be secure and stable, and can be used for a variety of purposes in climbing and rappelling.
A Figure-eight follow-through is a knot used in rock climbing and rappelling to create a secure and stable connection between a climbing rope and an anchor point or another piece of gear. It is considered one of the essential knots for climbers and is commonly used to tie in to a climbing rope or to attach the rope to an anchor point.
To tie a figure-eight follow-through knot, follow these steps:
The resulting knot should be a secure and stable connection between the climbing rope and the anchor point or gear for the Climbing merit badge.
A water knot is a knot used to tie two ends of a flat webbing or tape together. It is commonly used in rock climbing to create slings or anchors using webbing. The knot is also known as a double fisherman’s knot or grapevine knot.
To tie a water knot, follow these steps:
The resulting knot should be a secure and stable connection between the two ends of the webbing or tape for the Climbing merit badge.
A Double Fisherman’s Knot, also known as the Grapevine Knot, is a knot used to join two ends of a rope together, such as when creating a sling or a prusik loop. It is a reliable knot that is commonly used in rock climbing, mountaineering, and other outdoor activities.
To tie a Double Fisherman’s Knot, follow these steps:
The resulting knot should be a secure and stable connection between the two ends of the rope for the Climbing merit badge.
A safety knot is a knot used to create a stopper at the end of a rope, preventing it from slipping through an anchor or device. It is also called a backup knot or a stopper knot. The purpose of a safety knot is to add an extra level of safety to a climbing or rappelling system by preventing the rope from accidentally slipping through the anchor or device and causing an accident.
There are several types of safety knots, including the Figure Eight on a Bight and the Overhand Knot. To tie a safety knot, follow these general steps:
The resulting safety knot should prevent the rope from slipping through the anchor or device for the Climbing merit badge.
Correctly put on a commercially made climbing harness.
Putting on a commercially made climbing harness correctly is essential for ensuring safety and comfort during climbing or rappelling. Here are the steps for correctly putting on a commercially made climbing harness:
It’s important to follow the manufacturer’s instructions for your specific harness and to practice putting it on and adjusting it before climbing or rappelling for the Climbing merit badge.
Do the following:
(a) Explain the importance of belaying climbers and rappellers and when it is necessary.
(b) Belay three different climbers ascending a rock face or climbing wall.
(c) Belay three different rappellers descending a rock face or climbing wall using a top rope.
Belaying is an essential safety technique in rock climbing and rappelling. It involves the use of a rope system to protect the climber or rappeller in the event of a fall or slip. The belayer is responsible for controlling the rope and ensuring that the climber or rappeller remains safe at all times. You must understand this for the Climbing merit badge.
The importance of belaying climbers and rappellers cannot be overstated. Without a belay system, a fall could result in serious injury or death. A properly belayed climber or rappeller can climb or descend with confidence, knowing that they are protected from falls and accidents.
Belaying is necessary whenever a climber or rappeller is above ground level, whether it’s on a rock face, a cliff, or a building. It is also necessary when a climber or rappeller is traversing difficult or challenging terrain, or when there is a risk of falling or slipping.
A belay system typically involves the use of a belay device, such as an ATC or a Grigri, which is attached to the belayer’s harness and the rope. The belayer controls the rope by pulling it through the device, which creates friction and slows down the climber or rappeller’s descent in the event of a fall. The belayer also communicates with the climber or rappeller using verbal signals and hand signals to ensure that they remain safe and secure.
Do the following:
(a) Show the correct way to directly tie into a belay rope.
(b) Climb at least three different routes on a rock face or climbing wall, demonstrating good technique and using verbal signals with a belayer.
Directly tying into a belay rope is a common technique used by climbers to attach themselves to a belay anchor or anchor point. Here are the steps to correctly tie into a belay rope for the Climbing merit badge.
The resulting tie-in should be secure and stable, allowing you to climb with confidence and safety.
Do the following:
(a) Using a carabiner and a rappel device, secure your climbing harness to a rappel rope.
(b) Tie in to a belay rope set up to protect rappellers.
(c) Rappel down three different rock faces or three rappel routes on a climbing wall. Use verbal signals to communicate with a belayer, and demonstrate good rappelling technique.
Using a carabiner and a rappel device to secure your climbing harness to a rappel rope is an essential technique for safe and effective rappelling. Here are the steps to correctly use a carabiner and rappel device for the Climbing merit badge.
Once the system is properly set up, you can begin your descent by leaning back and keeping your weight on the rope, using the rappel device to control your speed. Always maintain a firm grip on the rope and keep your eyes on your surroundings, checking for any potential hazards or obstacles.
Demonstrate ways to store rope, hardware, and other gear used for climbing, rappelling, and belaying.
Proper storage of climbing gear is essential to ensure its longevity, safety, and performance. Here are some tips on how to properly store rope, hardware, and other gear used for climbing, rappelling, and belaying for the Climbing merit badge.
Proper storage of climbing gear is essential for ensuring its safety and longevity, and it’s important to take the time to properly organize and store your gear after each use while working on the Climbing merit badge.
COPE (Challenging Outdoor Personal Experience) Program Feature
National Outdoor Awards – Adventure Segment
The COPE Troop Program Feature is highly relevant to the Climbing merit badge, as it emphasizes the importance of developing teamwork, leadership, problem-solving, and communication skills, all of which are critical for successful climbing and rappelling activities. The COPE program also promotes the principle of “challenge by choice,” which encourages Scouts to push themselves beyond their comfort zones and develop self-esteem by facing challenges individually and as a member of a team.
Additionally, the program provides training on spotting, which is an essential safety skill for belaying and climbing. Overall, the COPE Troop Program Feature can help Scouts develop the skills and confidence they need to succeed while working on the Climbing merit badge and other outdoor activities, while promoting safety, teamwork, and personal growth.
The Climbing merit badge may be used to fulfill the requirements for this award. For Scouts or Venturers who want to challenge themselves further and be recognized for their outdoor accomplishments, the National Outdoor Award Adventure Segment is a great option. To earn this award, participants must complete a challenging high-adventure activity such as backpacking, paddling, sailing, or climbing. Additionally, participants must complete 10 adventure activities under the auspices of the Boy Scouts of America, such as a backpacking trip lasting three or more days and covering more than 20 miles without food resupply, or a climbing activity on open rock that includes camping overnight.
The National Outdoor Award recognizes those who go beyond the basic requirements of the Climbing merit badge, encouraging participants to challenge themselves and push their limits in outdoor activities. The award provides a great incentive for Scouts and Venturers to explore and experience the outdoors in new and exciting ways.
By earning the Mountaineering elective, Venturers can not only expand their climbing knowledge and skills but also demonstrate their commitment to personal growth and leadership, which can be a valuable addition to their Climbing merit badge accomplishments.
The Project COPE elective for the Venturing Ranger award can also be a valuable addition to a Venturer’s climbing experience, as it requires completing a BSA COPE course or outdoor education course that may include team building activities and ropes courses, enhancing their skills and knowledge beyond the requirements of the Climbing merit badge.